 I was trying to put together a menu for this weeks post when a close friend of mine called me and said, “I’ve made a huge batch of pimento cheese last night, I’ll bring you over some after work.” I politely declined and said, “I’m not a fan.” She responded with something like, “phsht, oh come on. Have you ever even tried pimento cheese?” No, I hadn’t and was ashamed to admit that I’d said no to something I’d never tasted. “You’ll like it,” she promised. So I’ll admit I had to look up pimento cheese the first time I heard about it. Growing up in the northeast it wasn’t one of the comfort foods that I had become familiar with. Actually when I finally I figured out what it was, I thought pimento cheese sounded perfectly awful. Mayo? American cheese? Jarred peppers? Why would I want to eat that? It was a southern tradition that I was fine to miss out on. Except that it kept popping up, at restaurants, in conversations and cocktail parties… I remained skeptical even when a friend ordered it at a diner in the grilled cheese fashion, and enjoyed it. It really took one of my best friends – originally from Mississippi – making a homemade batch, for me to try it. I trusted her not to steer me wrong, but I still told her no thanks the first time she offered. She persisted. I finally gave in and said, “What!? This is what I’ve been missing?” It was good. Really really good. Since then I’ve had pimento cheese with sliced apples, crackers, warmed up on toast as she suggested. I was a convert. What I learned is that like any dip, spread or sauce, there’s a supermarket processed version, and then there’s homemade. There are so many possibilities with pimento cheese, you could add pickles or garlic, mix different kinds of cheeses, or spice up your mayo.  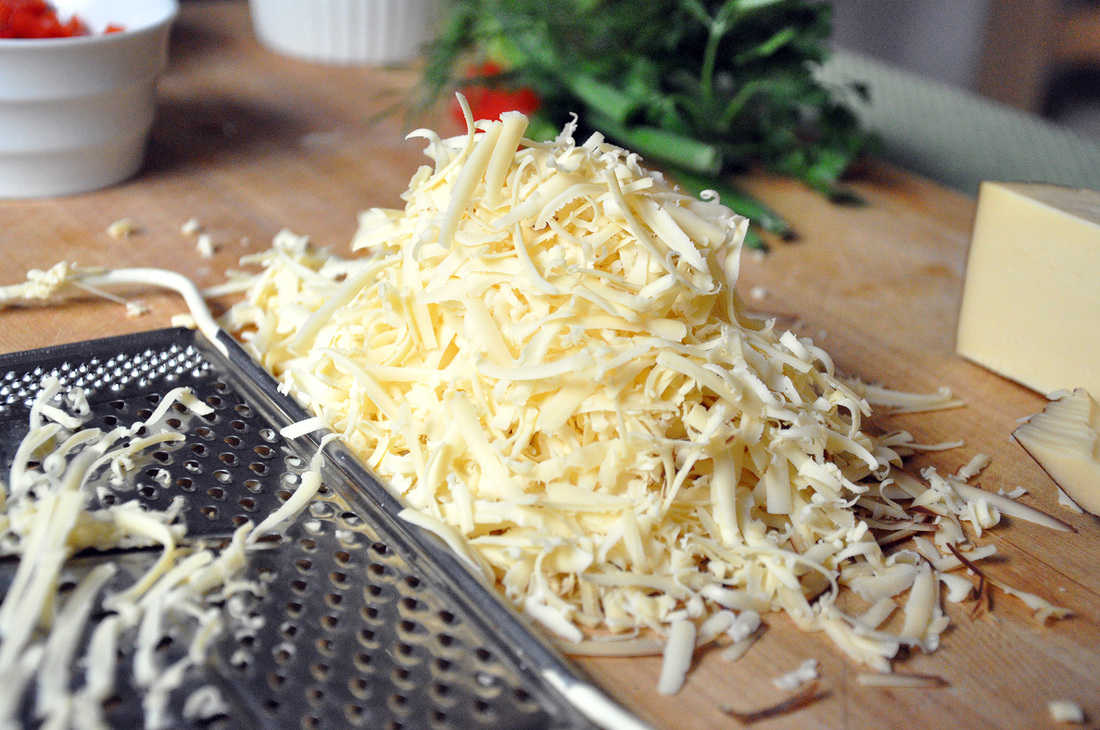  So Basically I’ve learned to shut my mouth, open my mind and try anything once. Especially when it’s homemade. I think I’ve made my southern friends very happy. 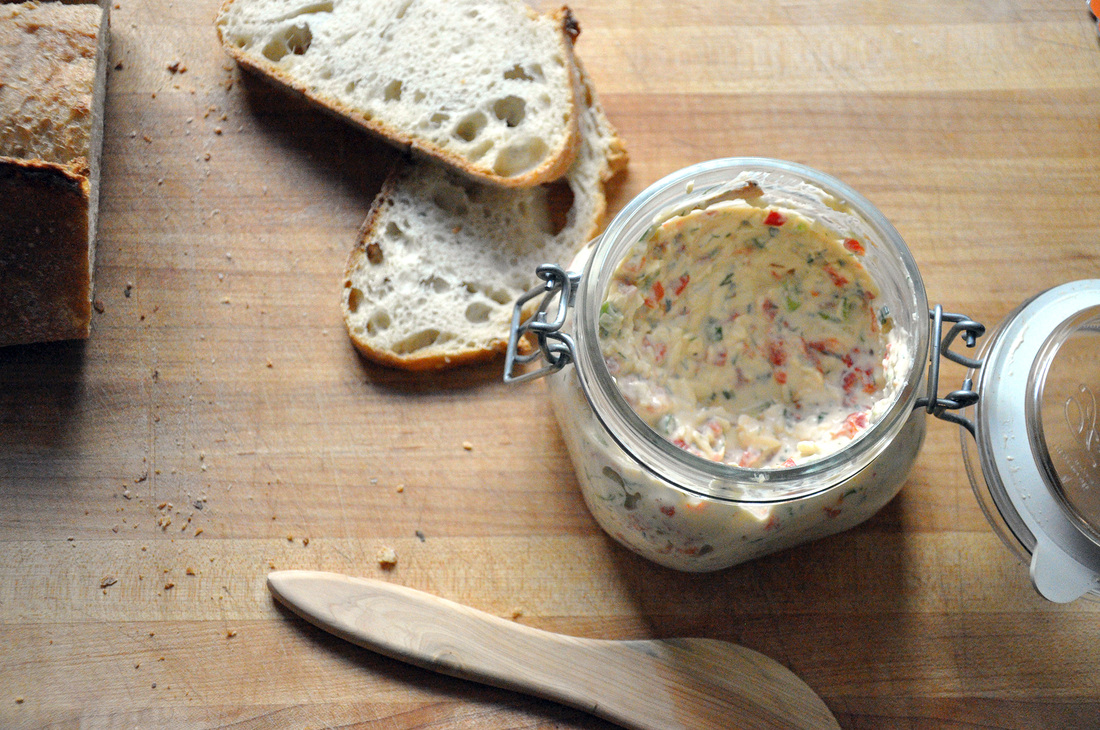 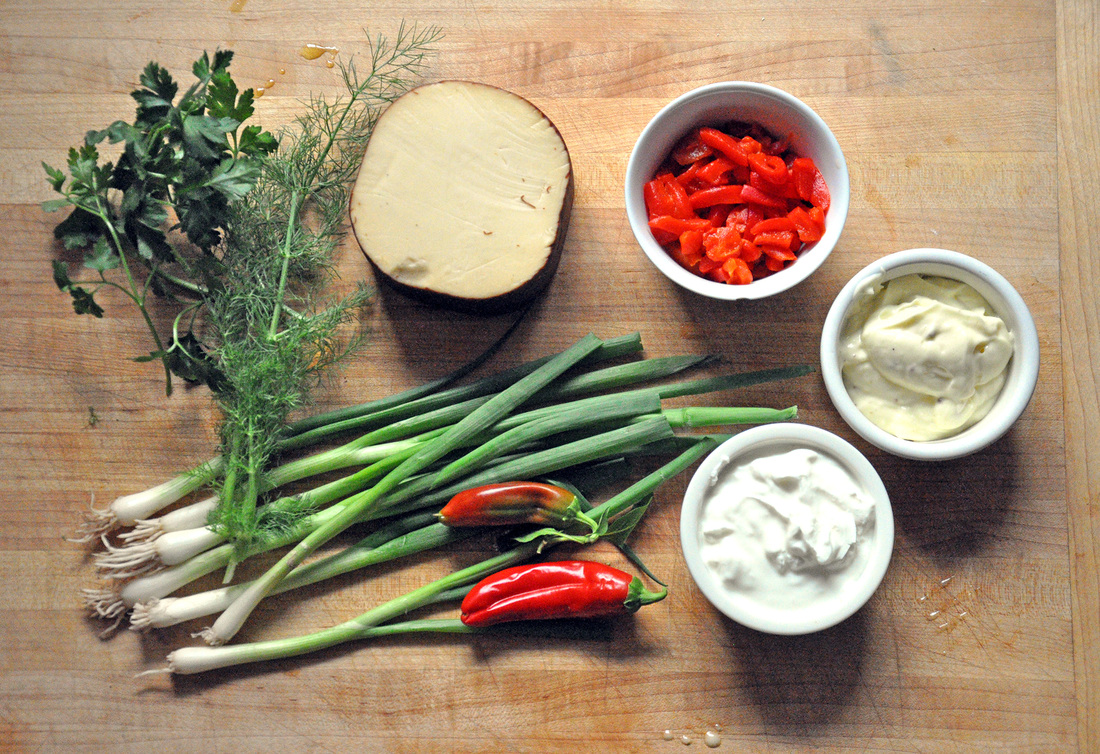 Smoked Gouda Pimento Cheese Sandwich PRINT RECIPE [Prep: 25min / Cook: 5min / TOTAL: 30min] [6 servings]
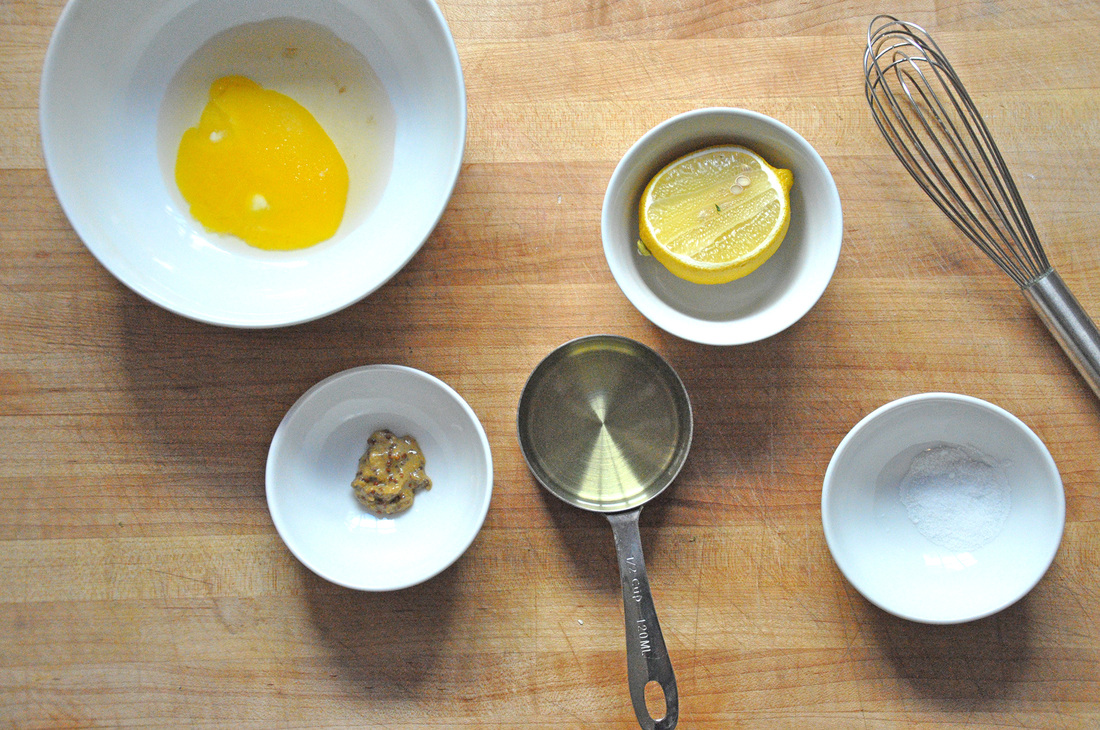
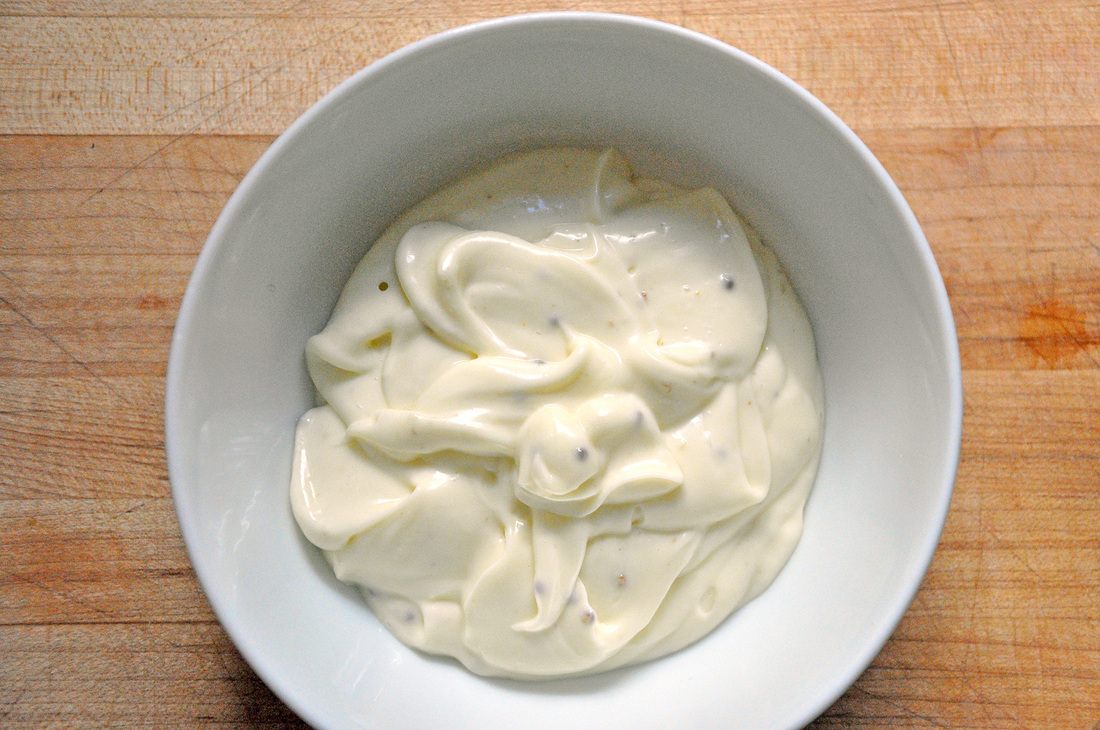
Homemade Mayo [~3/4 cup]
The hardest part of this recipe is making your homemade mayo – which of course is totally optional. While I’d like to say that I whipped it all up by hand, I recently got a mini food processor and really wanted to try it out. So first I added all of the ingredients for the mayo – except the oil – together in the mini food processor and pulsed it a few times. Then I slowly added the oil bit by bit until the ingredients started to come together, thicken, and become mayo. It really is that easy, and it tastes delicious. You should experiment with herbs and spices to make “fancy” mayo, a good way impress any dinner guest.
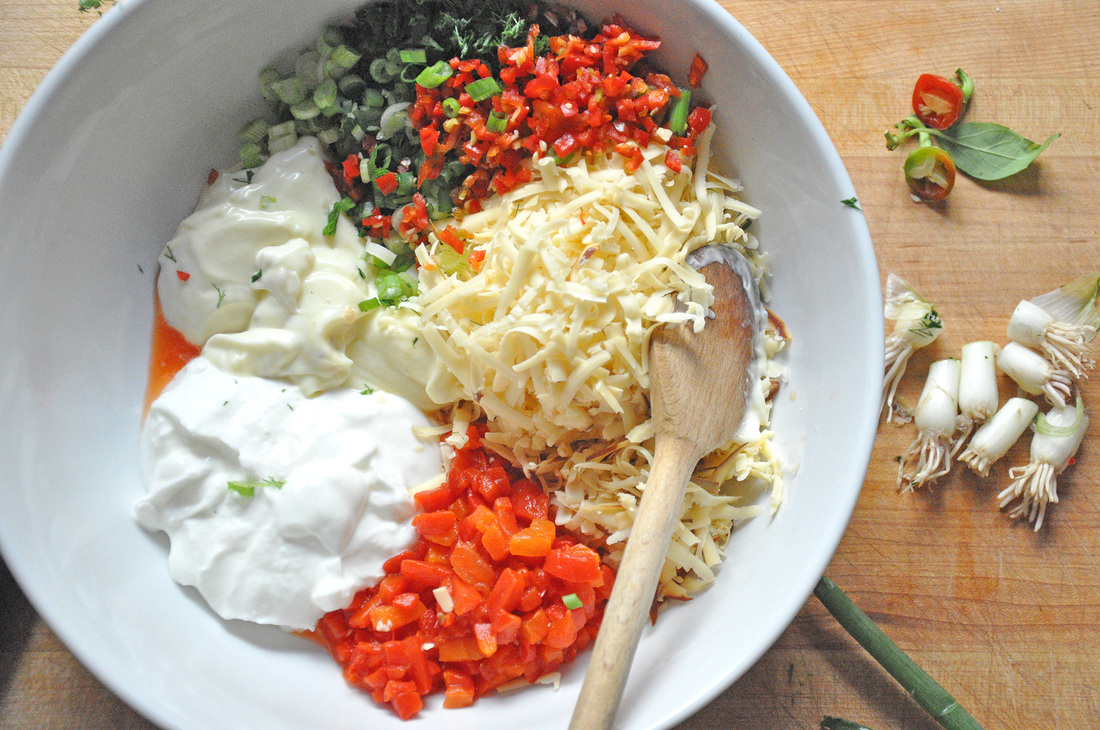
To make the pimento cheese spread start by shredding the smoked gouda, you can do this by hand or in a larger food processor that has a part for shredding cheese. In a medium sized mixing bowl, combine the cheese, yogurt, mayo, and pimento peppers. Finely chop up the rest of the herbs and veggies, incorporate and mix well. There you have it! Pimento Cheese. This type of cheese spread can be served many different ways, with crackers or veggie sticks, but I think the best way is the grilled cheese way. Basically just pile as much pimento cheese onto a slice of bread as you can handle, top it off with another slice and “grill” on a well-oiled cast iron skillet over med heat. Flip after one side is browned and toasted, about 3 minutes and cover, waiting about 1 more minute. 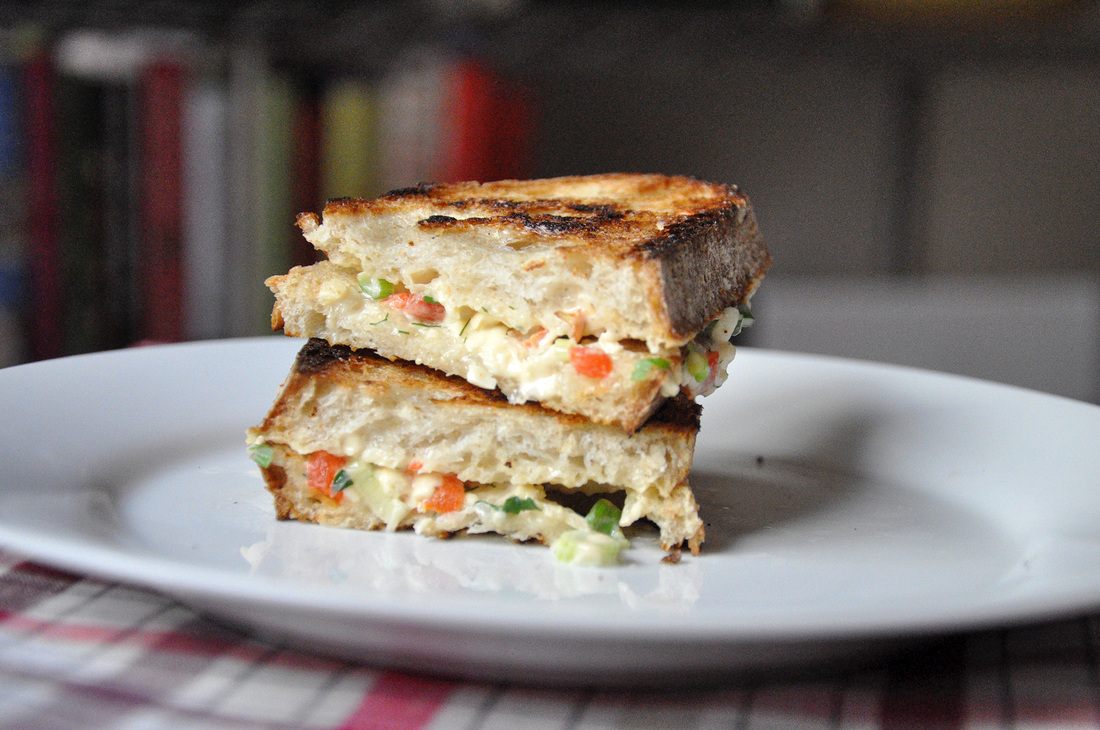
0 Comments
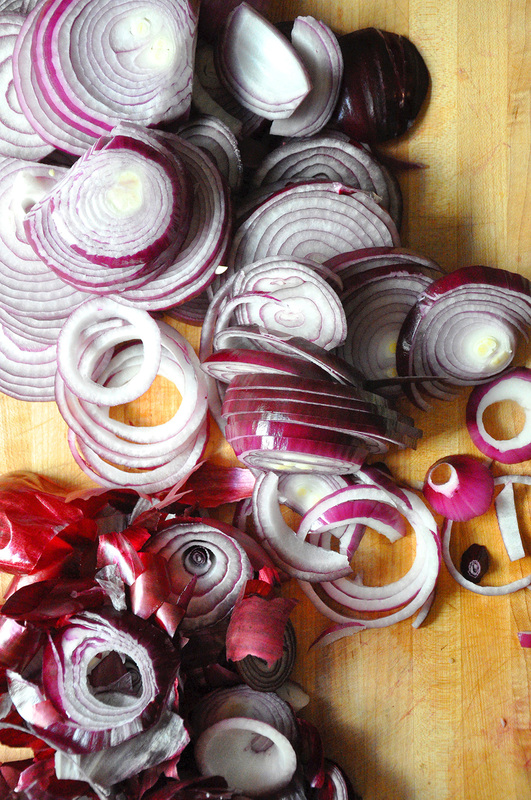
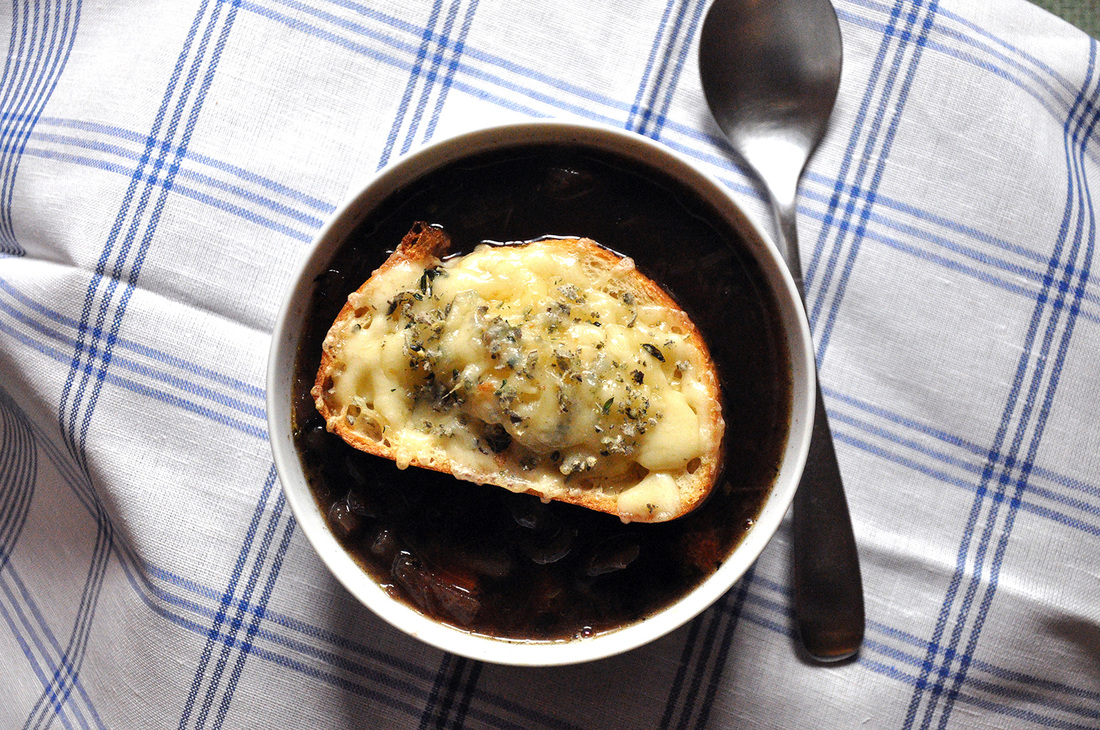 Here are a few things that we all know about winter: it gets cold, people get sick, soup gets made. We all have our favorites and family recipes. Me, I normally make a roasted butternut squash and sweet potato soup. In a restaurant though there’s really only one I order, the mouth burning French Onion soup. We all do it, we order it and wait expectantly for the gooey bubbly cheesy little crock to be placed in front of us – and when it finally arrives we are told to be careful because it is still quite hot. And what do we do? We dig in and burn our mouths. But we go on because the magical soup is so good, so comforting, and so cheesy, brothy and mushy. All table manners go out the window when the soup is all gone and we start to pick at the burned hardened cheese that had bubbled over under the broiler. But don’t worry, the other restaurant goers understand because you are eating French Onion soup and that is just what you do. 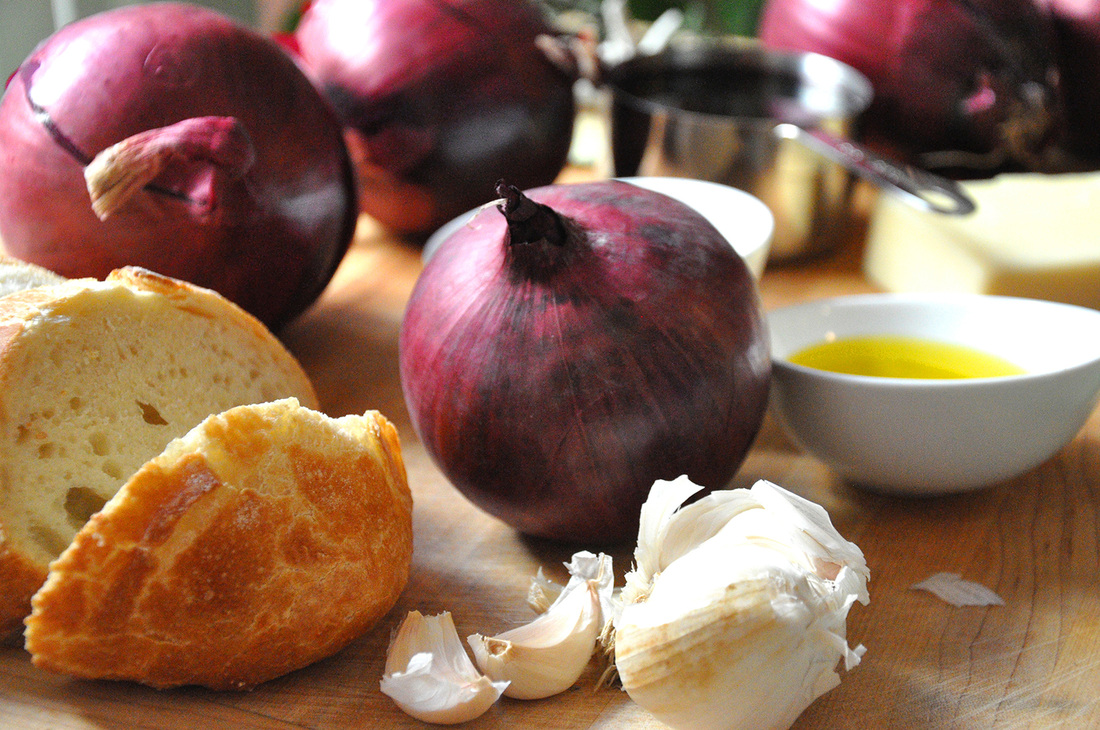 This past weekend I was gearing up to make my first batch of winter soup and I saw an article in the New York Times about Red Onion Soup. The author had made a similar version years before with Jacques Pepin – the be all and end all of French cooking (except for Julia Child of course) and he was going over how it was made. This version used water not broth; it really was a pauper’s soup – onions, garlic, herbs, stale bread, cheese, salt pepper, a little wine and a lot of water. I did a little more research and saw that everyone had their own style; some used broth – beef or chicken, wine – white or red, alcohol – sherry, brandy or cognac. So many choices! I’d never made French Onion soup before and was a little overwhelmed because so many people said theirs was the “true” recipe. I decided to stick with the original recipe that used water, I liked the simplicity of it – and honestly I wanted to see how good water and caramelized onions could actually taste. Good. Really really good. It tasted better than it had any business to. And it was so easy! So please, go to the store, stock up on onions and try this soup. Here’s the link to the NYTimes Red Onion Soup recipe published on 1/1/14. …and because we all love Julia Child
  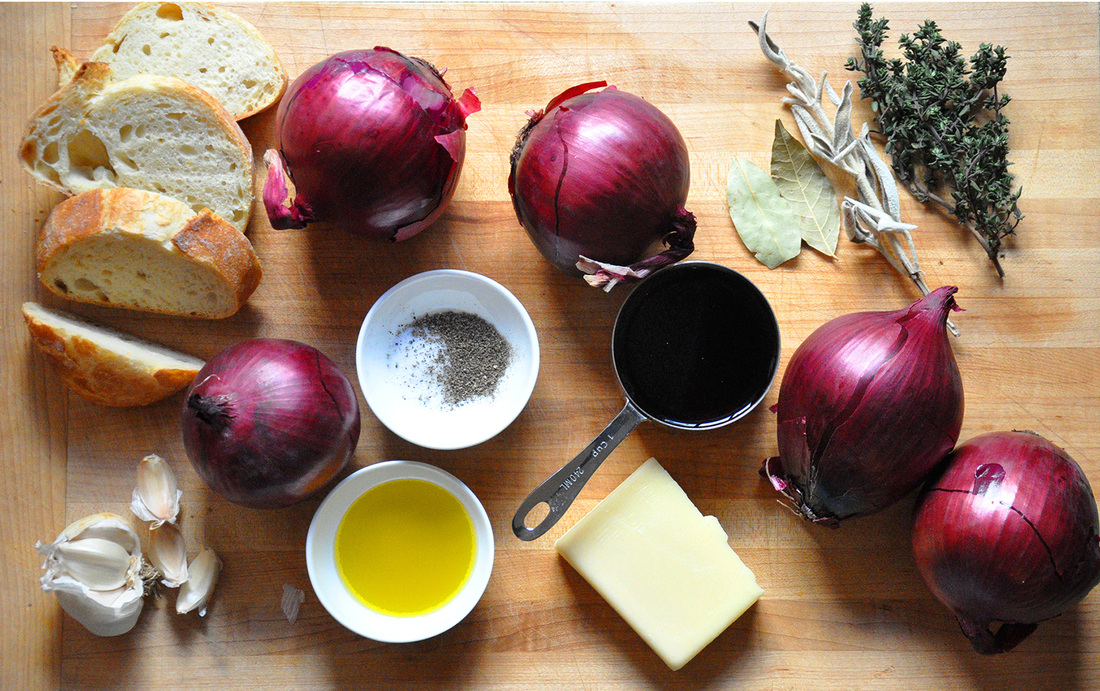 French Onion Soup PRINT RECIPE [Prep: 20min / Cook: 1hr 15min TOTAL: 1hr 35min [6 servings]
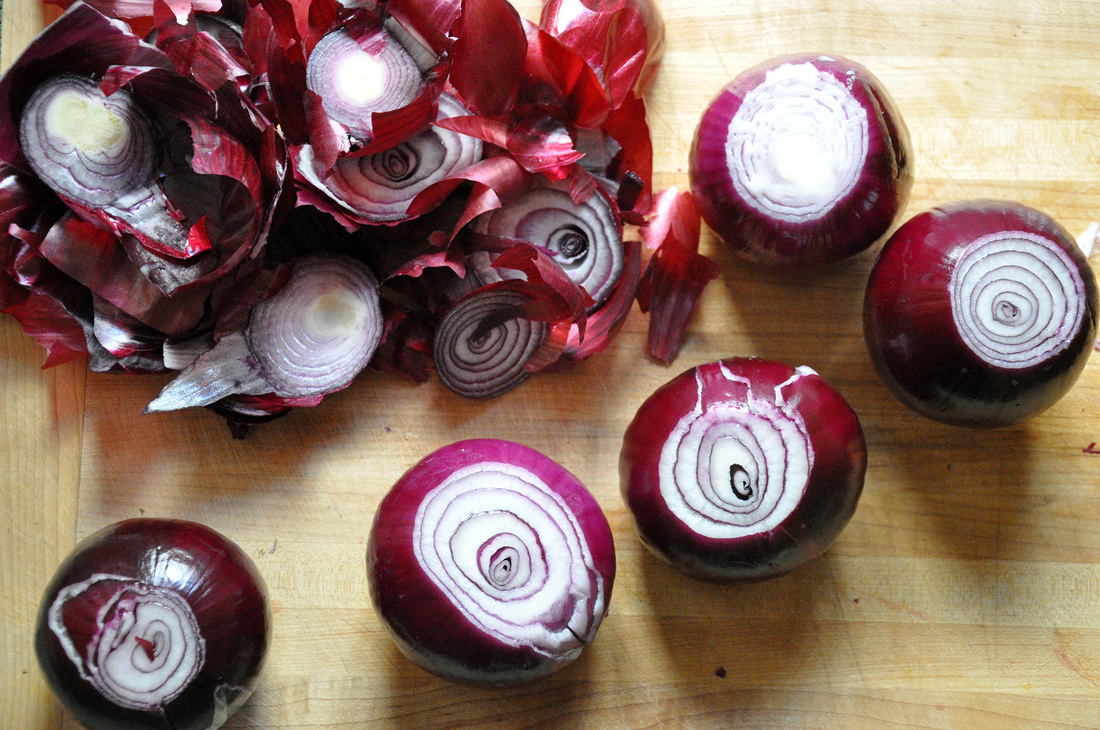
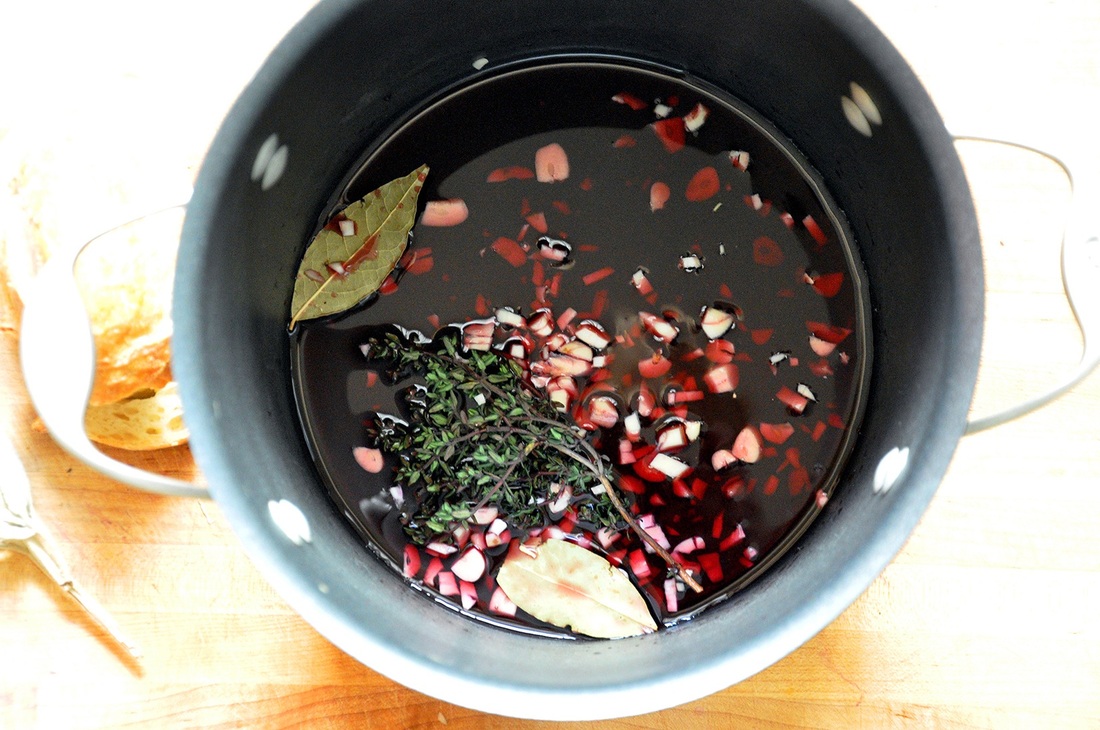
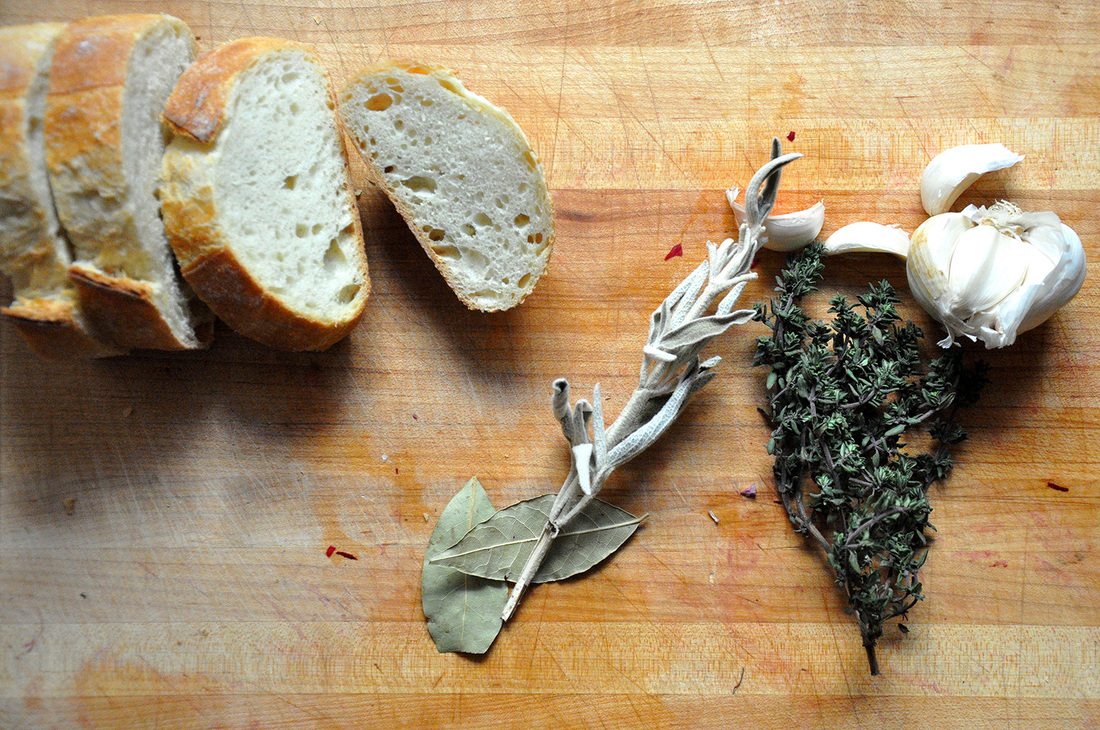
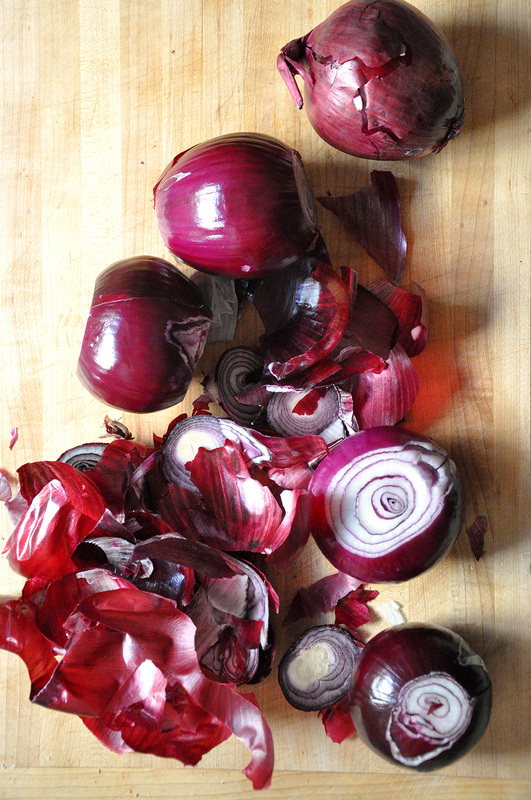
The prep for this soup is painfully simple, peel and thinly slice your red onions – but choppers beware you will most likely cry. This is a large amount of onions and it is hard to get through cutting all of them without taking a break. The only trick that works for me (sort of) is biting the wooden end of a matchstick. Now onto the garlic, the cloves just need to be roughly chopped – which is great because all you have to do is press the cloves with the flat side of the blade of the knife you’re working with – the garlic will smoosh and pop out of its skin a little, making it super easy to peel. Then just a few little chops – no tedious mincing required.
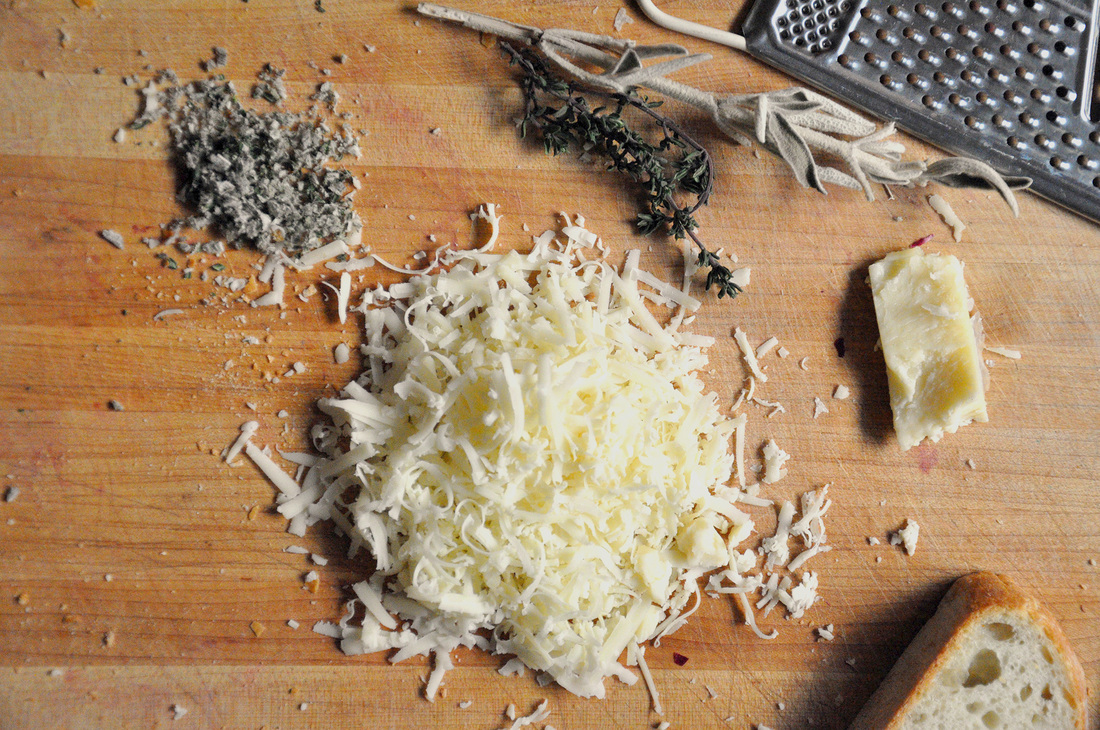
Once you’re done with the chopping, set up your stove with two skillets – as big as you have would be ideal – and a large pot, at least 3 quarts. Add 1 cup red wine, 2 bay leaves, small bunch thyme and minced garlic to the pot. Turn the heat to med-high under both of the skillets. As soon as they get hot – about 1 minute – pour 1 tablespoon of olive oil in each skillet and let heat up for about 30 seconds before adding the onions. They may need to be cooked in 2 batches, you don’t want to overfill the skillets, otherwise the onions won’t brown evenly. Add salt to each – about 1 teaspoon and a few grinds of pepper. Let sauté for about 10 minutes stirring occasionally so they don’t burn. Have 2 cups water ready – once the onions are finished, they should be a dark golden brown and may have sections of dark brown if they got a little burned (that’s ok!), turn off the heat and add them to the pot – then pour one cup water into each skillet to deglaze them. Using a wooden spoon scrape up all the little bits left on the bottom of the skillet, the water will take on the caramelized onion flavor. Add deglazing water to the pot. Repeat until all the onions have been cooked. Turn heat to mid-high under the pot and bring mixture of onions, garlic, red wine, deglazing water and herbs to a simmer, let sit for 5 minutes. Add two teaspoons of salt a few grinds of pepper and 8 cups of water. Bring to a boil – this will take a few minutes, if the tap water is hot when you add it this will speed up the process a little. Once the soup is boiling turn the heat down so it stays a slow simmer - you may need play with the heat a little. Let simmer for about 45 minutes. Now you can start prepping the bread, cheese and herbs. I suggested 6 slices of bread because this soup yields 6 bowls, however if you are making this recipe but only have a few mouths to feed you’ll only need a few slices. Also this soup (pre-cheese) will last a few days in the fridge and you can always freeze it for later! Grate the desired amount of cheese into a small mixing bowl. Chop the sage and thyme – or any herbs that you have on hand and think will go well – add them to the cheese and grate some fresh pepper on top. Mix it well. If your bread is fresh and not stale, now is the time you should toast it. After 45 minutes have past, taste the soup and season accordingly, you can always add another splash of red wine or even sherry, cognac or brandy. Let cook for 5-10 more minutes. You can make the soup ahead of time (up to a day ahead) and re-heat it. Once the soup is ready to plate put your oven on broil, make sure the rack in the oven is near the top, about 6 inches away, then pile the cheese and herb mixture onto the bread and put it in the oven. *I put the bread slices on foil first and then on a baking dish, otherwise the cheese melt over the sides and stick to the dish. You only need to leave the toast in the oven for about 45 seconds, just until the cheese is a browned and bubbly. Now you are ready to plate the soup. Pour a few ladlefuls into warmed bowls and put the freshly made cheesy toast on top. Grate some fresh pepper and enjoy! *If you have proper soup crocks with a rolled rim, follow these instructions for a more traditional presentation of the dish. Place the piece(s) of toast in the bowl before adding the soup and cover well with gruyere. Put the whole crock into the oven under the broiler, about 8 inches away from heat, for 3-4 minutes. 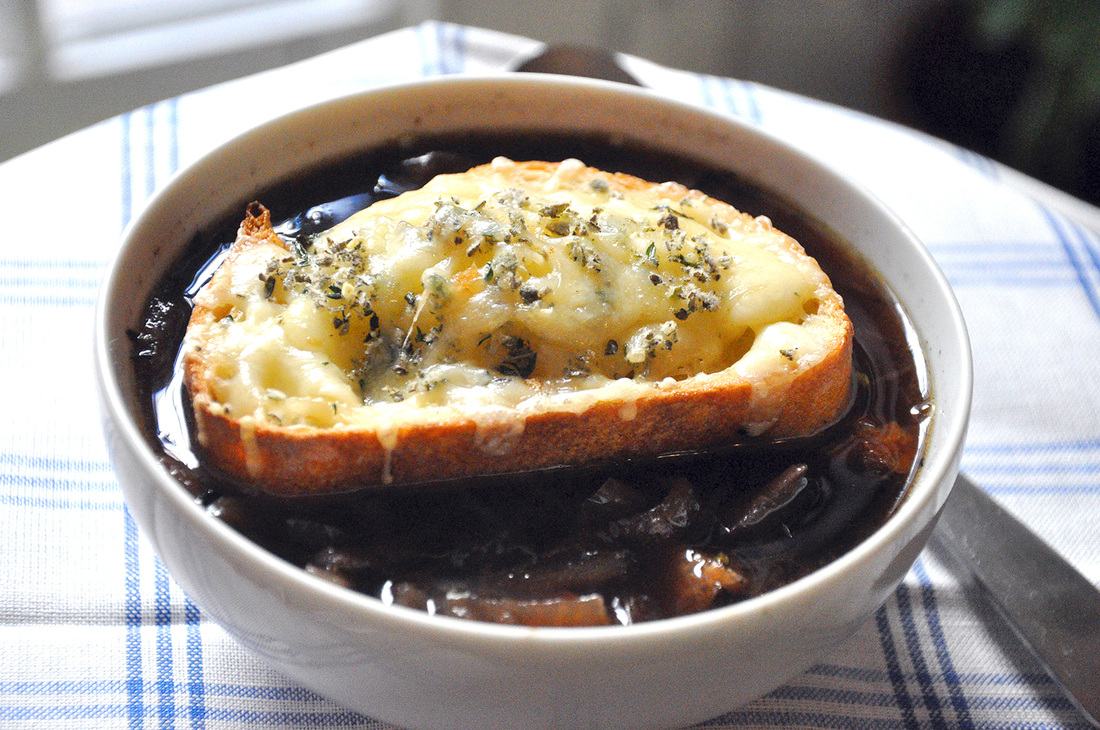 |
All
Stuff I follow...
Not Without Salt
My New Roots Sprouted Kitchen Thug Kitchen Lady and Pups A CUP OF JO The Daily Meal Melissa Clark ...always 3191 Miles Apart The Sartorialist Garance Dore The Nourished Kitchen Archives
October 2014
|
 RSS Feed