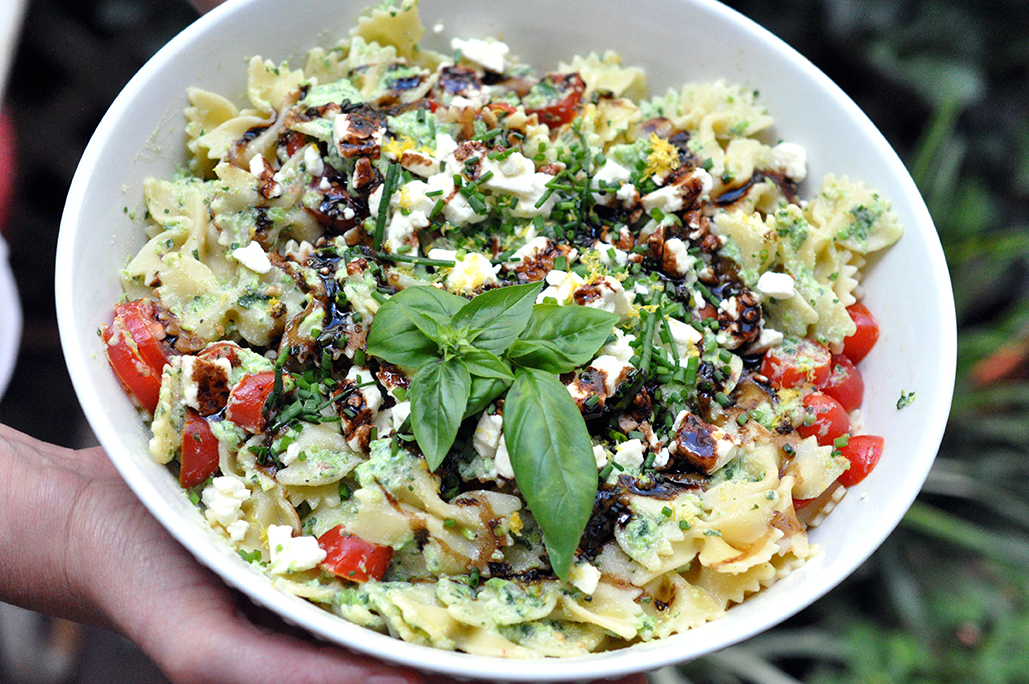
 I was on the road a lot this spring but now I’m ready to relax and settle into summer. Relax into morning iced teas and late night ice creams, into sun hats and flip flops and smelling like sunscreen. Relax into the poolside beers and dinner parties where the sun refuses to go down. So I though I would share a good potluck dish that tastes like summer, but is so easy to make it doesn’t keep you from enjoying it! Remember how I said that summer begins and ends with basil pesto…well, enter summer! I know it’s not official, we have a little over a week to go, but I decided to bring out the basil pesto. It’s a little different than the one I made for you guys before; it’s still a no cook, delicious the next day, pasta salad. Cue, sweet peas and grape tomatoes, more summer staples, then throw in some parsley, lemon and top it off with chives and you’ve got something special. The sweet pea herb ricotta sauce – a non traditional take on a pesto – is still a simple blender sauce, which is good because it leaves more time for you to make a little something extra like…a sweetly tart honey balsamic reduction that makes this dish a little fancy. A good looking well dressed pasta salad is always welcome at any party. Sweet Peas are made of these… 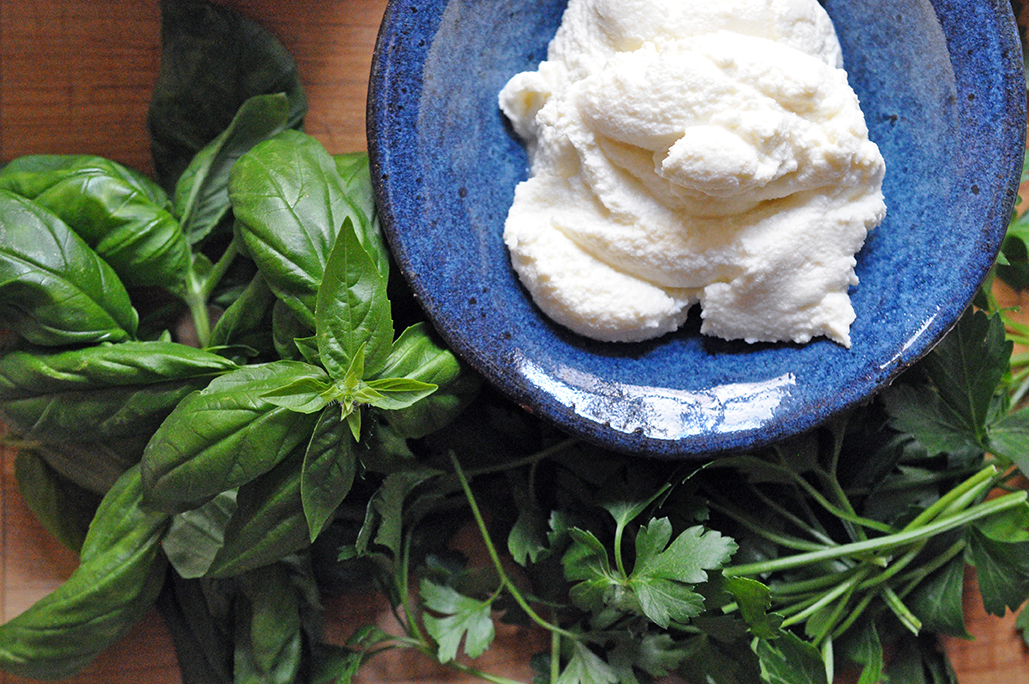 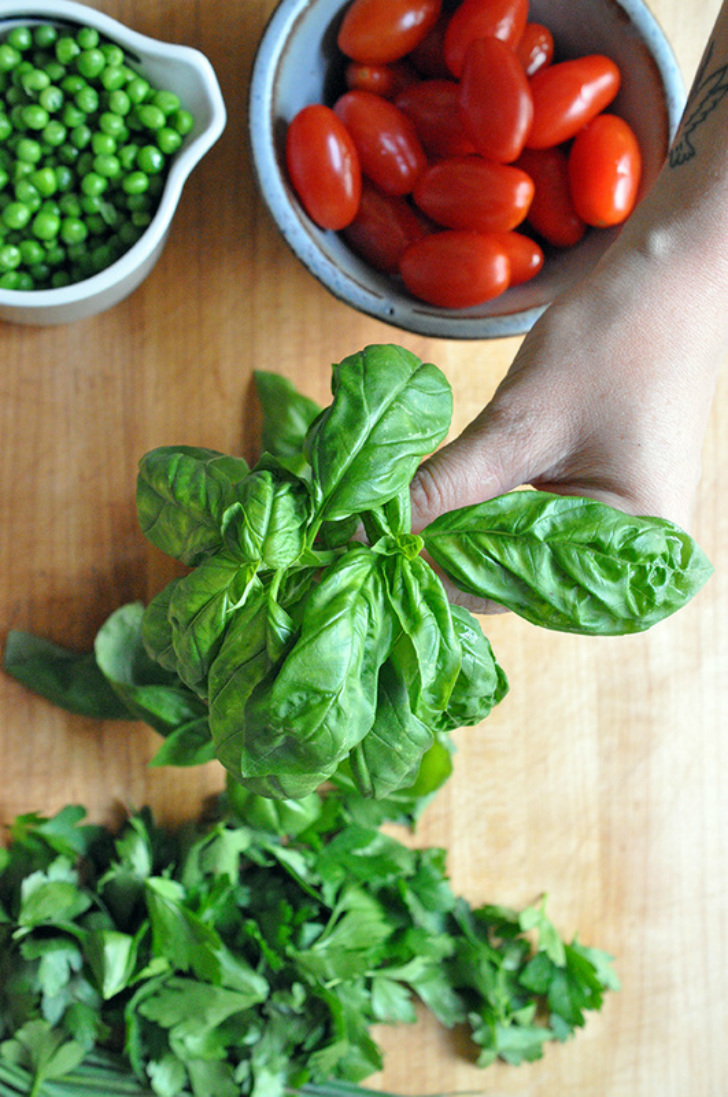 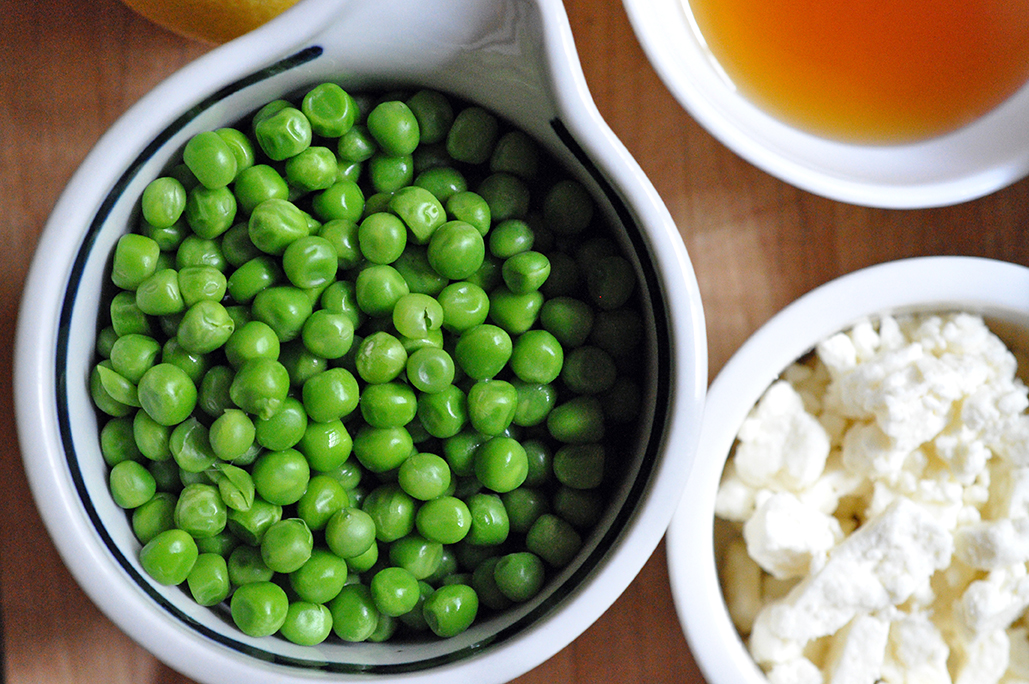 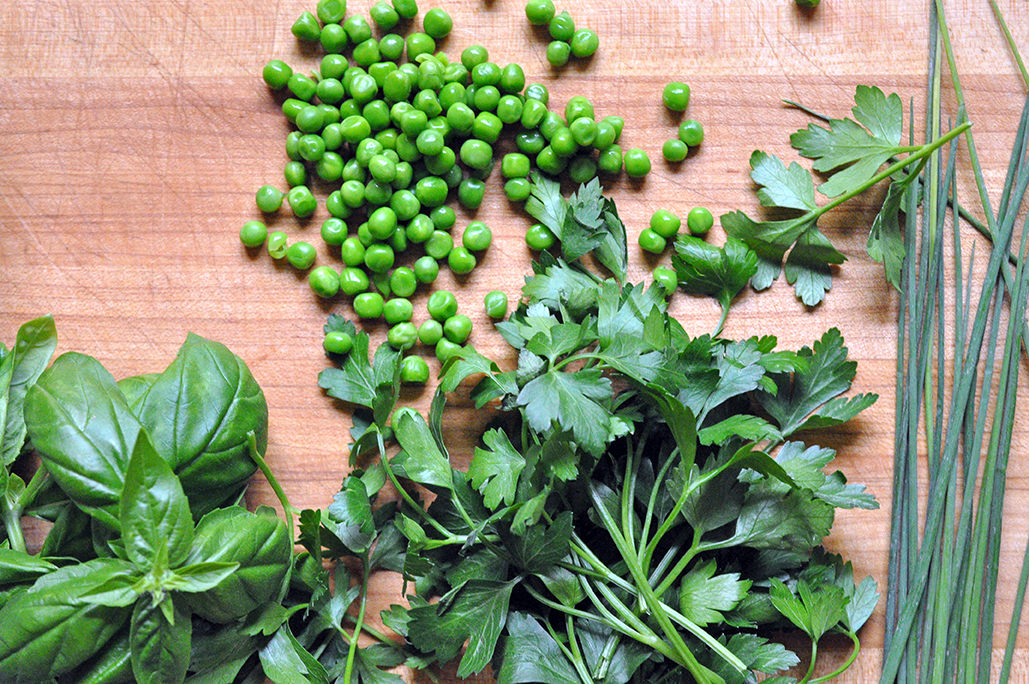 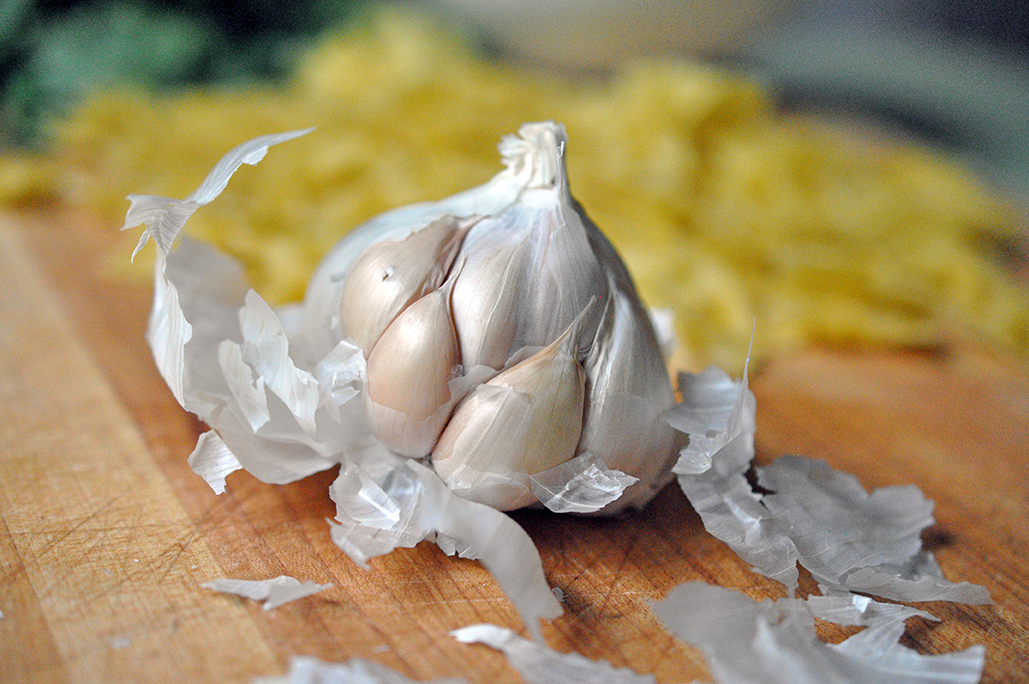
 Sweet Pea and Ricotta Pasta Salad PRINT RECIPE [Prep: 15 mins / Cook: 10 mins / TOTAL: 25 mins [Serving size: 4 dinner sized portions]
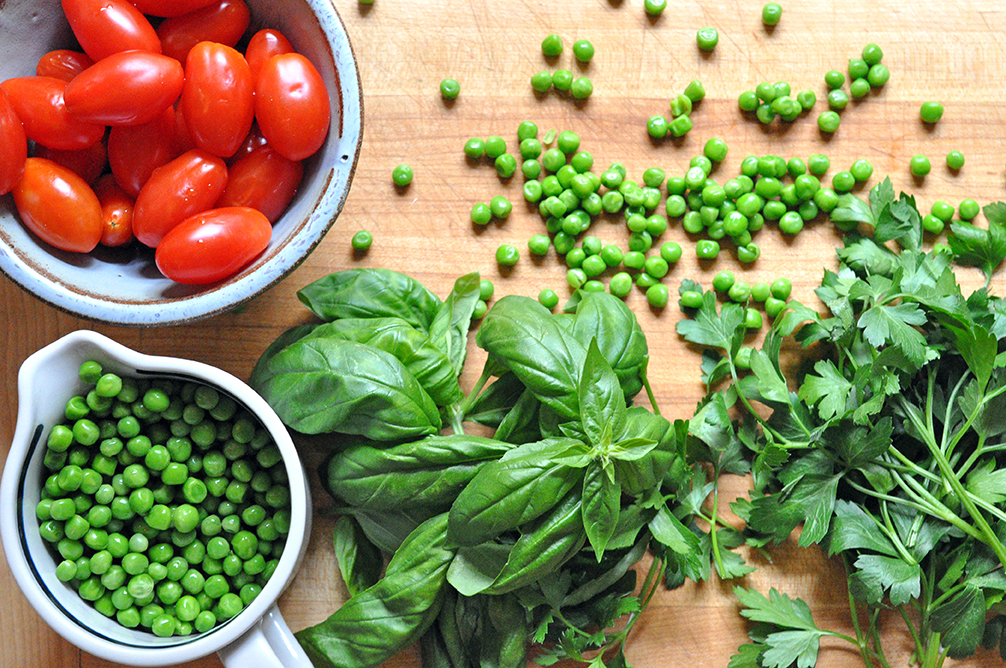
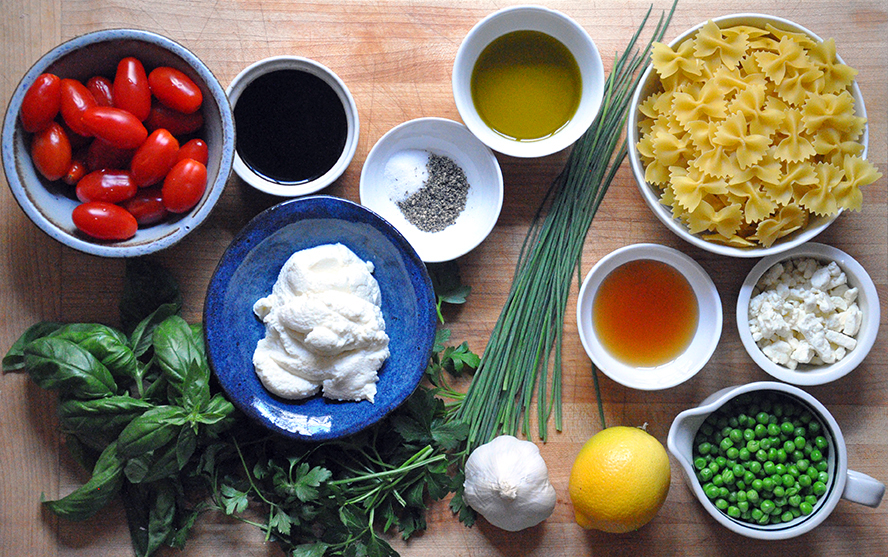
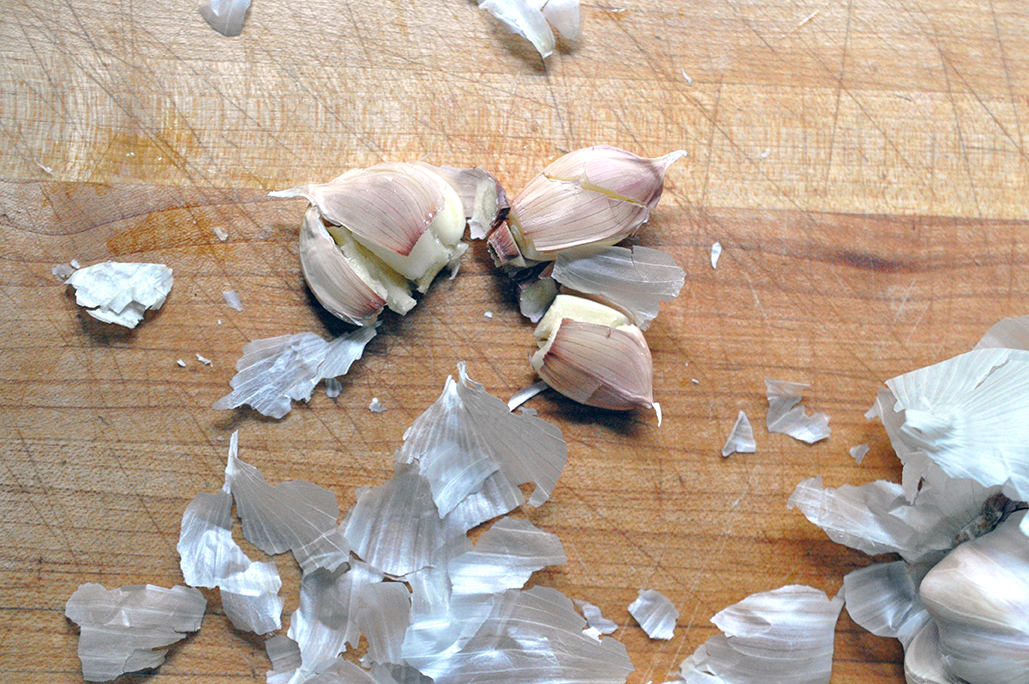
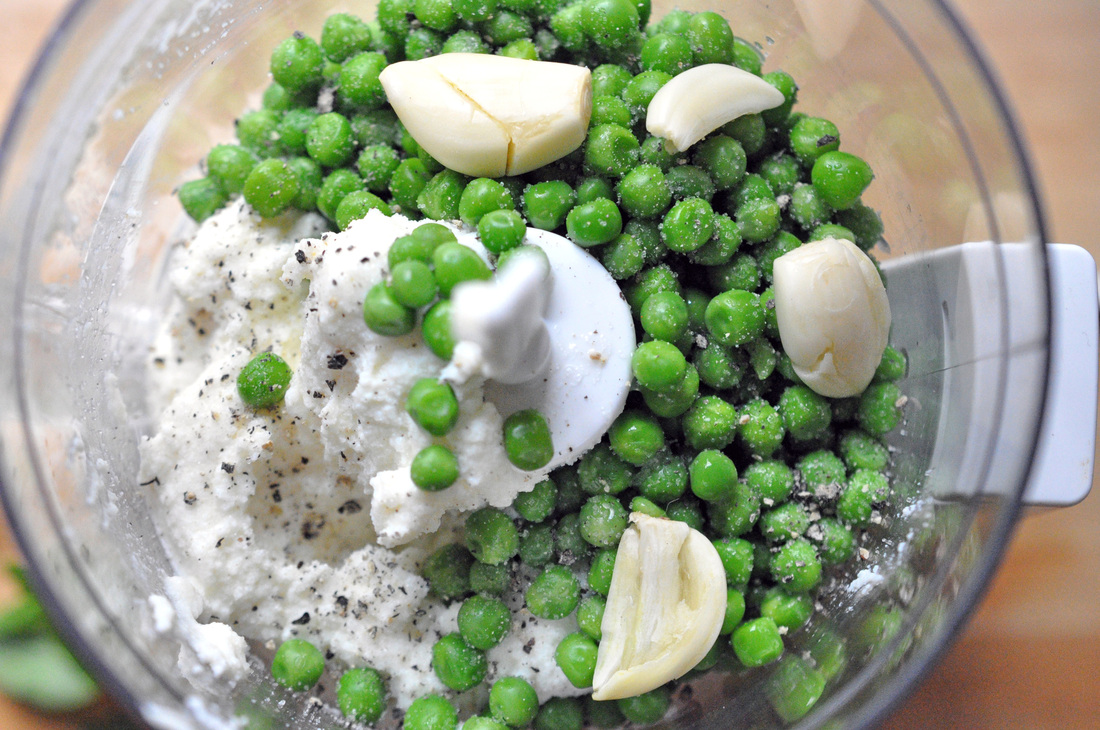
If using frozen peas make sure to take them out ahead of time so that they can defrost. If using fresh peas give yourself a little extra time to shell them. Fill up a large pot with about 5 quarts of water - or until water is about 3 inches from the top. Salt generously - at least 1 tablespoon - cover and set heat to high. Wash tomatoes and slice thinly. Marinate the tomato slices in 1/2 tablespoon olive oil and a pinch of salt. Wash and stem the basil and parsley, zest and juice 1 lemon, and peel 3-4 gloves of garlic [I like a lot of garlic, but it is used raw here so it gives a lot of kick, so use less if you want the flavor to be milder]. Chop the feta into small pieces and mince the chives. The feta, lemon zest and chives will be used as a topping, you can put them aside to use at the end. In a small food processor combine the ricotta, sweet peas, washed and stemmed basil and parsley, lemon juice, 2 tablespoons olive oil, garlic cloves, a few pinches of salt and a few grind of fresh cracked black pepper. Blend until all ingredients are incorporated and the texture is smooth. Let sit in the food processor. When water begins to bowl add the pasta and set timer to 8 minutes. Pour the balsamic vinegar and honey into a small skillet and cook over high heat until it begins to bubble/boil. Lower the heat and let the mixture simmer until it has reduced to half of its volume and is thick enough to coat a spoon, about 10 minutes. When pasta is done cooking, reserve 1/3 cup pasta water before draining. Transfer pasta to a serving bowl and toss with a splash of the pasta water and a tablespoon of olive oil, mix well. Add the reserved pasta water to the sweet pea ricotta sauce and blend – this will help to thin out the sauce a little. Toss the pasta as well as the marinated tomatoes and the sweet pea ricotta sauce. Top the pasta with feta, lemon zest and chives, drizzle the balsamic reduction over the top. Enjoy! 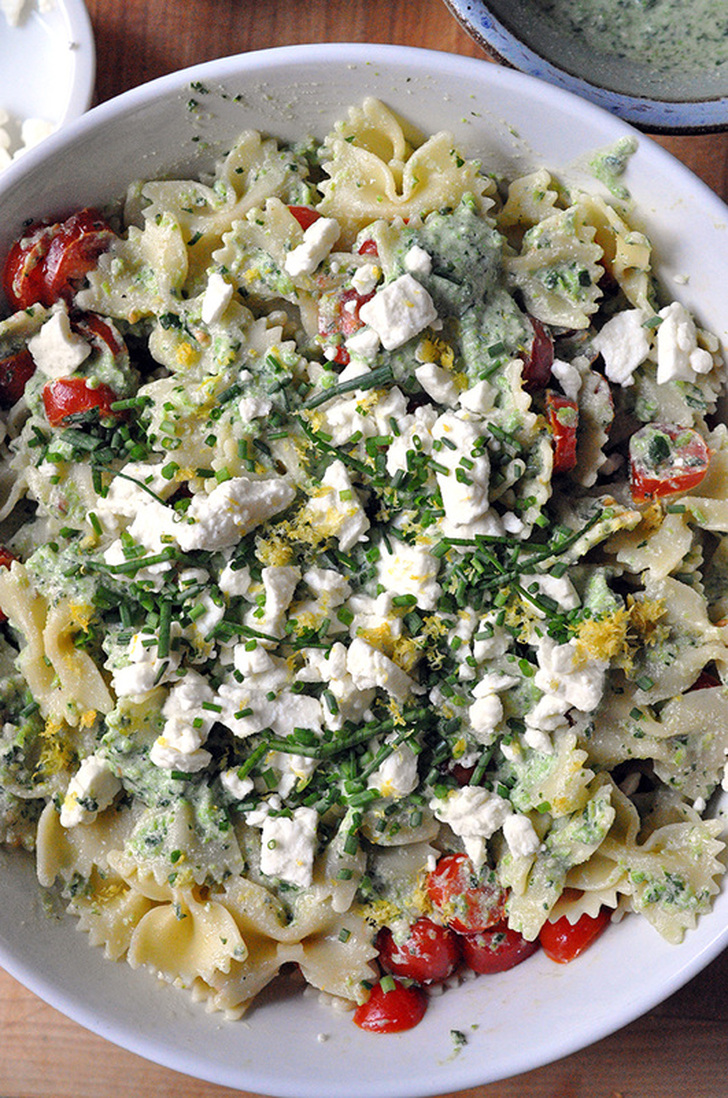 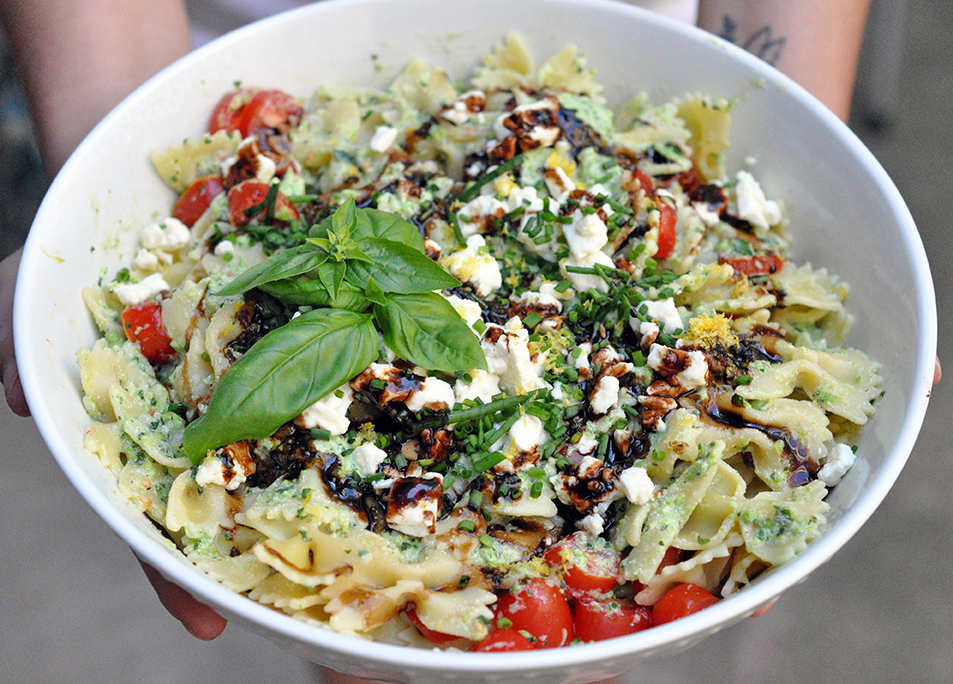
6 Comments
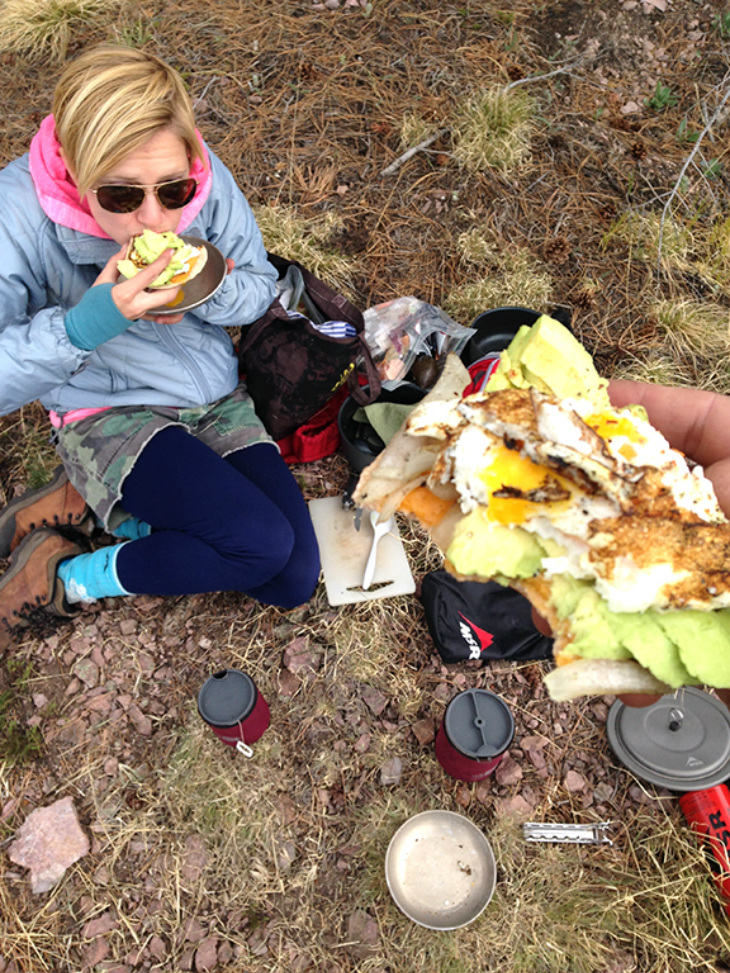
 Sorry for the long absence, life's been a little bit busy - in the good way. In early May Kaspar and I took a road/camping trip tour of New Mexico. We encountered a little snow, saw some amazing skies, dipped in a few natural hot springs and ate some good food along the way. We try not to let camping sacrifice the taste or quality of our food. Though it can be a bit tricky when you are out in the mountains for days at a time, there is always some way to spruce up a boxed soup or spice up a package of ramen noodle soup - mac and cheese has always been a go to for us. In fact I usually start to anticipate the bright orange meal days before we head out on our trip. Food that honestly wouldn’t be on our radar at the supermarket takes on a new significance – simply because you cant make everything from scratch when you are camping, it just isn’t practical. Along with pre-packaged food you can take a lot of good ingredients along with you – a sort of semi home made situation. You'll need a cooler and should try to cook the most perishable items first. Overall, it takes a fair amount of planning, but then when you’re out there in the wild or just car camping you already have your meals planned and there’s no stressing about what’s for dinner. Prepping and cooking becomes a matter of efficiency and waste becomes next to nil. It’s an interesting phenomenon – when I go camping with Kaspar, I get to relax [!] and let him take the culinary reigns. So I’ve decided to feature him in this post. He’s been camping for longer than I, and I thought we could learn a few tricks from him and enjoy his wisdom. From here on out this post is brought to by Kaspar, photos and all. Enjoy! [Disclaimer.. we wrote our entries separately - so any similarities is not meant to be redundant, just a coincidence. Perhaps its just evidence that we finally have camping routines down, we've been doing this for almost 8 years now!]
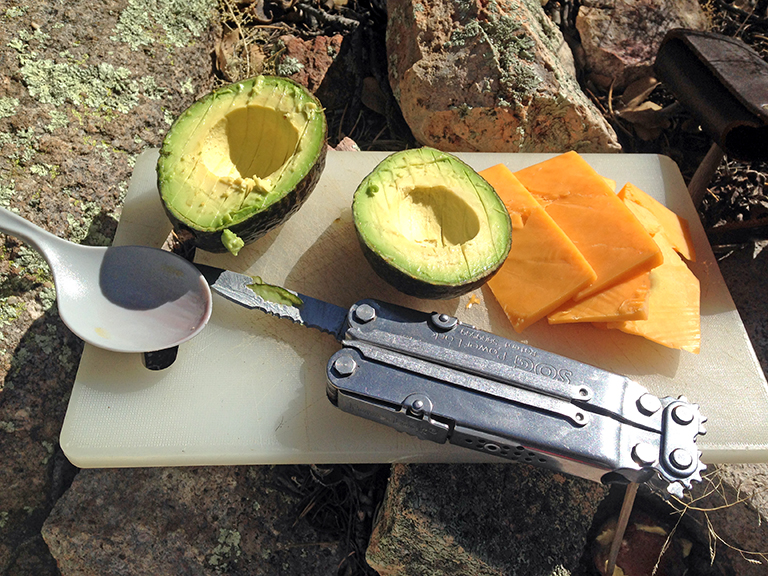
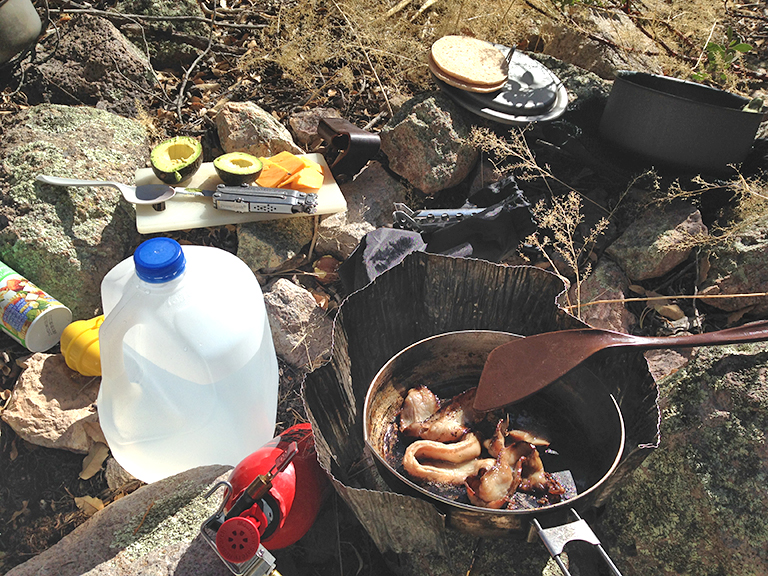
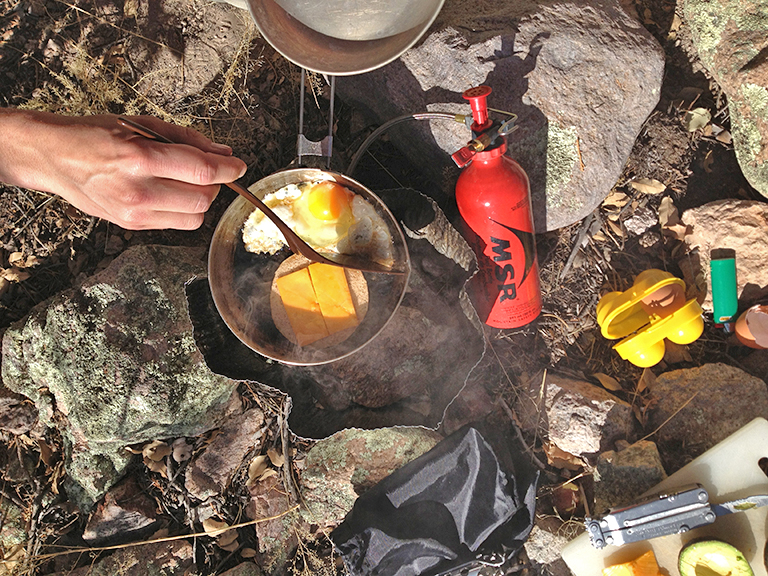
The great thing about cooking in the backcountry is that it is the only thing other than making sure you have shelter that matters. Nothing else even needs to enter your mind; you know all you need is food, water and a place to sleep. The reality is that those three things are all we ever really need, but we tend to over complicate things. When it comes to camping I get to handle the cooking and show off my domestic side. I do it all, the meal planning, cooking and cleaning. I think it blows Ali's mind that when we are in the outdoors all of a sudden I decide to be neat and tidy with the dishes and fastidious about the food. We have some "go to" meals we like to cook, but ultimately you really have to be able to freestyle when you get to the bottom of the food bag. 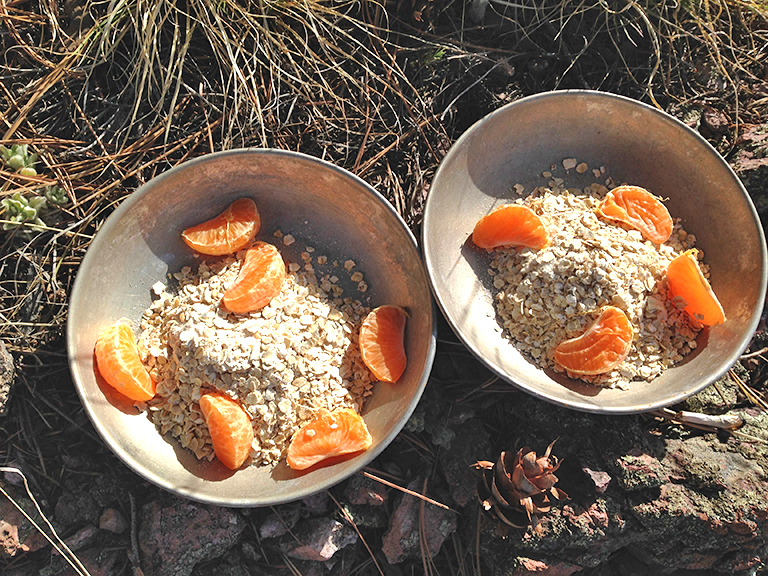 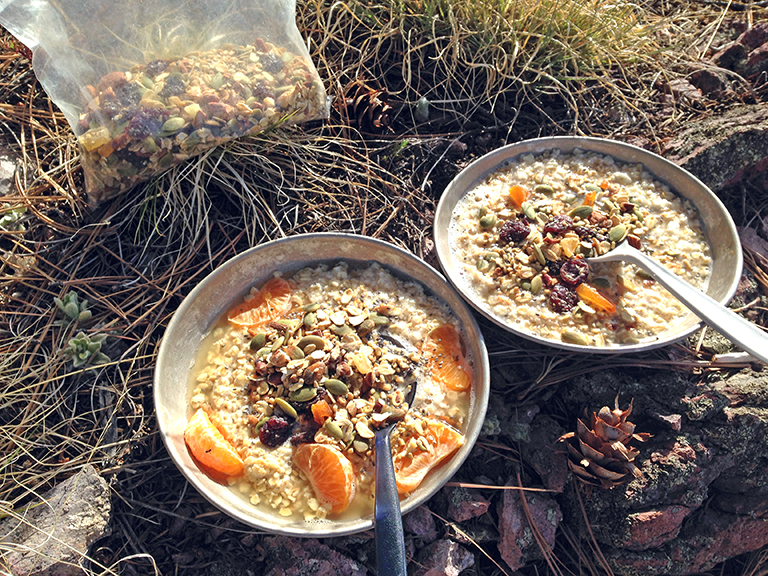 Breakfast: Coffee or tea is a must-there are quality camping French presses out there, we've been using the GSI Coffee Press for a few years now, Make sure to pack sugar and powdered milk! Sweet: Instant oatmeal base - Optional additions: homemade granola, fruit (sometime you can find wild blueberries or strawberries). This is a great way to wake you up and make sure you do your business at the beginning of the day so you don't have to worry about it once you hit the trail. Savory: Bacon Egg and Cheese on toast - Optional additions: avocado or leftover grilled veggies from the night before. This is the best protein bomb you can make to repair your legs. Tip-we’ve been liking One Bun for a bread option. 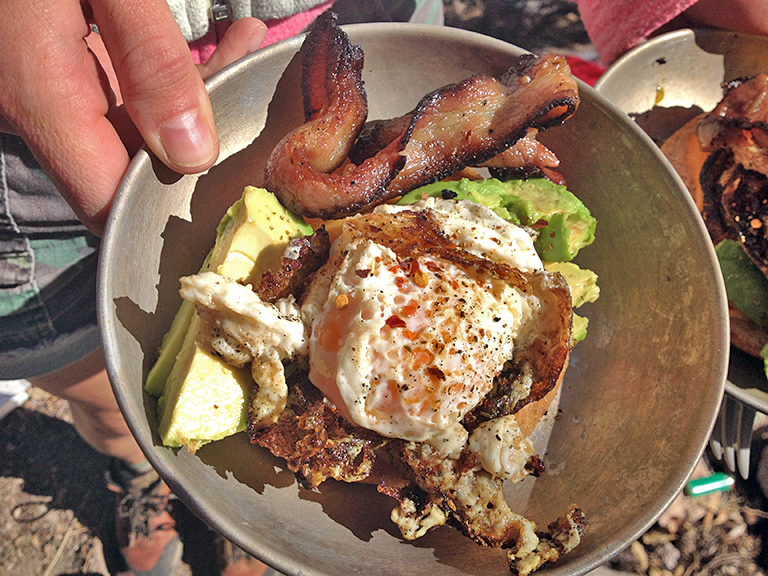
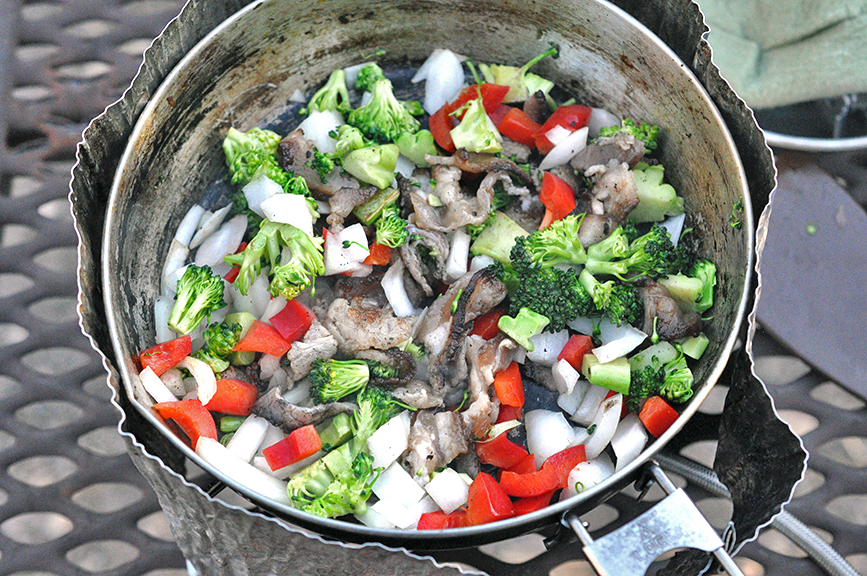
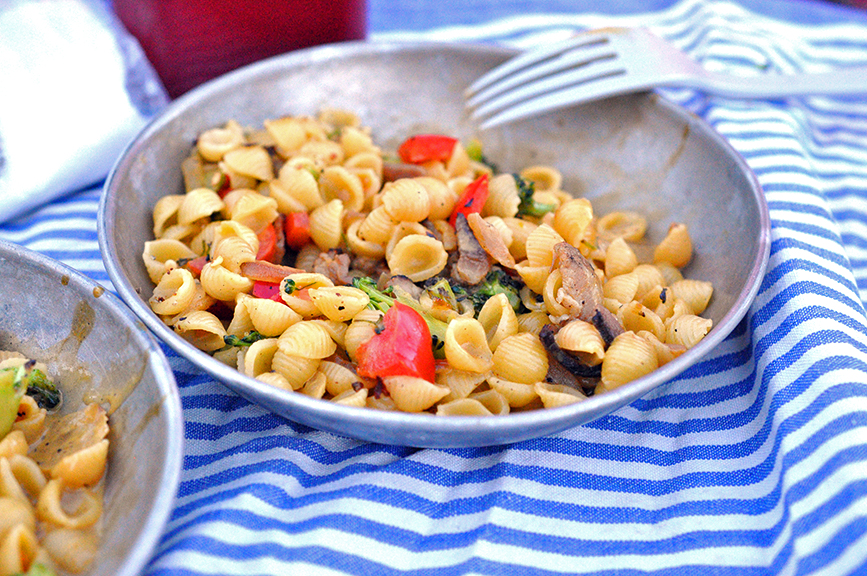
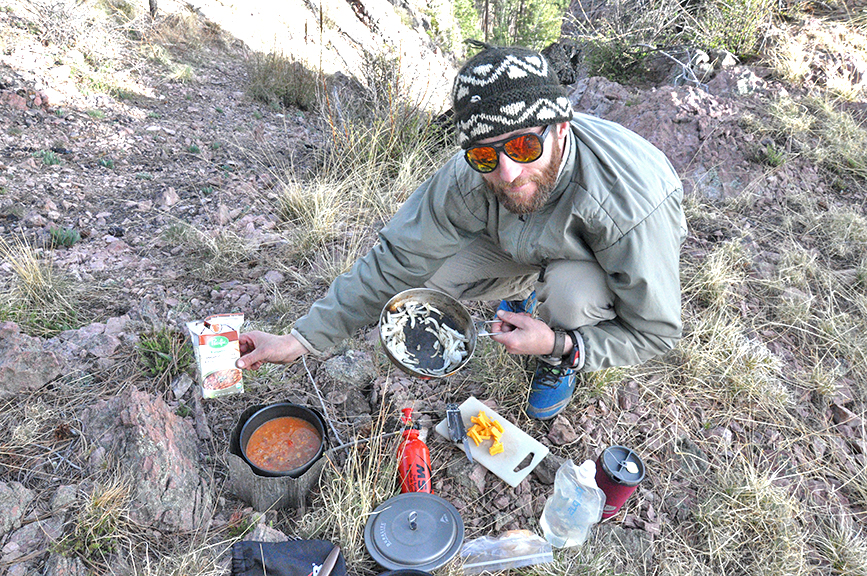
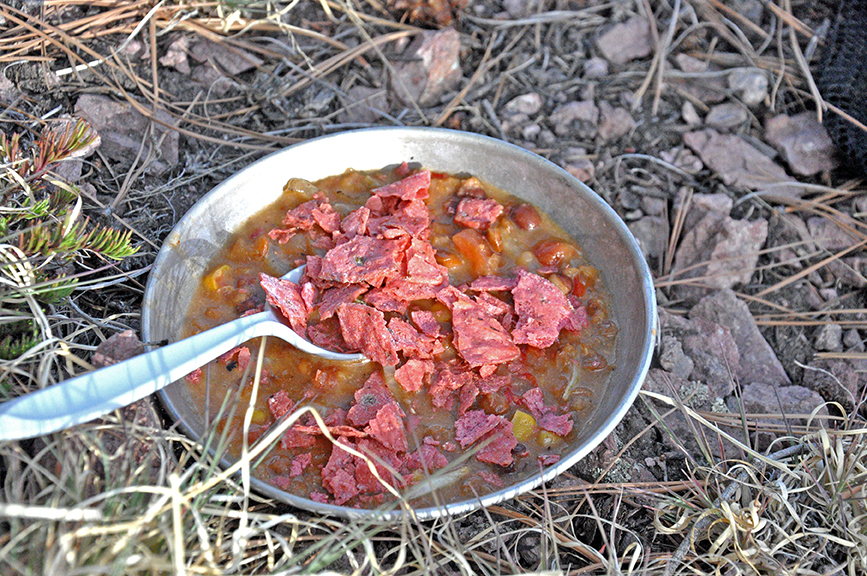
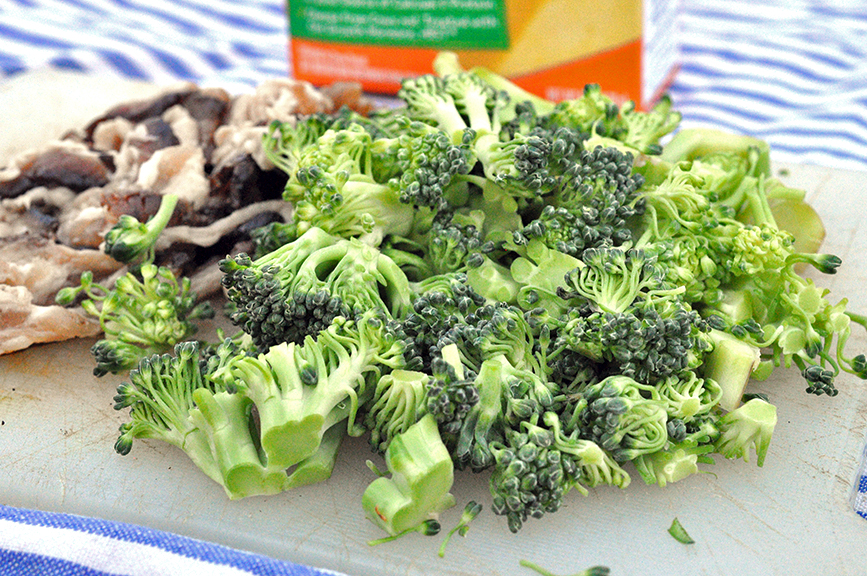
 Lunch is usually on the go, a granola bar, trail mix or piece of fruit. Dinner: Sausage and Vegetables - Optional additions: spicy mustard, horse radish, onions, carrots, broccoli and peppers will all keep for a few days without refrigeration so chop up what you got and toss it in. Tip-don't forget to pack spices for seasoning. Pre-mix them at home and store them in mini zip-lock bags. Mac and Cheese, Ramen or Boxed Soup - Be sure to get a good mac and cheese like Annie's - Optional additons: peppers, garlic, onion. Tip – when boiling water for the noodles or shells you can place the skillet with sautéed veggies on top of the water, this keeps the veggies warm and act as a lid to speed up the boiling process. 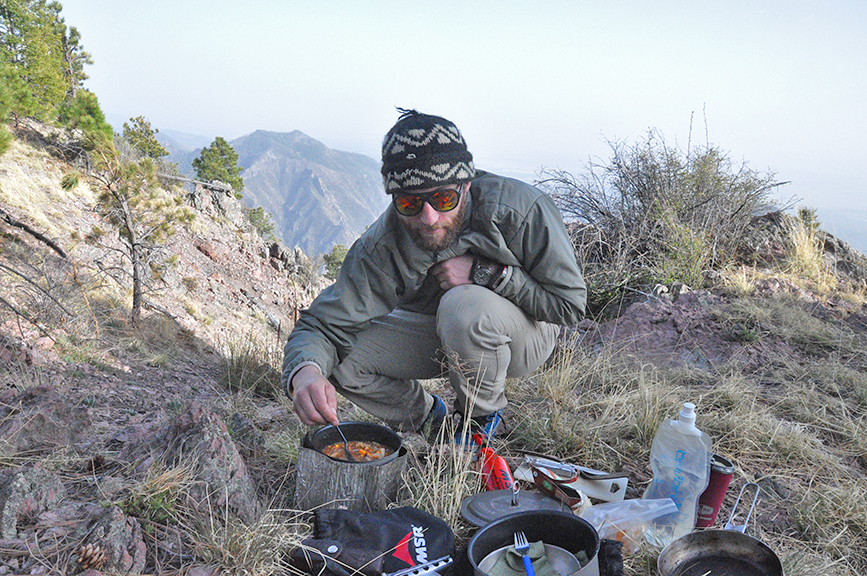
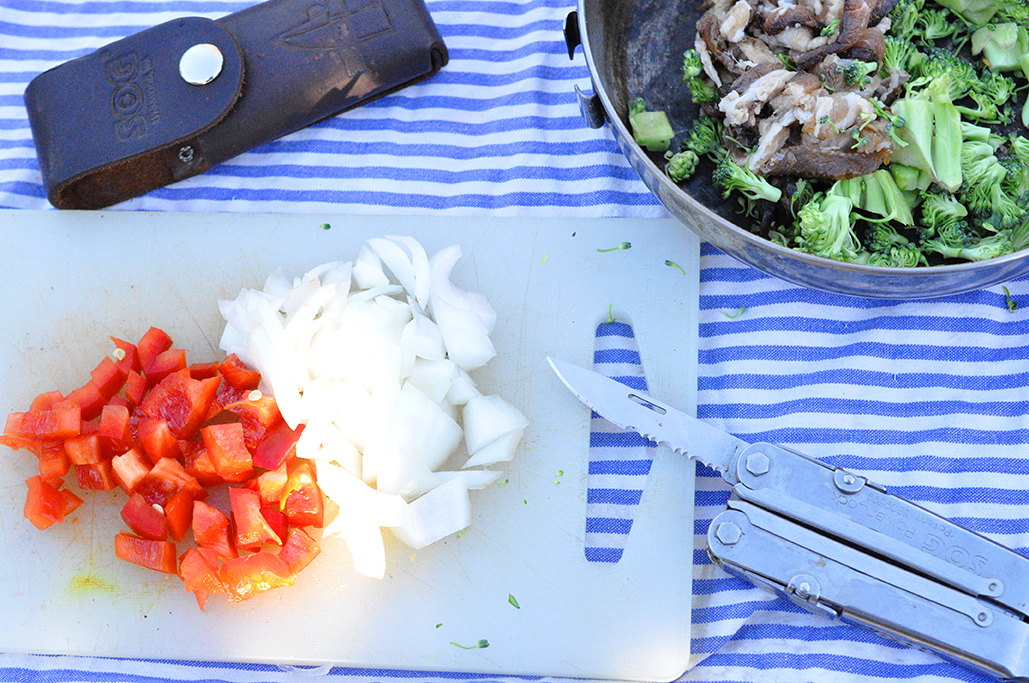
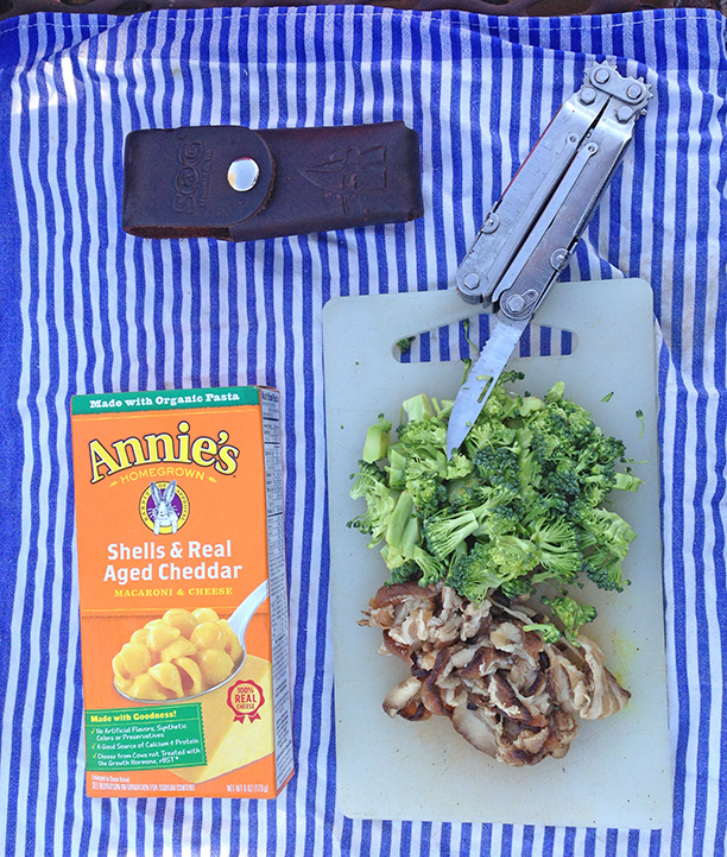 a multi-tool comes in super handy while prepping a meal
  Don’t forget your flask with your liquor of choice. Ours this time was some home made moonshine that we infused with strawberries to make it into the camping version of a desert liquor. 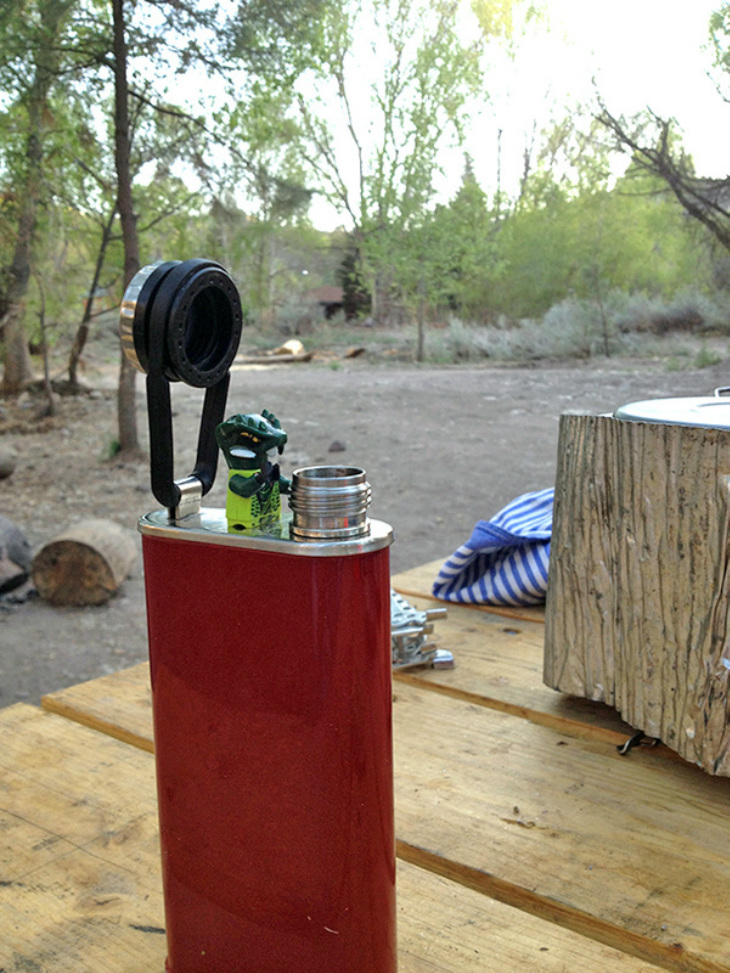 don't forget to share And of course there's the long road home - where all bets are off. When you've been hiking, trailblazing, and just generally exhausting yourself in the great wilderness - you deserve a treat. These donuts, hole included! are from Buns N' Roses in Marfa, TX. 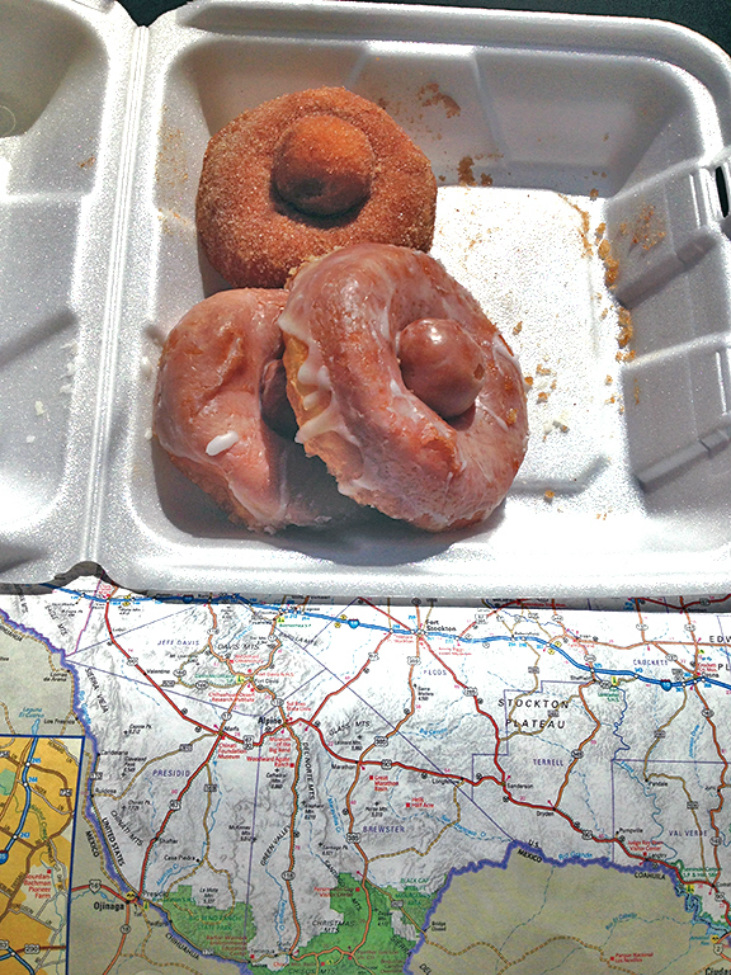 Please submit any questions you have about food and camping! Also to see more photos from our trip find me [Ali] on instagram @borninaford.
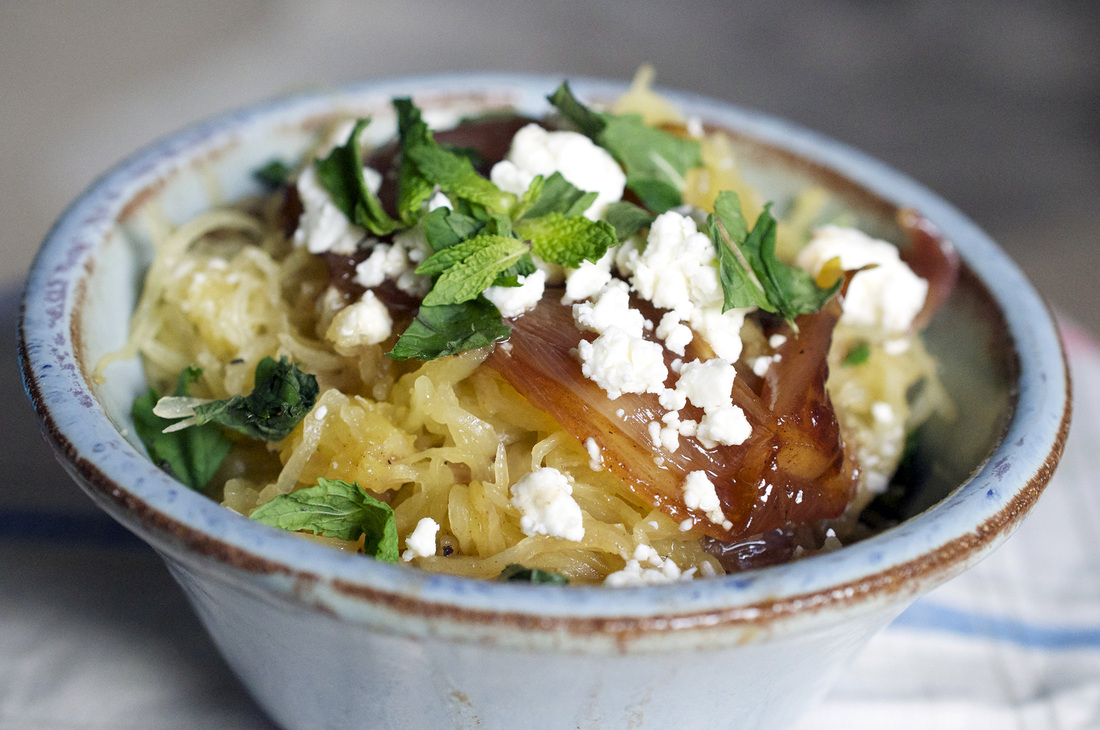
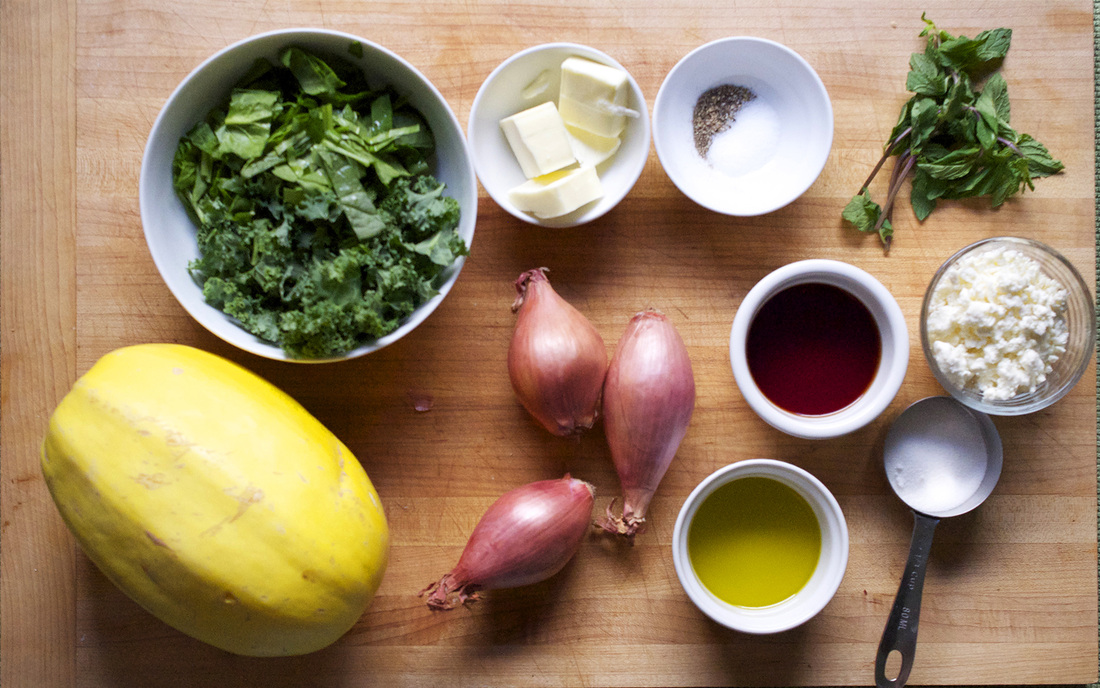
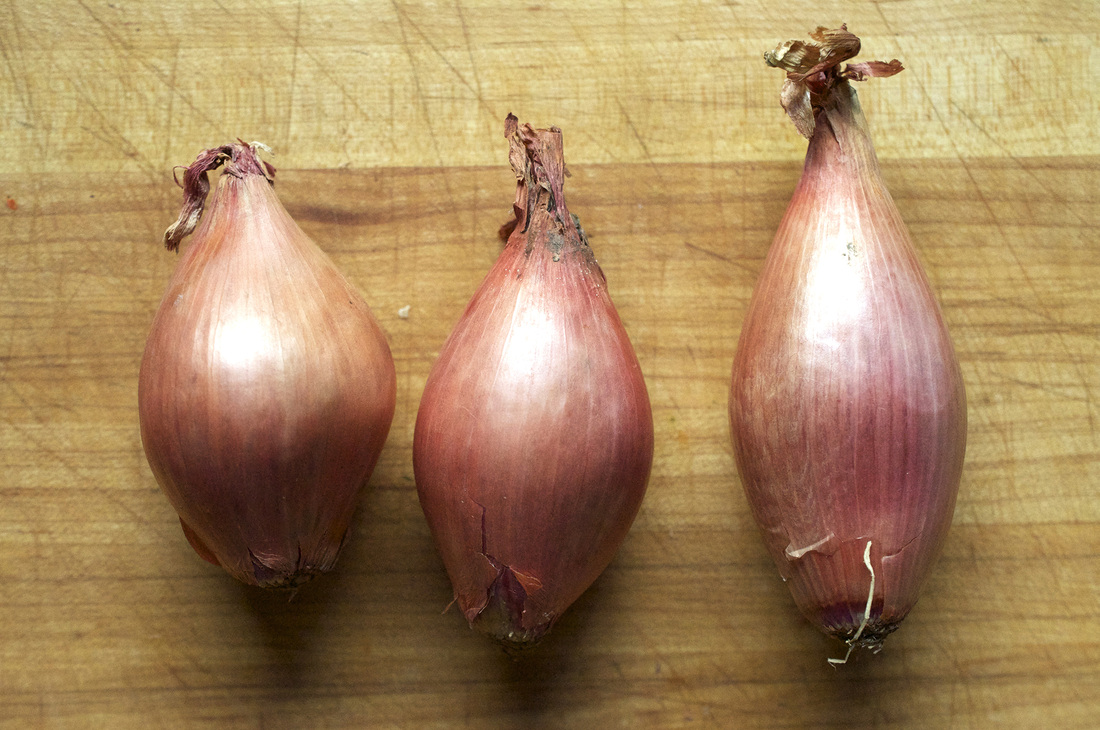
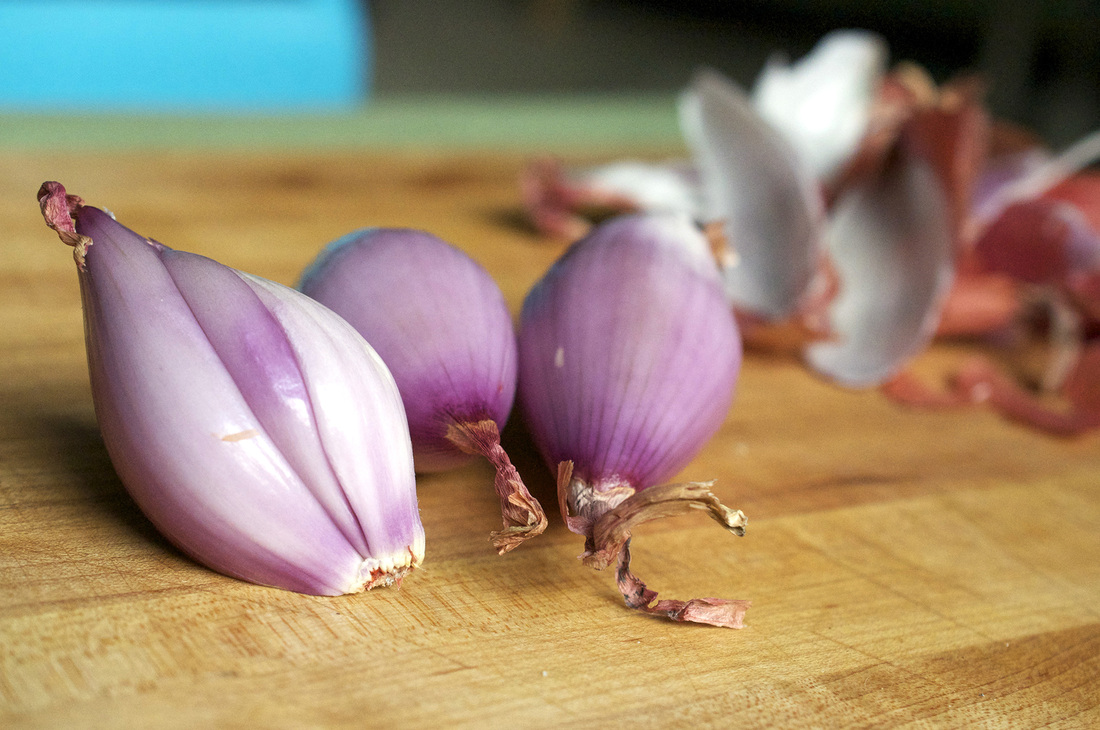
There are few things that I enjoy more then when random food I have hanging out in my fridge becomes an honest to goodness meal. My mom calls this catch it and pull it. I do this quite often but recently this chance encounter of ingredients worked together so well, that I made it again within a week. The culprit was spaghetti squash. I know it’s not really the season for it, spaghetti squash is more of a winter vegetable but it was hanging around in the supermarket sort of like how winter has been hanging around even thought it’s technically Spring now. I then had the squash sitting at home for days not knowing what to use it with, but I wanted to use it before it went bad. Now, my mother and I have had an ongoing conversation about the best way to caramelize whole shallots and I’d recently come across a few recipes that caramelized them on the stovetop and then roasted them in the oven. I happened to have a few shallots, and I wanted to try out one of the recipes, so those were quickly added to the list of ingredients. It really wasn’t until the [buttery sugary] shallots were roasted in the oven along with the spaghetti squash that I picked out a few other things to perk up the dish. Whatever greens I had in my fridge were rinsed, chopped and then quickly sautéed – just to the point of wilting. A little feta saltiness to counteract the sweetness of the shallots and then some mint. Mint because…well just because it adds a surprising flavor to savory dishes and works more often than not. So even though this is more of a Fall/Winter recipe I couldn’t wait to share it. I had it as a main course, because as I mentioned I was rooting around in my fridge for ingredients and hadn’t really planned it all out. If I did it again I’d maybe have it as a side with some sort of fish. Cod or sole would go great…or maybe some scallops… 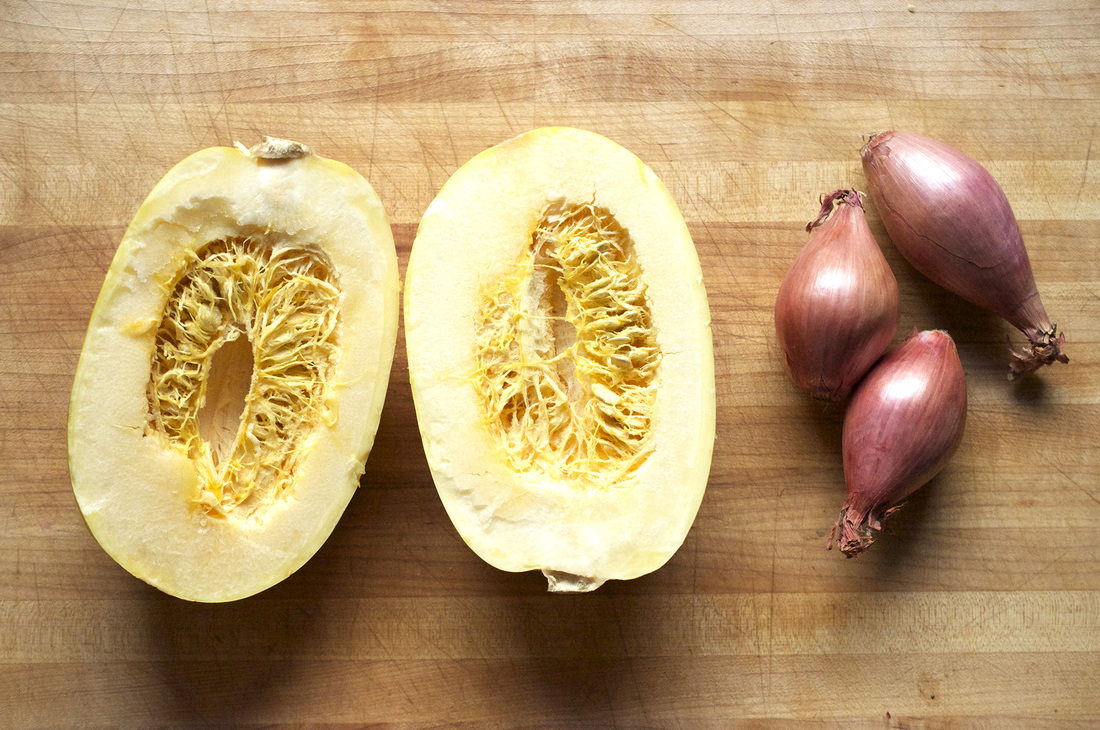
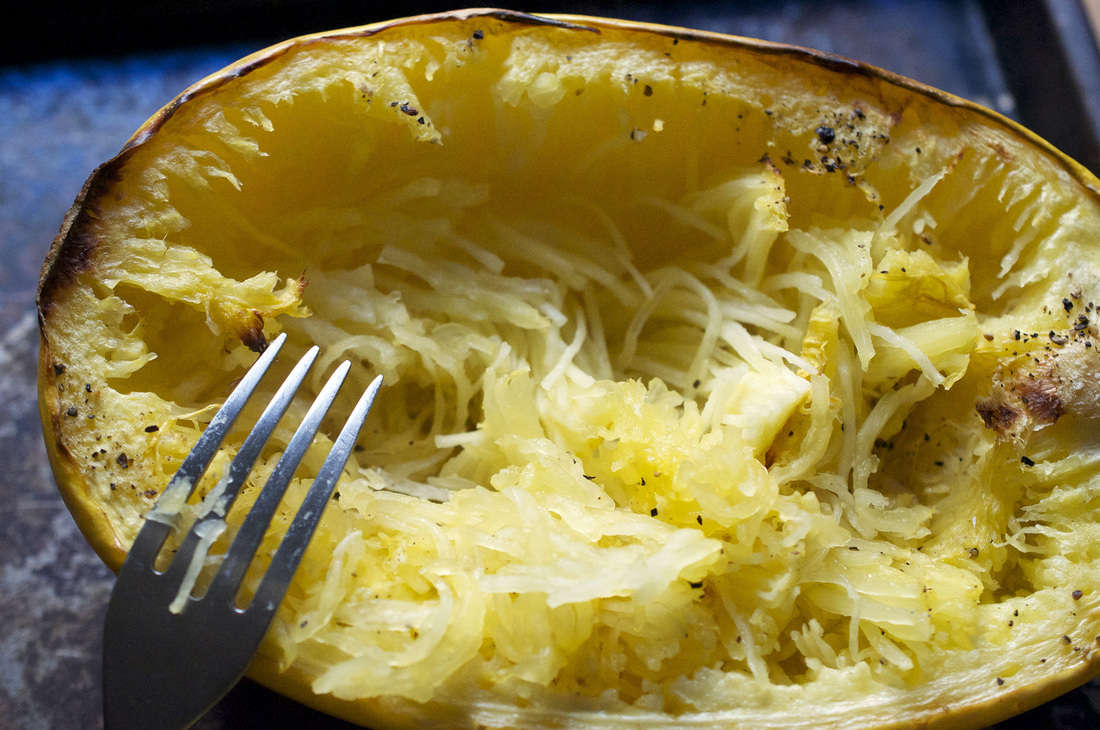
Roasted Spaghetti Squash with Caramelized Shallots PRINT RECIPE [Prep: 10mins / Cook: 45mins / TOTAL: 55mins [2 dinner servings, 4 side servings]
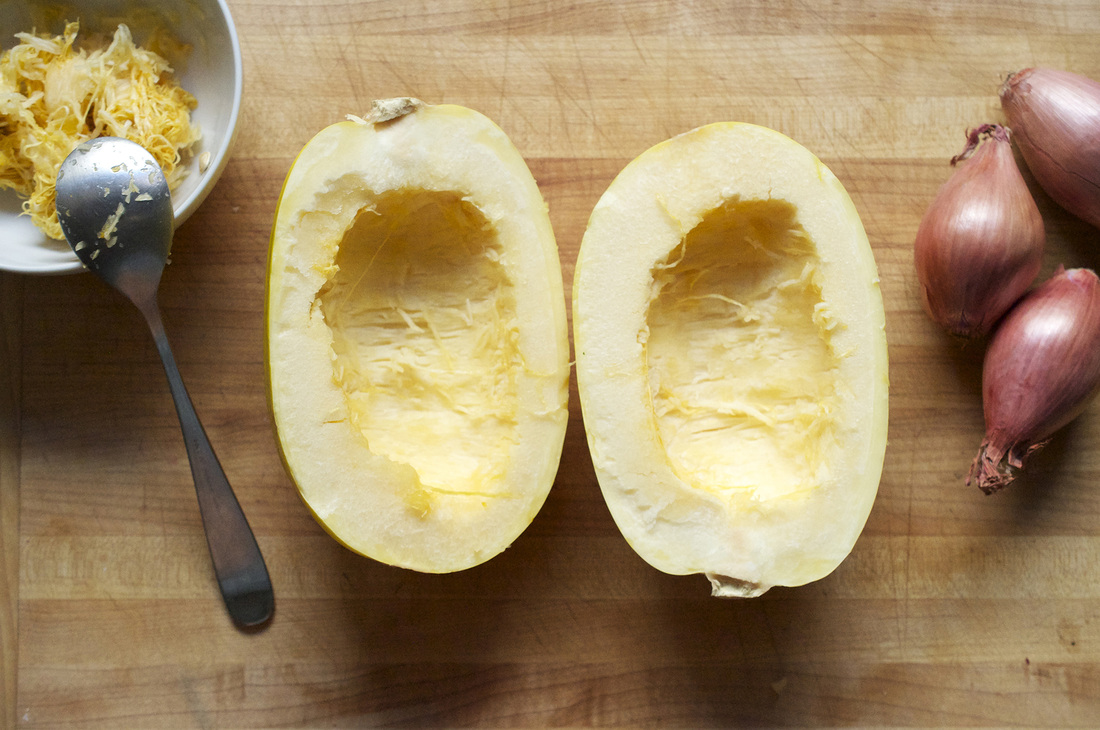
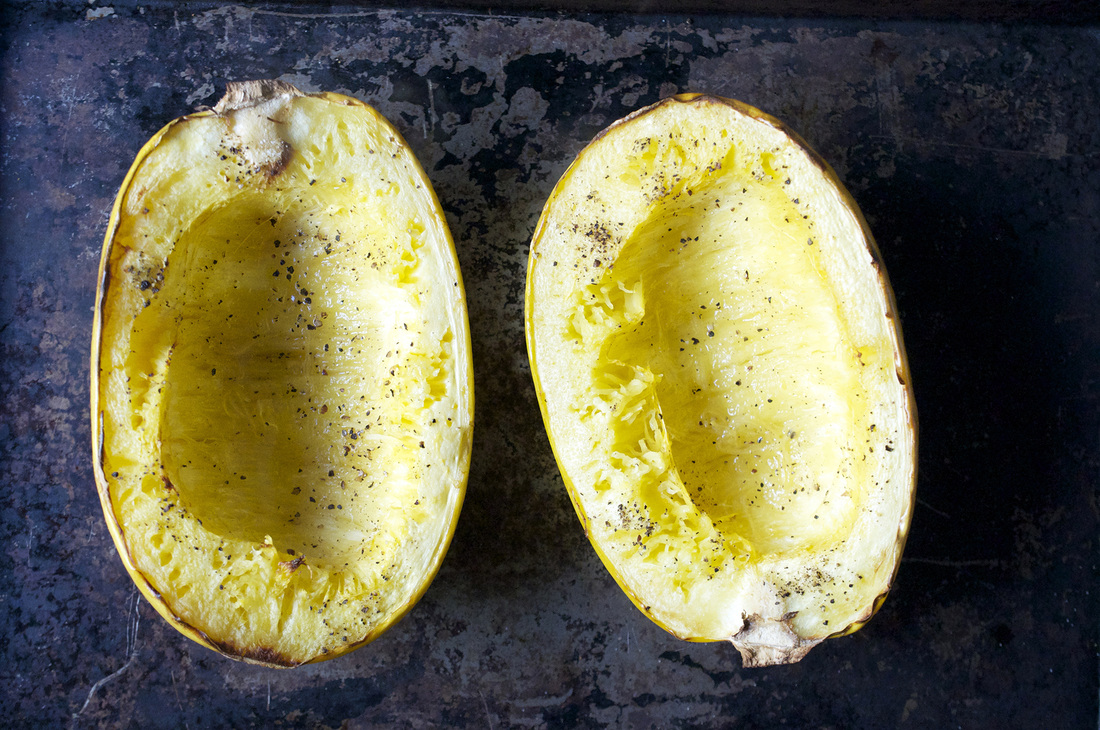
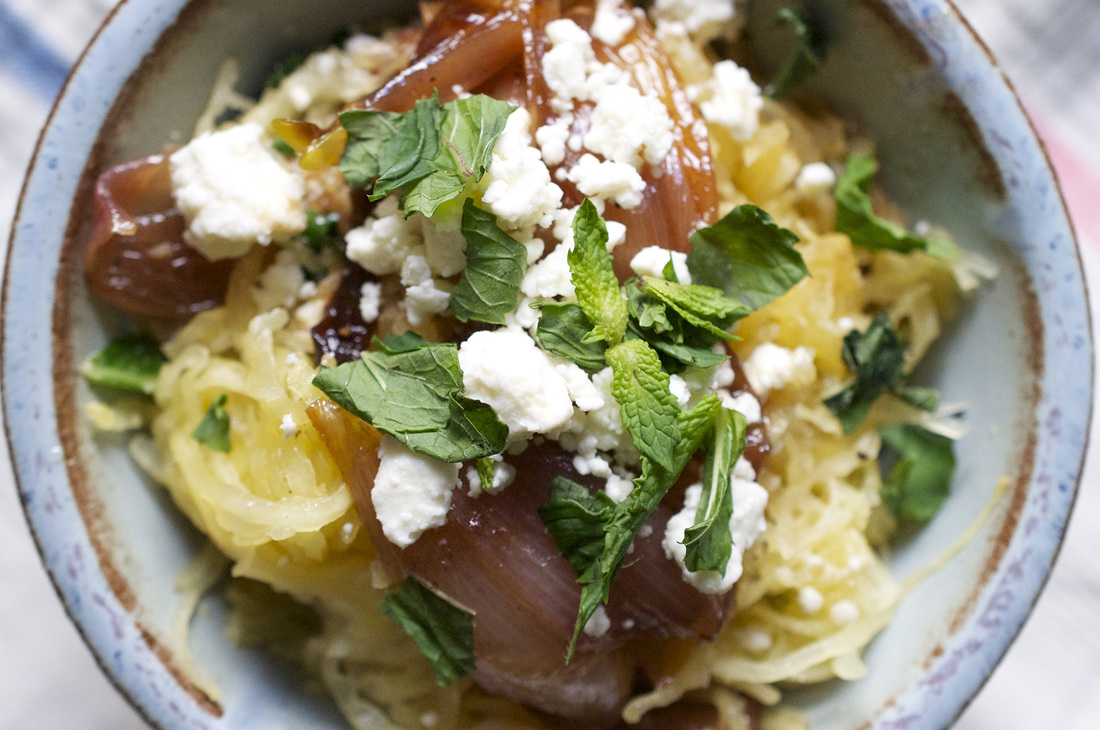
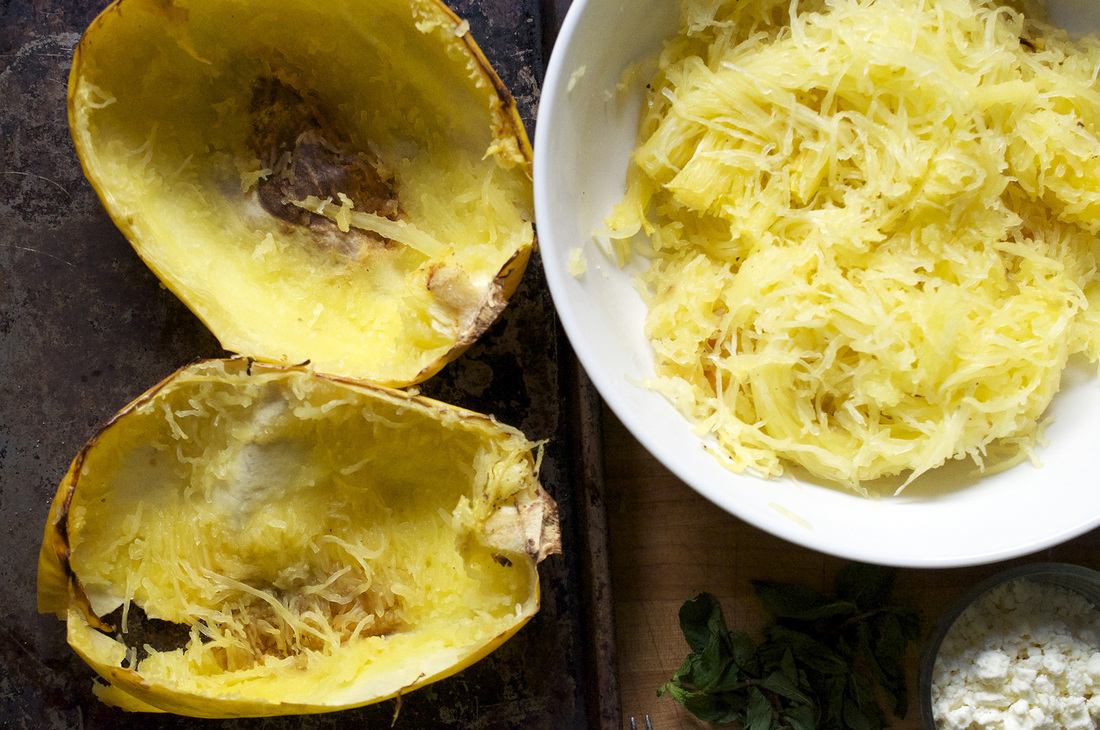
Preheat oven to 400°. Cut the spaghetti squash in half lengthwise and clean out the seeds and pulp with a spoon. Transfer the 2 halves on a baking sheet and spread 1 1/2 tablespoons of olive oil over the surface of the squash and season with a few dashes of salt and some freshly ground pepper. Put in the oven and set the timer to 30 minutes. Peel the shallots and cut in half lengthwise. Put a small skillet over med-high heat and melt the 3 tablespoons of butter. Once melted add the shallots to the butter and let them sit for 1 minute, spooning the butter over the tops of the shallot halves. After letting them sit, flip over and add the sugar. The shallots will start to brown and caramelize faster with the help of the added sugar. Let sauté for 8 minutes longer, about 10 minutes total, stirring often, the shallots will begin to fall apart. Season with a few dashes of salt and some fresh ground pepper. Remove the shallots from the heat and add the red wine vinegar. Return to the heat and stir vigorously, scraping up all the bits stuck to the bottom of the skillet. The shallots will start to break down even more and the vinegar will deglaze the skillet. Turn off the heat. When the 30-minute timer goes off you’ll want to add the shallot mixture to the oven. Transfer the shallots to a small ovenproof platter. Set the timer for 15 minutes. Rinse both the spinach and kale. Stem the kale and roughly chop both of the greens. Using the same skillet [no need to clean it, the skillet is well seasoned by the shallots] turn the heat to medium and add 1 tablespoon olive oil. After 1 minute, add the greens, stirring often. You just want to wilt the spinach and kale a little, sauté for amount 3 minutes, then remove from heat. Once the spaghetti squash is ready, after 45 minutes or so of roasting – it should be fork tender, remove it from the oven and let cool for 5 minutes. Removed the shallots from the oven as well. Shred the squash with a fork, it will break up into spaghetti like segments, so that all you have left is the skin. Transfer the “spaghetti” to a bowl and incorporate the wilted greens. Add 1/2 of the shallots, crumbled feta and torn mint leaves. Mix well. When you are ready to plate the dish incorporate the rest of the shallot mixture, feta, and mint as a topping on eat serving and finish with some fresh ground pepper. This dish is best when served warm, but it’s also great the next day right out of the fridge. 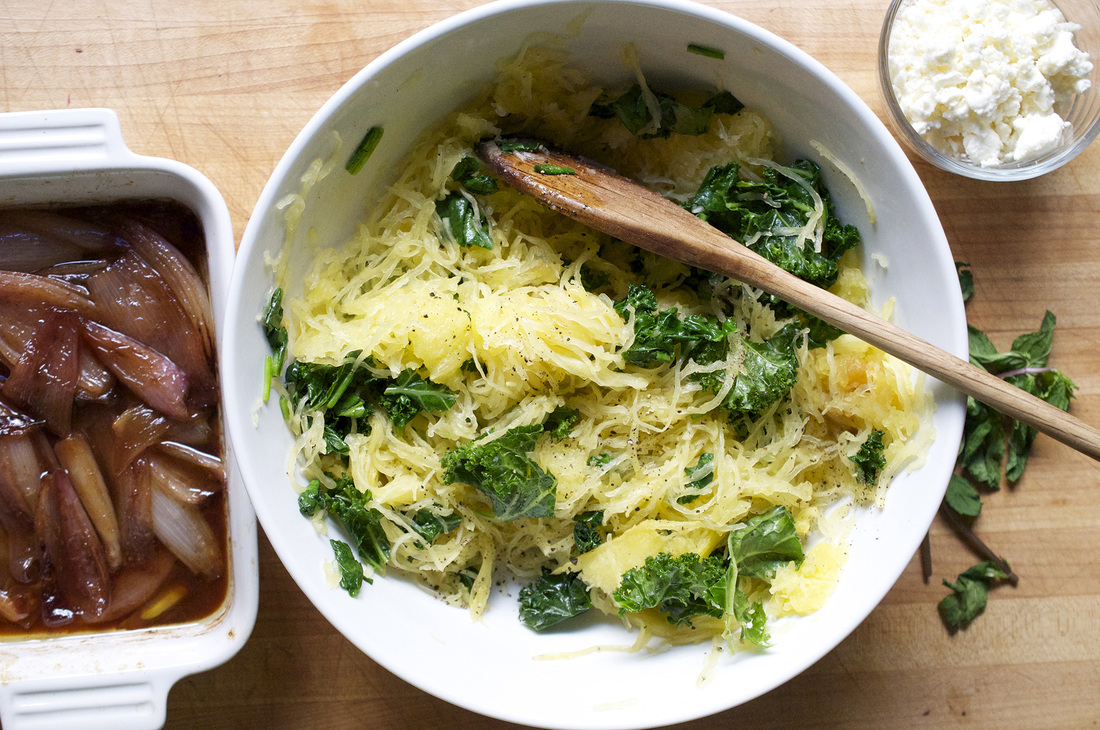
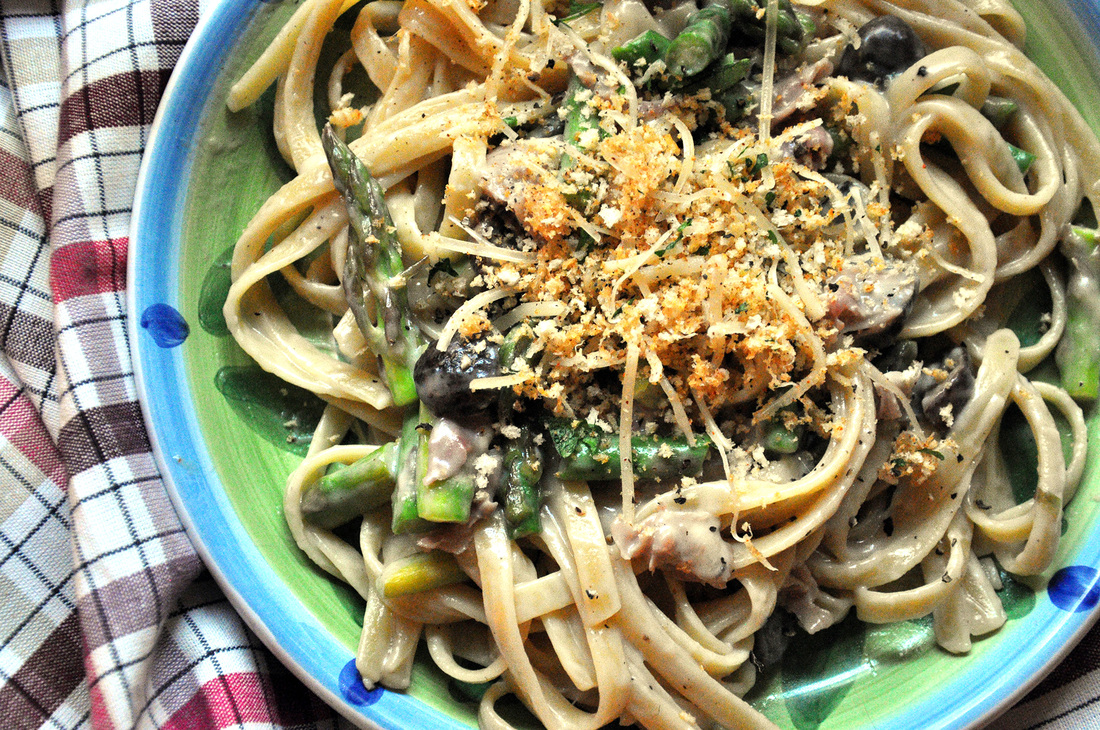
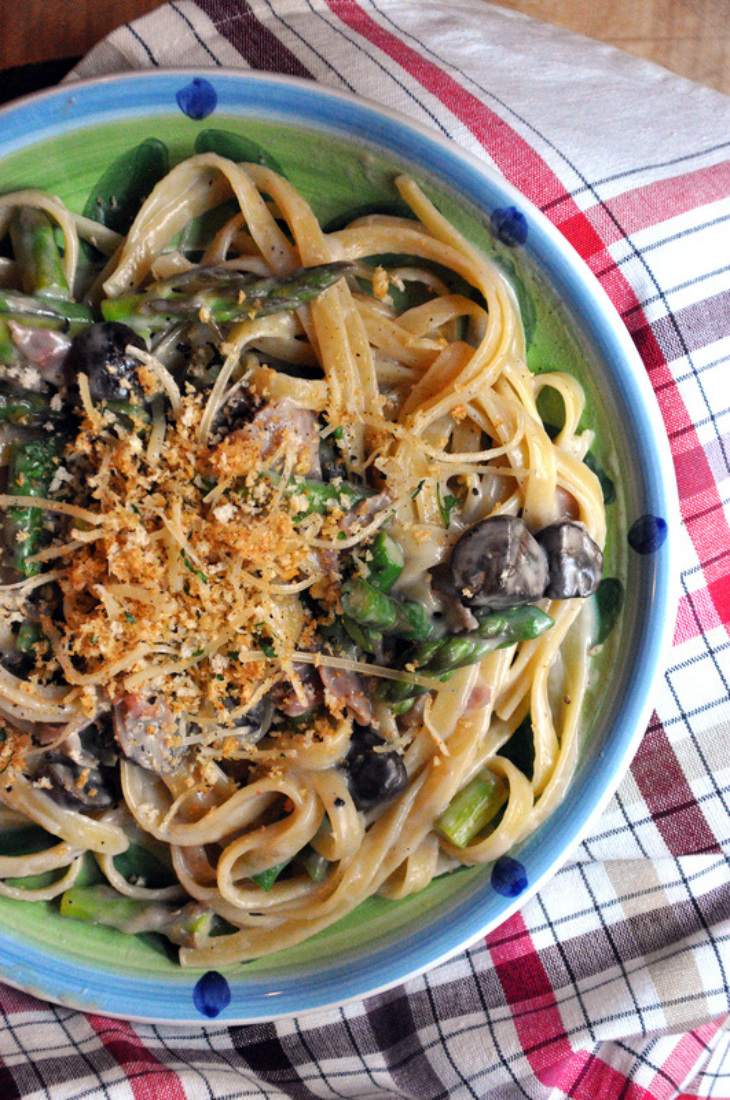
It’s sort of fun to see how much ones tastes change depending on the weather. Bright sunny days make you want to start anew and eat something healthy. Juice smoothies anyone? Rainy days are often cookie days. And cold weather…I don’t think I’ve ever heard someone say, man this cold weather is making me hanker for a garden salad with dressing on the side. No. We want stews, and steaks. We want pizzas and pastas. Oven roasted tasties, sweet and savory. So needless to say (or as I’m always thinking in my head “needles to hay”), the transition from winter to spring is a confusing time. The temperature fluctuations, pretty much all across the country, will make your head spin. Most nights what I end up eating is concocted on my bike rides home from work (when I’m not planning a meal a head of time) and recently I’ve been all over the map. One day I’m riding in a sweatshirt giddy with anticipation for spring, the next I’m hunkered down in my ski parka, ski mittens, a fleece lined hat and neck warmer. I could go on, but lets talk food. What I really wanted to talk about is this magic thing called a roux. Now it’s not very nutritious or glamorous. It’s not some new superfood. It’s nothing really, just a little butter, flour and milk full of old fashioned charm. I think it’s magical. Add some spices, infuse the milk with an herb, throw in a little cheese…and now you have a bonafide fancy cream sauce, a faux-alfredo sauce. You don’t need mountains of cheese or heavy cream, just a few basic pantry items. Now I’m not trying to label this pasta recipe as “healthy” but it does have some veggies in it, and it’s way lighter than some other cream sauces that I’ve come across. It’s still a comfort dish and I think we’re all in need of a little comfort to battle this cold winter. 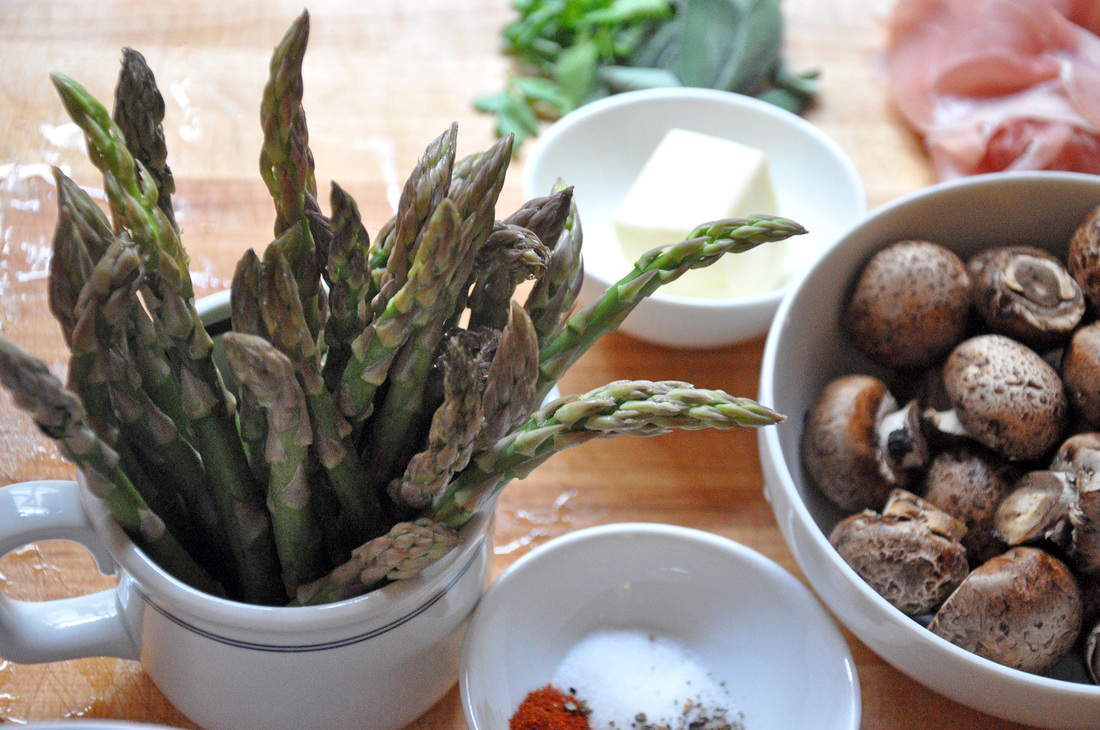

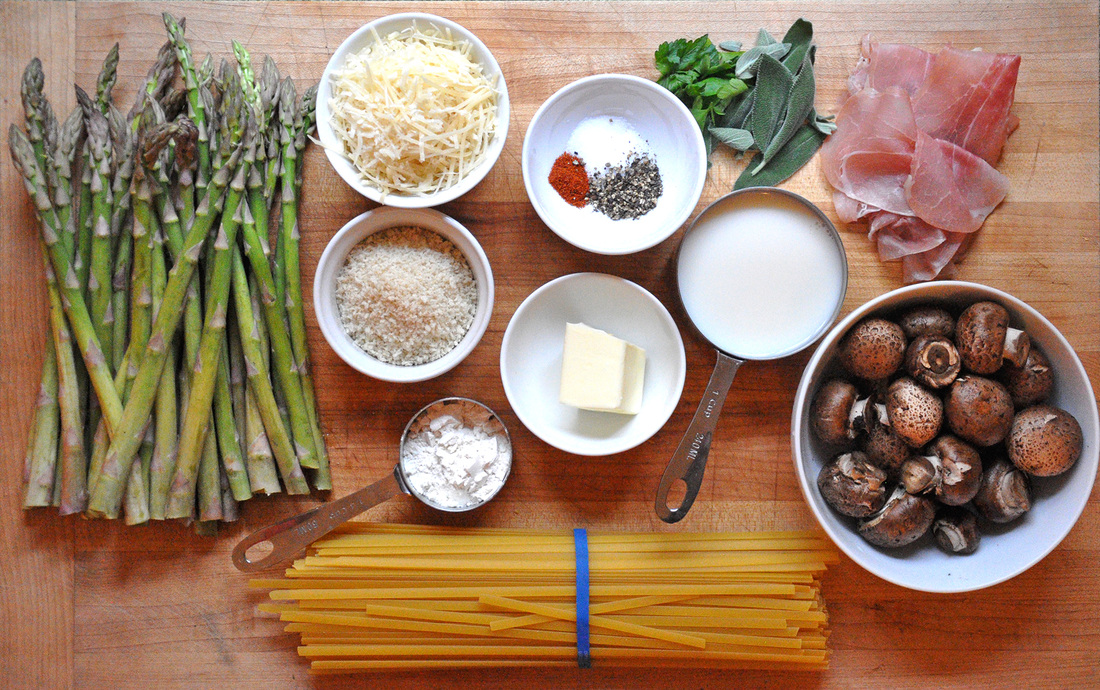
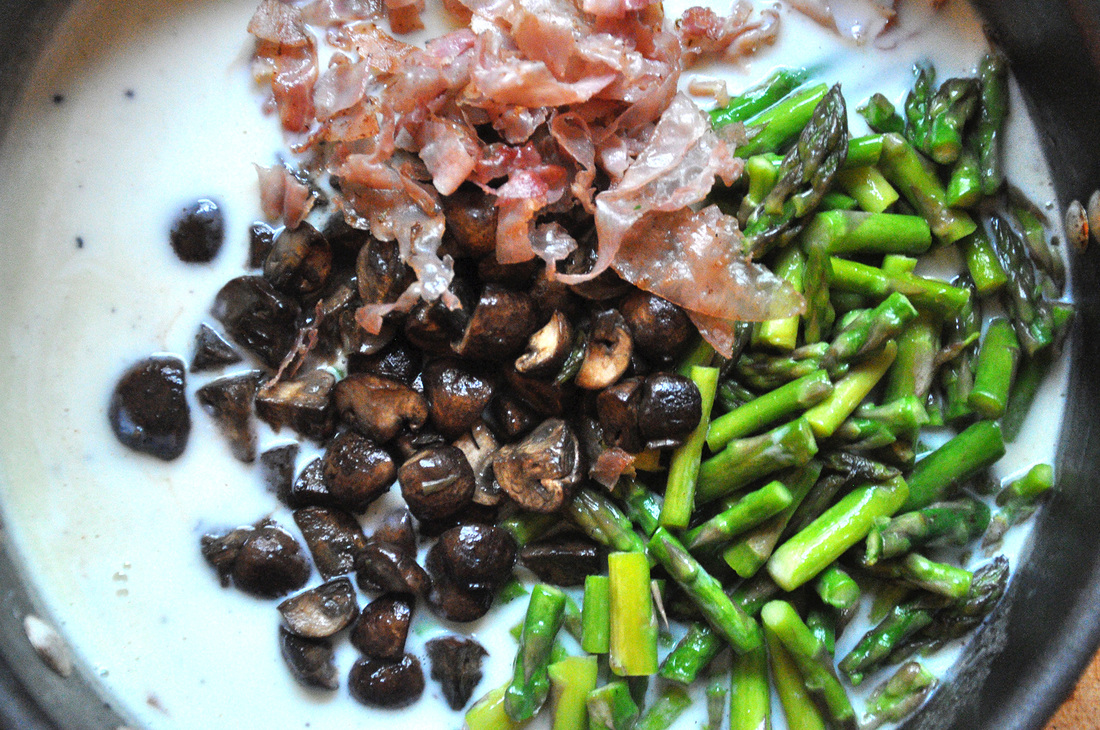
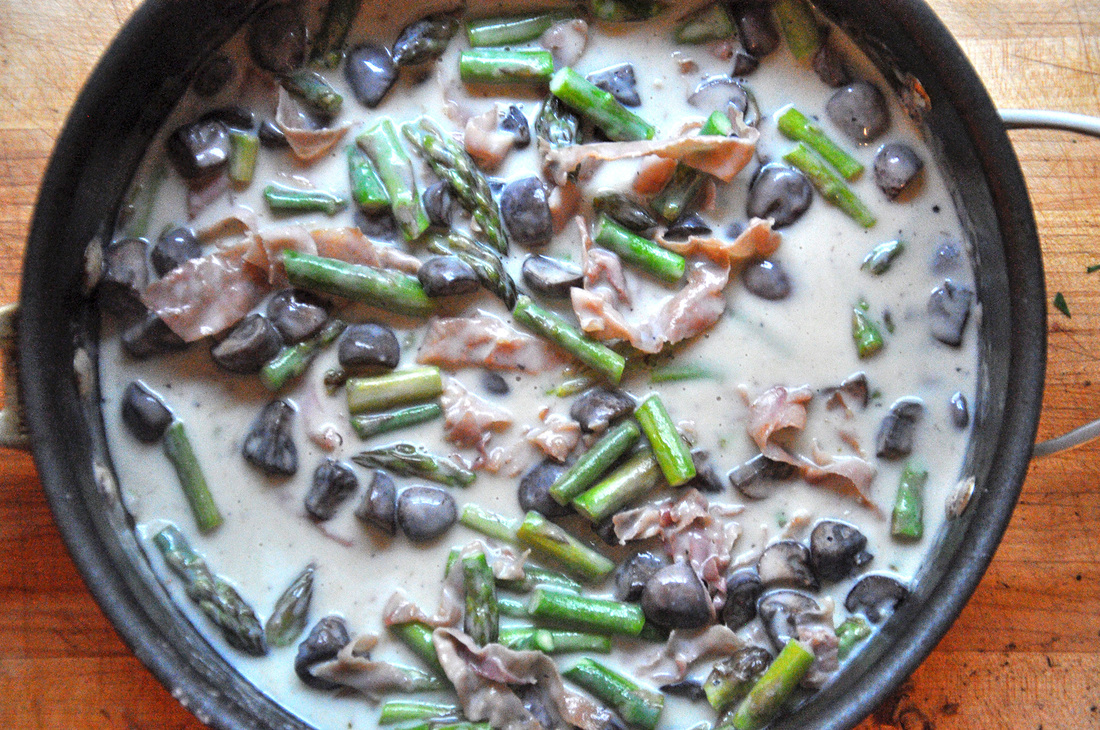
Faux Alfredo with Asparagus, Mushrooms and Prosciutto PRINT RECIPE [Prep: 10mins / Cook: 25mins / TOTAL: 35mins [4 servings servings]
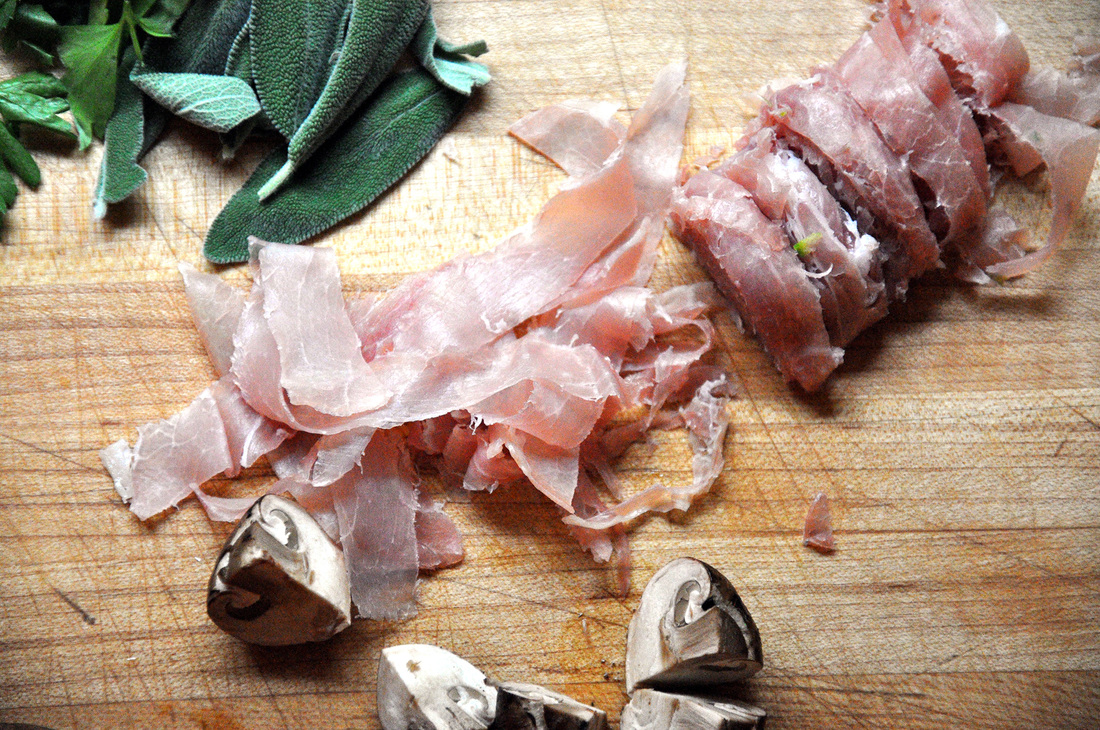
Put a large pot of salted water over high heat and cover, it should take about 10 minutes to boil. During this time you can start prepping the ingredients. Into a small skillet or saucier pour 1 ¼ cup milk, add the sage leaves and bring to a slow simmer over med heat. You’ll want to whisk the mixture so the milk doesn’t burn and stick to the bottom of the skillet. After a few minutes of simmering turn the heat to low and let sit for 5 minutes. Pour off the milk mixture into a small container, there should be about 1 cup remaining. Rinse and dry off the skillet – you can reuse it to toast the panko. While the milk is simmering you can get started on the veggies and prosciutto. Rinse the asparagus, snap off the bottoms - discard, and cut the remaining pieces into 1 ½ inch spears. Rinse the mushrooms, trim the stems and quarter. Layer the prosciutto slices on top of each other and roll tightly lengthwise. Cut into ½ inch strips. Unroll and pull strips apart. Heat a large skillet over med-high heat. Add ½ tablespoon butter, asparagus and a dash of salt. Let sauté for about 5 minutes, stirring a few times. Remove asparagus and add the mushrooms to the same skillet. Add ½ tablespoon more of butter and let mushrooms sit undisturbed for the first minute. Add a dash of salt and stir mushrooms a few times, after 5 minutes remove them from the skillet. Add prosciutto strips to the skillet, let sit for 1 minute undisturbed. Stir a few times and let cook for about 5 minutes or until crisp. The pasta water is probably boiling at this point. Add 1 box of fettuccine – or any other pasta that you have chosen, I think bowties would work really well this recipe – and bring back to a boil. If you are using fettuccine set your timer to 10 minutes. Now onto the last two elements of the dish. To toast the panko, just add a little pad of butter to the small skillet and put the heat on medium. Once it’s melted add the panko, a dash of salt, a few grinds of fresh black pepper, and 1 /4 teaspoon cayenne pepper. Let it toast for about 5 minutes, stirring occasionally so the panko doesn’t burn. Once it is finished, pour toasted panko into a small bowl and add 1 tablespoon of the grated parmesan cheese, mix well. (I had a sprig of parsley I wanted to use up so I chopped that up and added it in to the mix) The base of this “cream sauce” is the roux. To begin, melt 2 tablespoons of butter in the large skillet over med-high heat, whisk in the 2 tablespoons of flour. The mixture should be smooth, thick and start to bubble. Remove it from the heat and whisk in the sage infused milk. Put it back over the heat, but lower it to medium. Season with a little salt, some fresh black pepper, and a pinch of cayenne. Gently whisk roux until it thickens – about 2-3 minutes. Add vegetables, prosciutto and parmesan. Mix well until everything is coated. The pasta should be finished about this time. Reserve ¼ cup pasta water. Drain and add pasta to the large skillet. Mix well add a little of the reserved pasta water, cover and let sit for 2 minutes. Serve and top off with the panko mixture and enjoy!
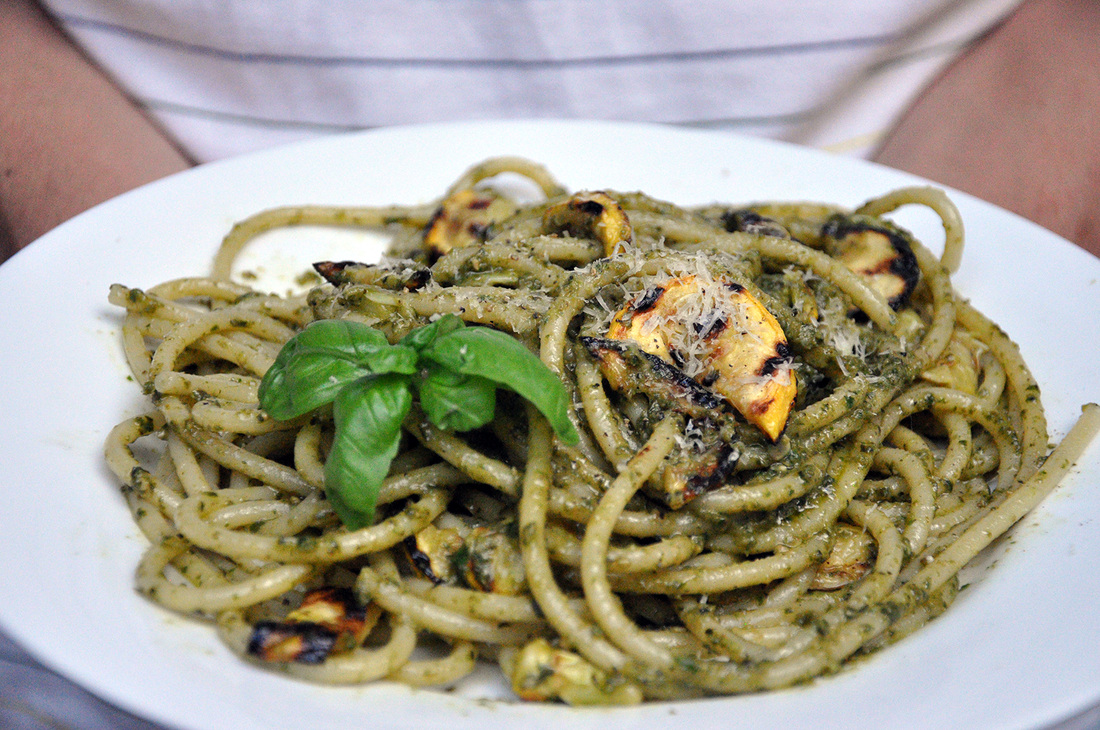 Summer begins and ends with basil pesto. Let me backtrack. I’ve headed north to the coast for a late summer visit home and it’s clear that summer is slowly wrapping itself up – I’m sorry I had to say it. I only just learned this myself when on the hunt for popsicle molds. I went into the local hardware store and was told “Summer is over, you won’t find those anywhere” and when I replied that no it wasn’t over, I was politely [if that’s possible] laughed at. The nights are cooler but the ocean is warm. The sun isn’t as strong or up as late but the late blooms are abundant. Seasons aren’t a switch you can flip, they transition into each other and I say summer isn’t over – yet. Not until I make one last bunch of fresh basil pesto. That’s right ocimum basilicum pesto. The herb that finds it's name in roots of the Greek word βασιλεύς [basileus], meaning king. So yes, it is the King of Herbs pesto. Basil pesto is actually something I’ve never ordered in a restaurant or bought from a store. There’s really no need. It’s just a few little ingredients blended together. And once you’ve mastered the holy grail of pesto sauces, Marcella Hazan's, feel free to experiment. Switch basil for parsley or pine nuts for walnuts. The art of pesto, which is really just crushing or mashing, never gets boring. 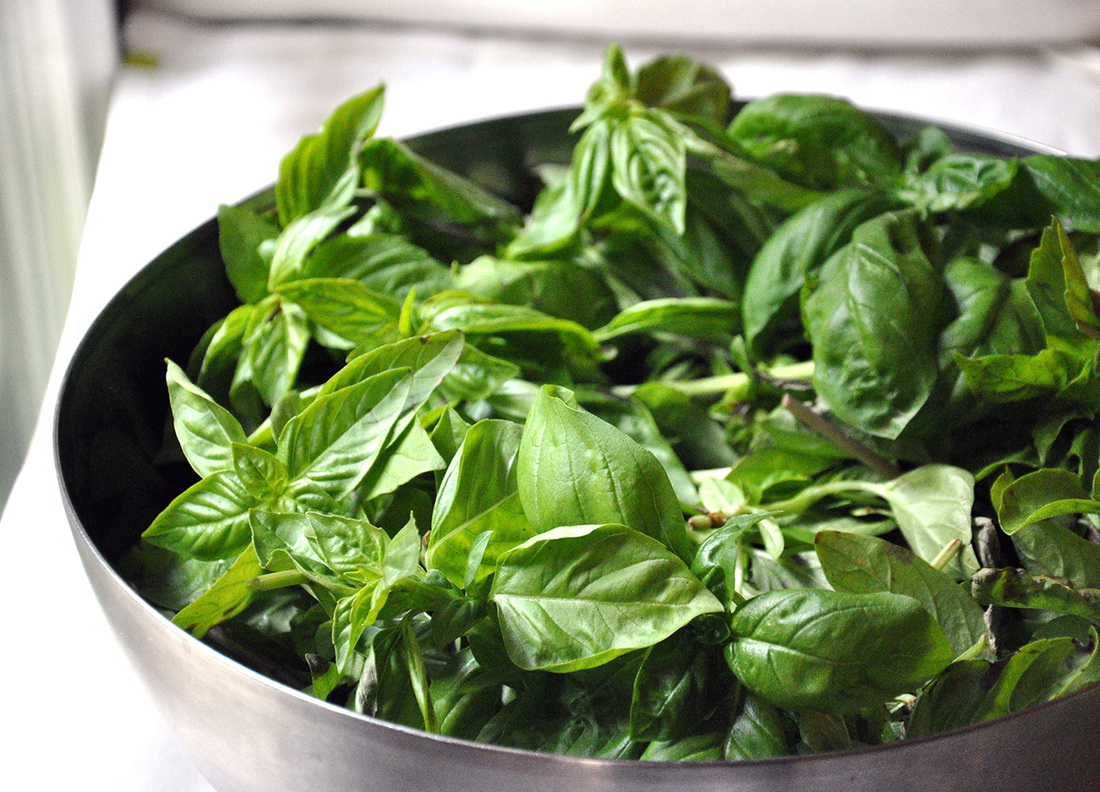 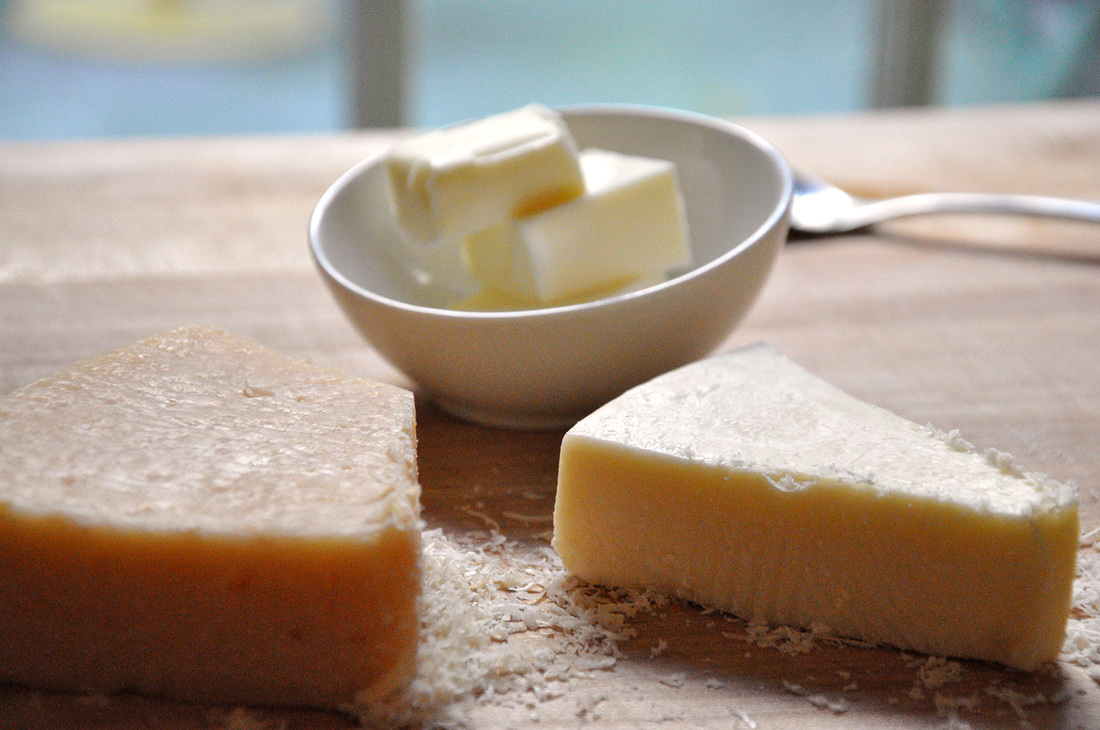 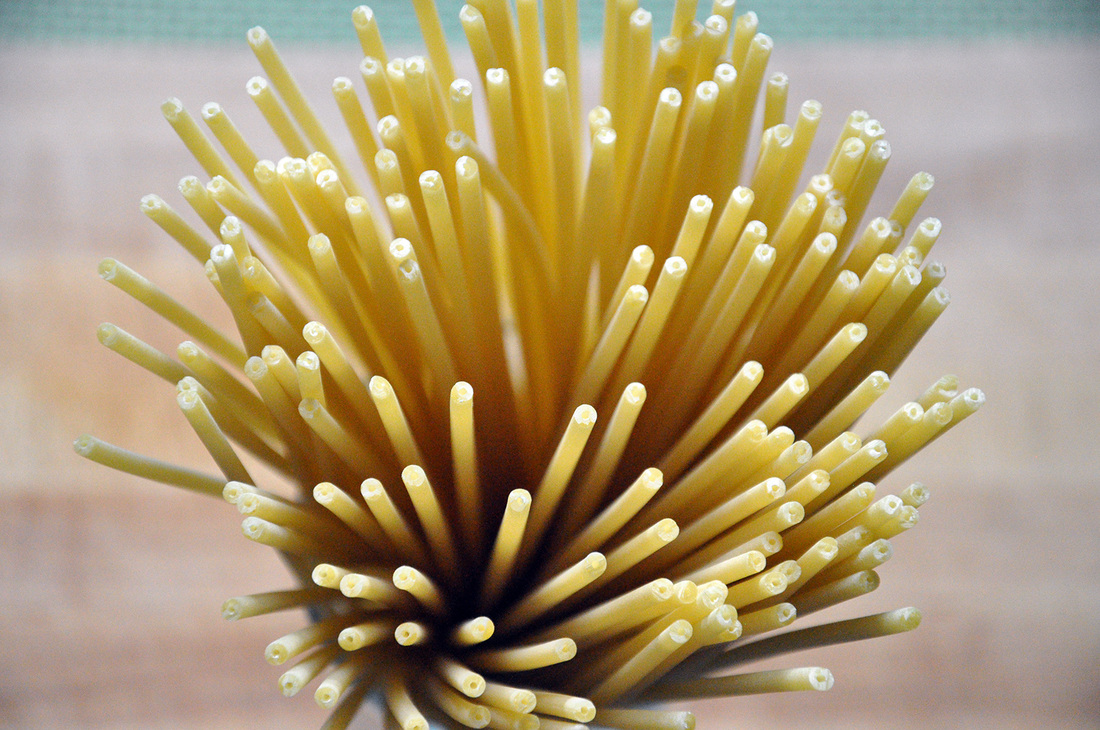 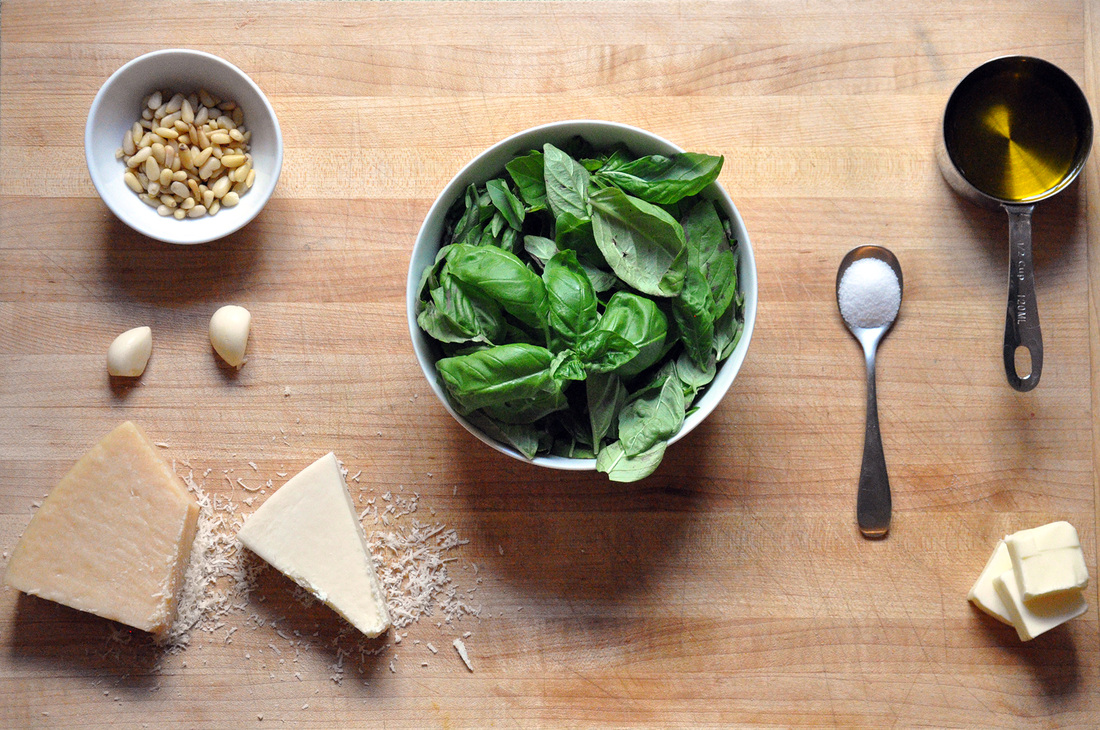 Basil Pesto [c/o Marcella Hazan] PRINT RECIPE [Prep: 20 minutes / Cooking: 10 / TOTAL: 30 minutes] [Serves 4 dinner sized portions]
Grilled Summer Squash [Prep: 3 minutes / Cooking: 6 / TOTAL: 9 minutes]
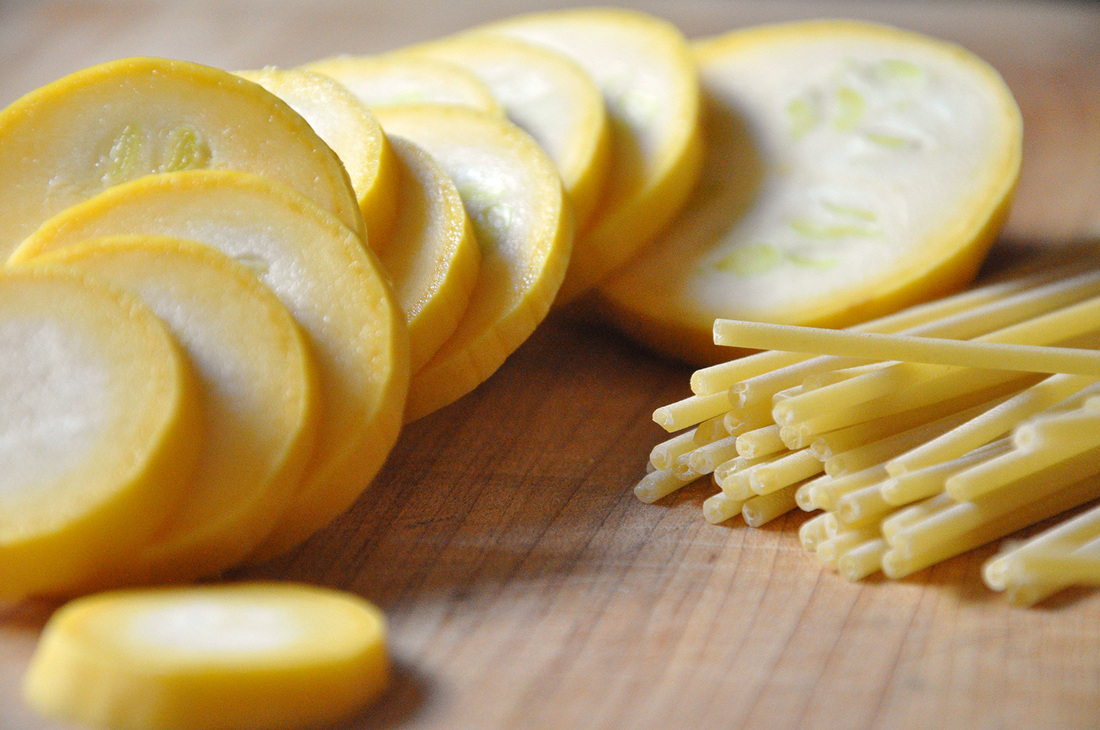 To start take out the butter so that it can soften and come to room temperature, it will get mixed into the pesto with the grated cheese at the end. If you are using long pasta, fill up a large pot with about 5 quarts of water - or until water is about 3 inches from the top. Why so much water? Salt generously - at least 1 tablespoon - cover and set heat to high. This amount of water will take about 10 minutes to boil. Now onto the star of this meal, Basil. So how do we prep this noble green? Simple, just pick it off its stem and wash it. Some basil is dirtier or sandier than others depending on how it's been packaged or grown. An easy way to wash it is to put the leaves in a cold water bath for a few minutes and let any grit settle on the bottom. Pay careful attention to the next few steps, you won’t want to miss them…pack the basil into a blender [or food processor] add the olive oil, garlic cloves, pine nuts and salt. Blend until incorporated – it should be a nice smooth texture but not a liquid – and…you’re done. [If you are using a blender you may need to stop and use a spoon to push the ingredients down off the sides once or twice.] If you are really adventurous you can use a mortar and pestle. The water should be boiling by now and ready for the pasta. I chose to use bucatini because it’s fun, hearty and has a nice bite to it - it turns this dish into a meal. It looks like thick spaghetti but has a hole going down the center. In general I like to use long pasta when making pesto, but that’s really just a personal preference. Bucatini should boil for about 9 minutes, until al dente. Transfer the pesto to a medium sized bowl and add the softened cubed butter. With a fork mush the butter in until mostly mixed. Grate the cheese, Parmesan and Pecorino Romano, and incorporate into the pesto sauce in batches. The Pecorino is saltier than Parmesan and is a nice addition to the sauce. The pesto will come out ok without it. Before straining out the pasta, save some of the water. Toss the bucatini in a large bowl with 1 tablespoon olive oil and mix in half of the pesto sauce with a little of the reserved water. This creates a nice base and all of the pasta should be coated in the sauce. The rest should be served on the table and your guests can add more as they please. I also leave out the block of Parmesan so everyone can top off their dishes with a fresh grate! The last step to this meal was grilling up some summer squash and topping off the pasta with it. This took less then 5 minutes and could easily be done in the oven. However, this is not a necessity, I just had a yummy lone squash hanging out in the fridge. See this recipe on how to grill it! 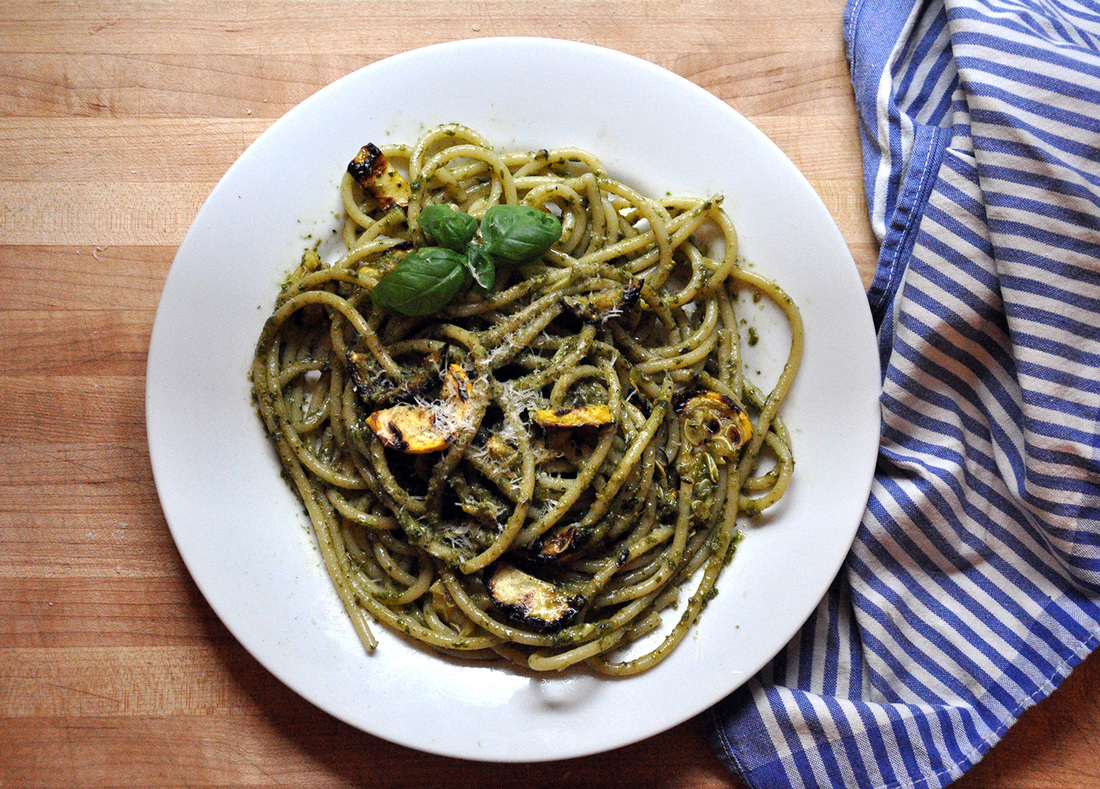 Tips: If you are having more than 4 guests and don’t have enough ingredients to double the recipe, this pasta goes well as a side dish with grilled sausage or shrimp.
Also if you have any leftover pesto it rocks on sandwiches or as a base on homemade pizza. I like to make a big batch of basil pesto at the end of summer and freeze it. It will keep for months and is a nice treat to have in the winter – it tides me over until the summer. I don’t add the butter or cheese before I freeze the sauce; it tastes fresher to add that after defrosting the pesto. You can freeze it in an ice cube tray and then transfer to a zip lock bag or freeze it in a glass jar – it’s up to you – you won’t regret it!  It was a few years ago when I realized that I never seemed to have the right ingredients on hand for recipes like this. They can be hard to find and over priced in your average grocery store. I make it a habit now to go once a year to a Chinese supermarket and stock up on all the sauces, noodles, oils and pastes I can carry. So when I came across a tasty looking sesame-peanut recipe I was ready to play and make it my own. It was few months ago that I tried this dish for the first time and since then I’ve made it three times. It’s the sort of meal you can serve any time of the year and it’s definitely on my current [mental] list of go-to dinners. So what do I want to say about this noodle salad? It goes quickly. Who knew that peanuts went so well with so many contrasting ingredients? Ginger, lime, rice wine, soy sauce, tahini – they all come together to make a nutty-tangy sort of sweet and salty perfection. This is simple kitchen chemistry at its best. Since the sauce is a little decadent –the yummy peanut butter and tahini sauce are to blame - I like to play around with hearty power vegetables like kale and broccoli and bright refreshing ones like cucumber and red onion. The color combo ain’t to bad either, the greens and purples make a pretty palette. This is a feel good, comfort food dish and since it makes really good leftovers, you might find that you’re feeling good the next day or two. Its quite filling so I serve it in a small bowl, oh and I eat it with chopsticks – so it feels a little like take out, but healthier. 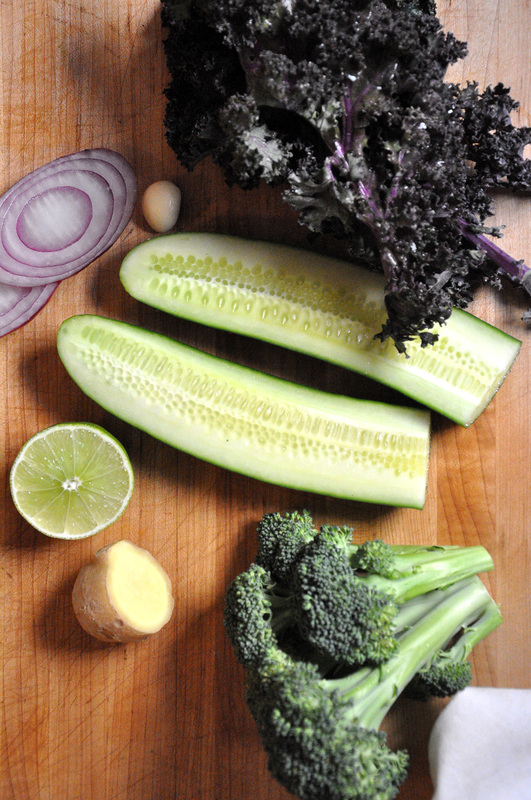 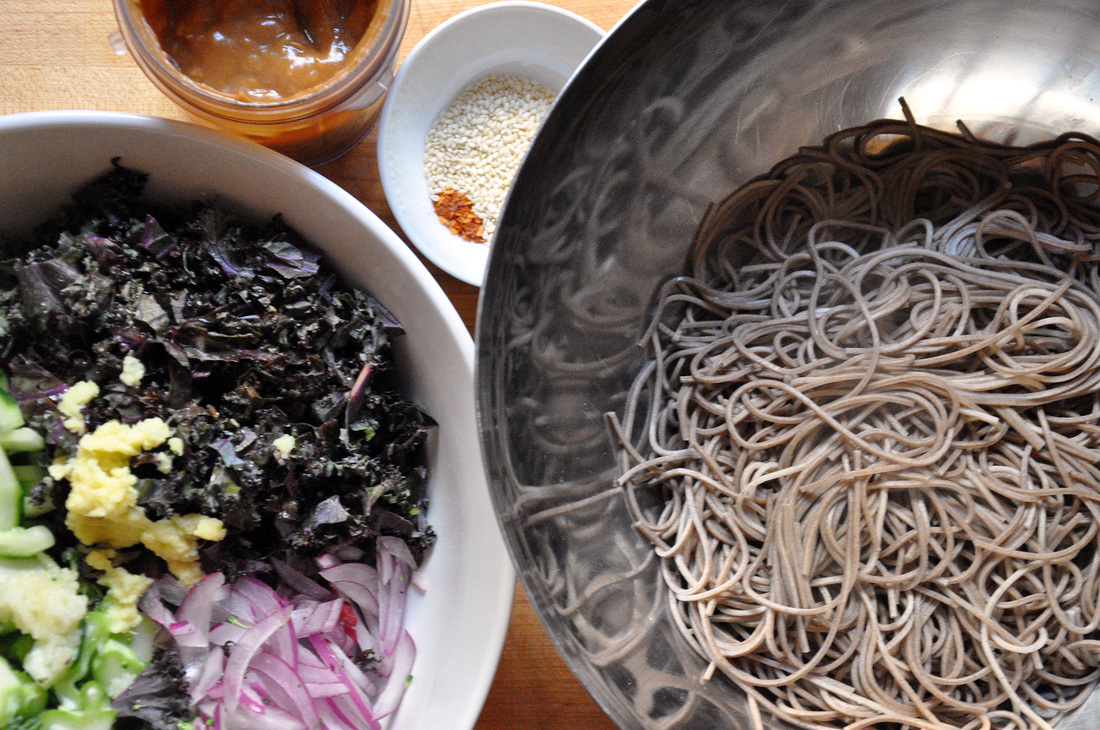 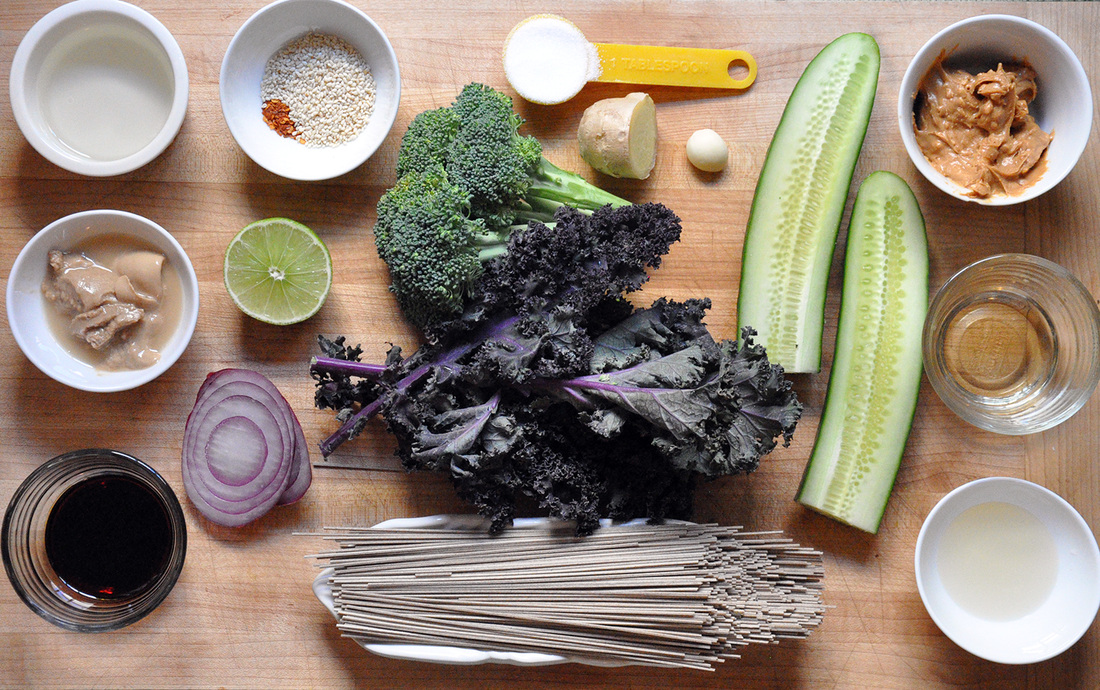 Chilled Sesame-Ginger Peanut Noodle Salad PRINT RECIPE [Prep: 25 minutes / Cooking: 5 minutes / TOTAL: 30 minutes] [Serves 4 small dinner sized portions] Noodle Salad:
Sauce:
[This recipe was inspired by Andrew Zimmerman’s version as seen in Food and Wine.] 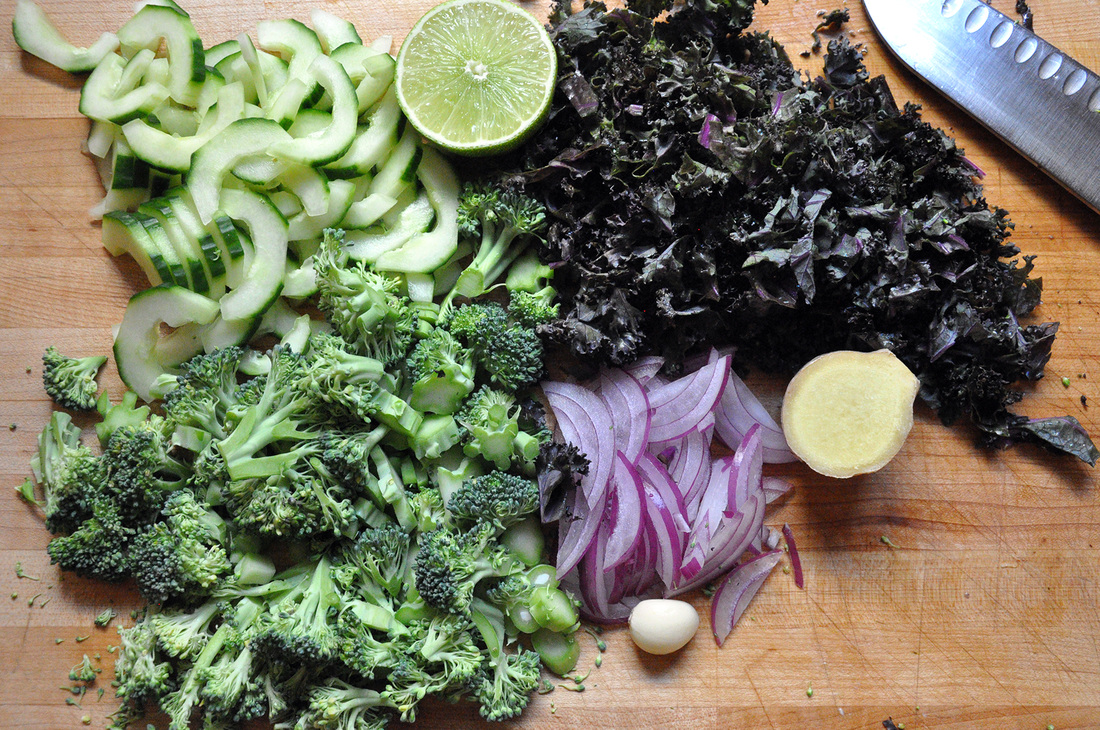 This noodle salad recipe is super easy and there’s literally no cooking involved. Start out with the veggies. The broccoli should be washed and cut into bite sized pieces, the cucumber peeled, de-seeded and cut into little half moon slices. Likewise with the red onion, it should be peeled and slivered – here you could use scallions instead if you like. The kale should be washed and de-stemmed – just slice the leaf along the stem nearly to the top on each side. The stem can be tough and bitter, especially if uncooked. I should point out here that the kale doesn’t have to be purple – it just creates a nice color contrast with the rest of the greens, any other leafy green can be substituted. Put all of the veggies in a large bowl – large enough to accommodate the noodles that will be mixed in at the end. These last three steps should be done over the large bowl: squeeze the ½ lime, press the peeled garlic clove and grate the peeled ginger with a zester/micro grater. Mix all the ingredients together. The acidity in the lime will help to break down the tougher veggies a little – think of it as a marinade. There are many types of noodles that will work for this dish. I had half a packet of soba noodles in my pantry, but you could even use linguine – though I would break the pasta in half before boiling. I was happy to only have half a packet because I wanted this to be more of a noodle salad than noodle heavy dish. Fill your pot with 8 cups of water, cover and turn the heat on high. It should take about 5 minutes to come to a boil. [You should have enough time to prepare the sauce while waiting for the water to heat up – see the directions below]. Once it’s boiling, add the soba noodles and leave uncovered. Wait for the water to come back to a boil and then add 1 cup cold water and wait for the water to boil one last time. [These directions are specifically for those using soba noodles]. Before straining the noodles in a colander over the sink, reserve about a 1/3 cup of the noodle water. Now onto the sauce. I use a small bullet blender for the next step but a mini food processor will also work. As for the peanut butter I tried to find one with no sugar and low salt, but all I could find was a low sugar and salt variety – because of this I used 1 tablespoon of sugar and no extra salt. Add the peanut oil, peanut butter, tahini paste, sugar, mirin, rice vinegar and soy sauce to the blender and mix until all the ingredients are well incorporated. The consistency should be thick - it will be thinned out with the reserved noodle water later. All that’s really left to do is mix everything together. First toss the noodles with the veggies, add the sesame seeds and red pepper flakes and then alternate incorporating the Sesame-Ginger Peanut sauce and the reserved water a little at a time. Mix well each time. Everything should be coated well with the sauce. If you have time to wait to eat, put the noodle salad in the fridge for about 15 minutes so it gets chilled. If not, eat it warm tonight and then cold tomorrow! 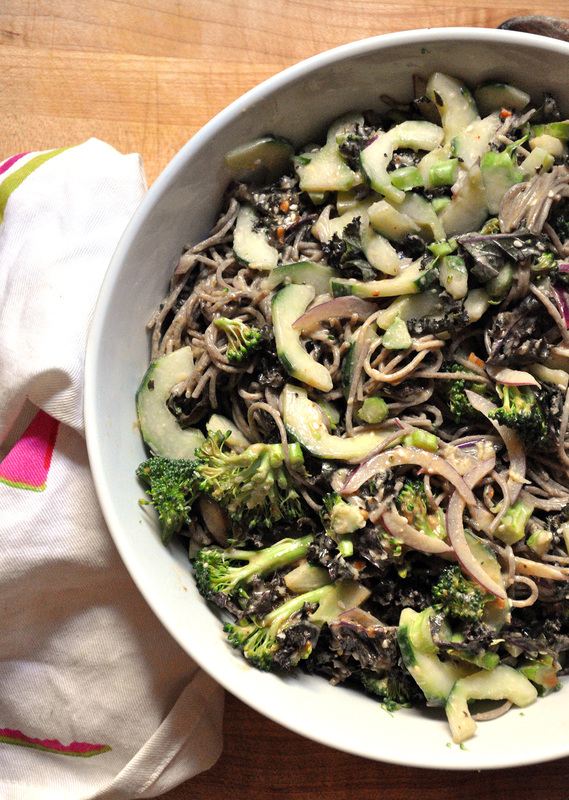 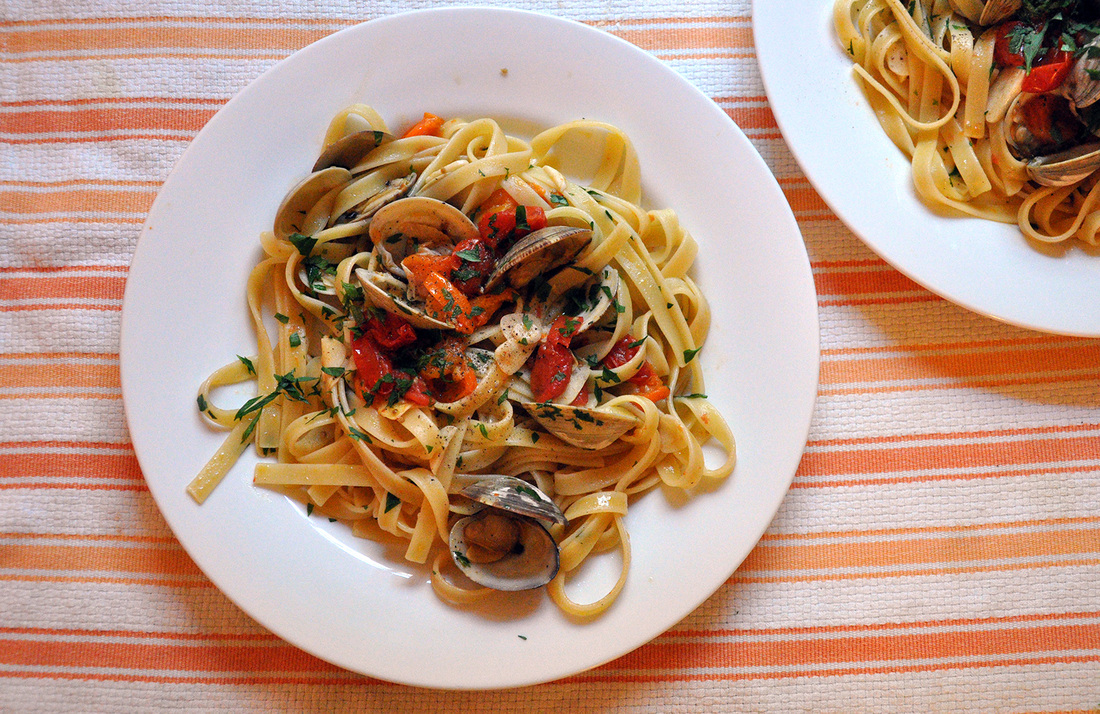 This recipe is a version of one my mother used to cook in the summertime. It’s meant to be eaten outside with family in the fading sun, back then with a glass of milk, now with friends and a glass of chilled white wine. This dish was full of summer’s bounty – freshly picked parsley, fragrant cherry tomatoes, garlic from the nearby farm and local littleneck clams. I remember the clammy briny flavor and the sweetness of the tomatoes. I loved the taste but couldn’t stand the texture of the clams – to my mother’s dismay I would eat around them. Garlic too, I adored the smell but couldn’t stand getting a chunk of it in my pasta. I wanted it smashed, mashed, pressed just not chopped or sliced. And the parsley…my mother would say “What’s wrong with Parsley?!!” I didn’t have an answer, it was just too…too…something, it was too something and could you please add it to the pasta after I’ve served myself, please? I was a silly silly child. Too picky for my own good, a trait that I’ve mostly grown out of. If I could have all those uneaten clams now I would feast on them for days, I would eat a garlic clove whole, I would use all that parsley and make some pesto… Today I live halfway across the country, but my parents still live in a coastal town in the Northeast. Nearly every time I go home I ask for clams – I am lucky enough to have a mother who takes requests. Clams grilled, clams raw in a half shell, baked clams, clams with linguine – with garlic and parsley. Every time I visit I look forward to when I can ask her “Can we go to the seafood store now?” She may tire of the menu, but thankfully she doesn’t tire of my enthusiasm. I’ve carefully watched her over the years to see how she makes her “linguine alle vongole” asking way too many questions and always standing next to her in the kitchen watching them cook, waiting to tap on them and willing them to open – because I was ready to eat! I’ve been making my own version for a few years now. I use big slices of garlic, lots of parsley and more than enough clams – I’m always worried there won’t be enough. Often as I stand in my own kitchen and prepare this dish I think it’s funny how I’ve come to adore it and wouldn’t change a thing about it. 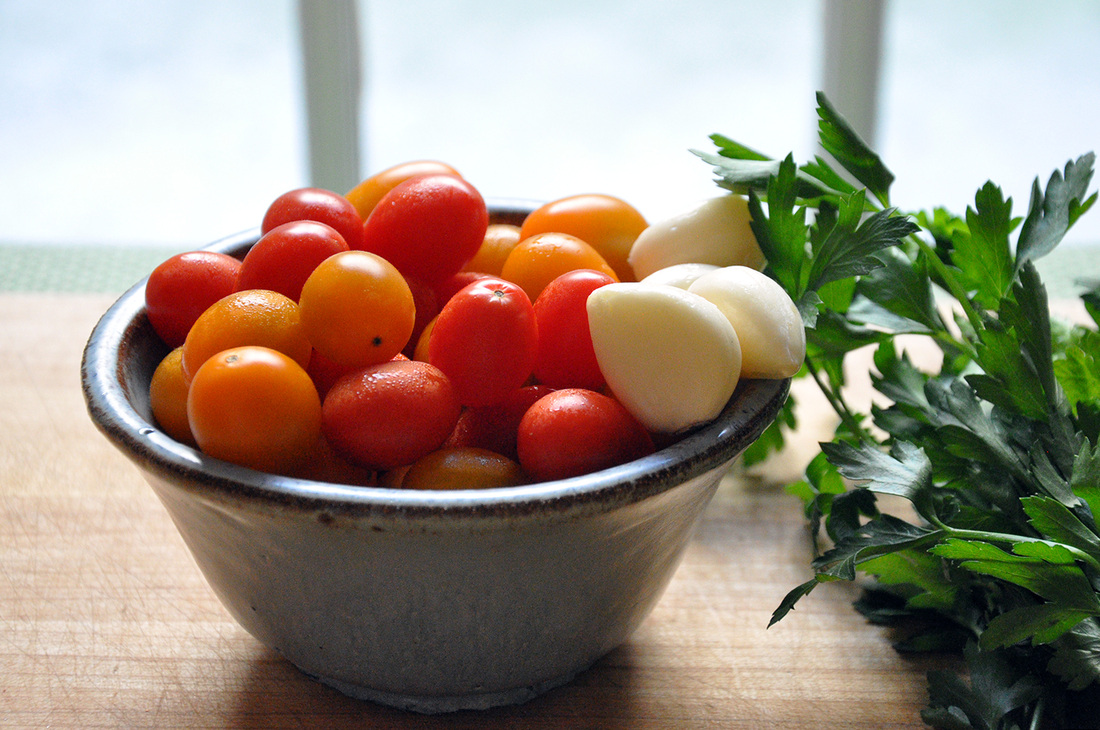 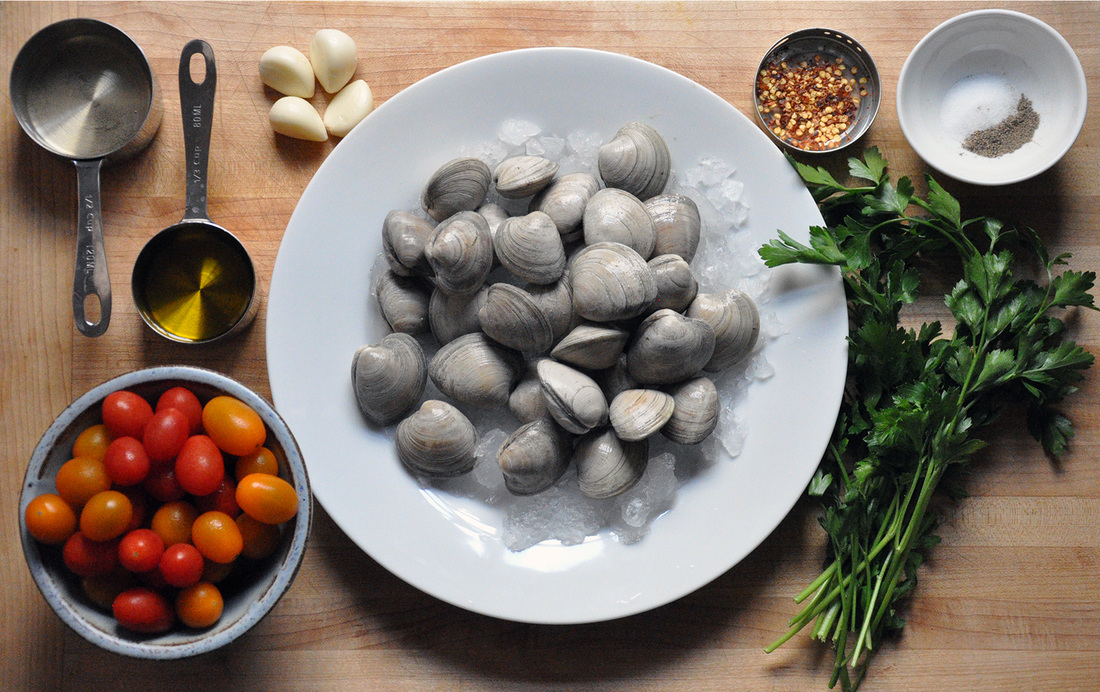 Summer Clam Pasta PRINT RECIPE [Prep: 15 minutes / Cooking: 25 / TOTAL: 40 minutes] [Serves 4 dinner sized portions]
The clams should be in the fridge - preferably just brought home from the store and sitting in a bowl. A few things to know about clams, they should come chip free and tightly closed. If you see any clams that are open you should try tapping them - if they close they are still alive and safe to cook, if they stay open, even just a little, you should throw them out. When you are in the supermarket or seafood store you can always ask if there's a fresher batch in the back - the person helping you should also be looking for cracked or open clams. When you are ready to start prepping the meal take the clams out and fill the bowl with cold fresh water. Let them sit for 20 minutes. This will cause them to spit out any sand or grit that they have inside their shells. Most clams won't come covered in barnacles so they just need a good rinse with a firm brush right before they're cooked. 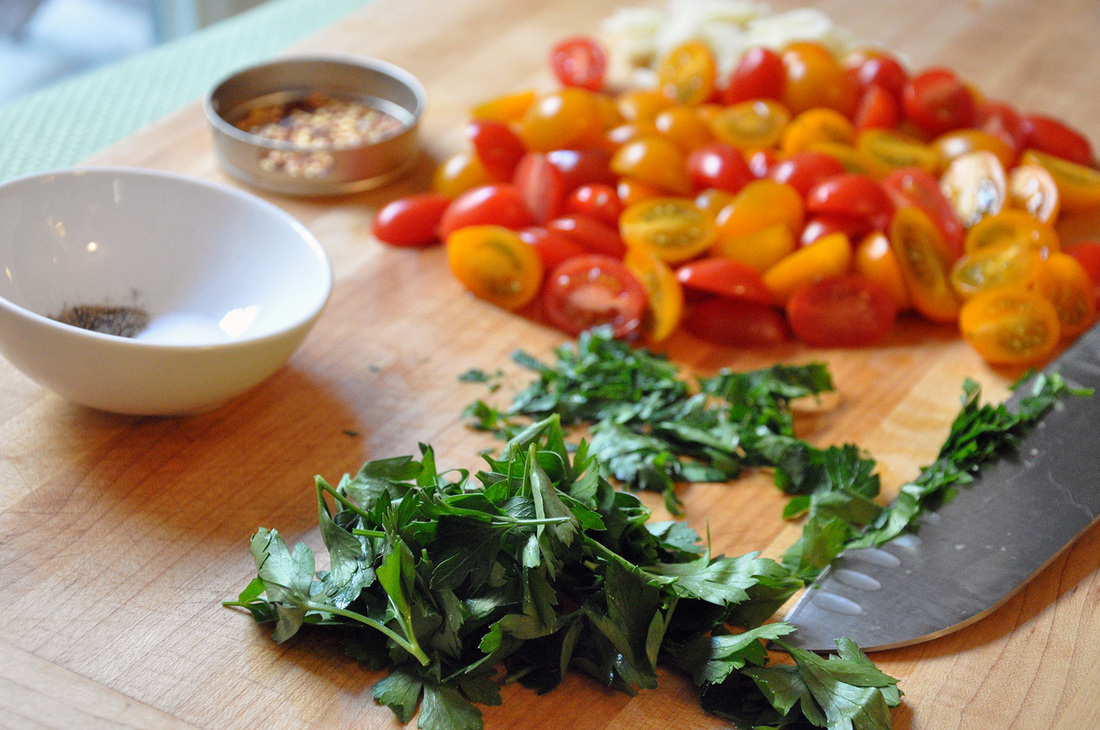 While the water is heating up you should start prepping the other ingredients. Rinse the cherry tomatoes in a strainer and slice them lengthwise. Peel and thinly slice the garlic. If peeling the garlic is a little tricky try flipping the blade of your knife so that it’s plane is parallel to that of the cutting board, lay it on top of the unpeeled garlic and push down on the blade with the heel of your hand. The garlic should split and the peel will be easy to pull off. Pull off all of the parsley leaves [it’s a personal preference, I don’t like the taste of the stems] and roughly chop them up. Your prepping is done. The water for the pasta should be boiling by this point [if not keep an eye out for it during the next steps]. Usually this recipe calls for linguine, but I had some fettuccine on hand. This type of pasta will take about 8 minutes to cook al dente. We want this pasta al dente [slightly undercooked so that it still has a bite to it] because we will be adding it to the sauce at the end where it will cook for a little while longer. Make sure to set the timer since it is easy to get distracted Put a large skillet over medium-high heat [this should be at least 2 inches deep to accommodate all of the ingredients at the end]. Let it to heat up for about 1 minute and then add the 1/3 cup olive oil. Wait another minute and then add the garlic and red pepper flakes. Cook for 1 minute or wait for the garlic to turn golden. [If you have any anchovies or clam juice on hand, this is when I would add it and cook for 1 minute.] Now add the ½ cup dry white wine and let it cook off for another minute – the sauce at this point should be at a rolling boil. Add the cherry tomatoes, the 1 teaspoon of salt and about 5 grinds of cracked black pepper [or about 1 teaspoon]. Adjust heat down to medium and let sit for about 2 minutes stirring once or twice. Then cover and let sit for 3 minutes – you don’t want too much of the tomato juice to cook off. While you are waiting for the tomatoes to cook down a little, check on the pasta [if it’s ready see directions below] and finish cleaning the clams. Take them carefully out of the water – all of the sand or grit will have settled at the bottom and you don’t want to disturb it. You can lay the clams on a dishtowel next to the sink. Run cold water over them and scrub them with a coarse brush – if you don’t have one you can use another dishtowel. As soon as the clams are all clean add them to the sauce and cover. They should take about 5-8 minutes to open – you should check on them a few times and can encourage the clams to open by tapping on them. The pasta should be done by now or nearly done. I recommend reserving a little bit of the pasta water for the sauce at the end. You can do this by taking a measuring cup – or any cup with a handle – and dipping it into the water carefully, until a about a 1/3 cup collects. You may what to use a potholder to protect your hand from the steam of the boiling water. You can test the pasta by carefully spooning out a noodle [make sure to blow on it!] and biting into it. It should have just a slight bite to it, and a small whitish dot in the center, that’s the part of the pasta that isn’t cooked yet. If it is ready, take the pot - be sure to use potholders since the water will let off a lot of hot steam - and slowly pour the contents into the colander in the sink. Drizzle about 1 tablespoon olive oil over the pasta and mix it around so it doesn’t become stuck together. The cooked pasta can sit like this for a few minutes while the sauce is finishing up. 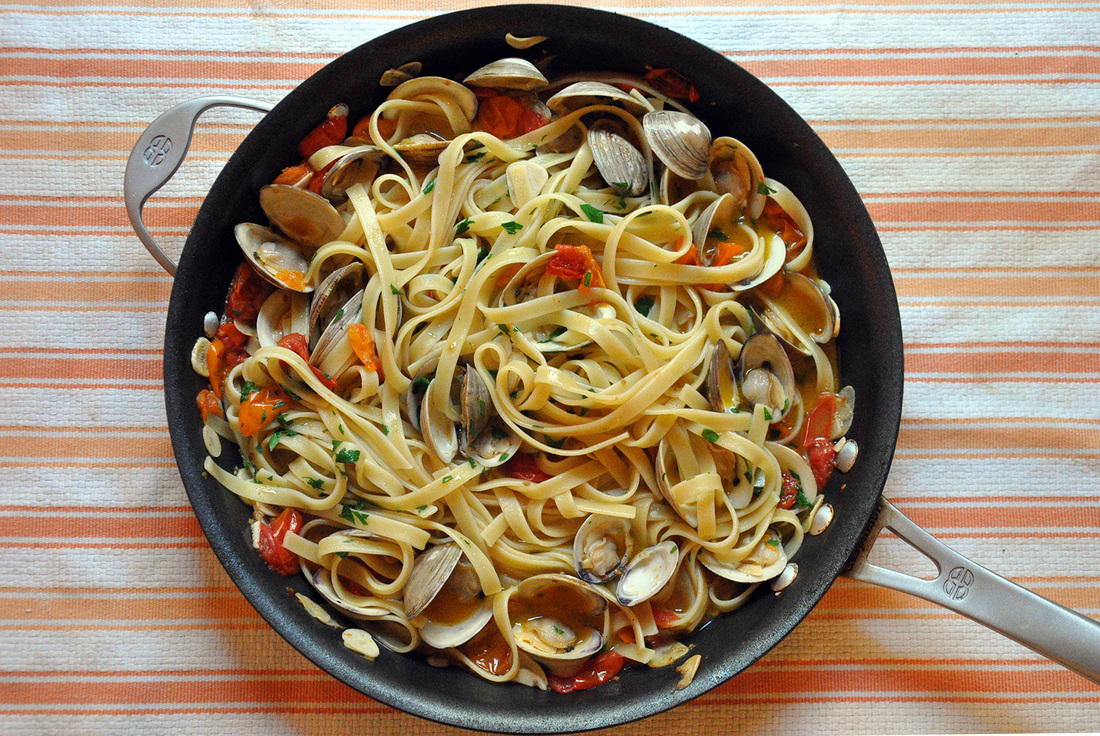 The drained pasta should be added to the skillet after most of the clams are open. [If by this point there are still some clams that are not open, they should be discarded.] Add the chopped parsley, a splash of olive oil, a little bit of the reserved pasta water and make sure to mix everything well. Turn down the heat a little and let simmer for another 2 minutes. This dish can be served right out of the skillet. I like to add fresh parsley, a few grinds of pepper and some flakes of sea salt right before eating it. Make sure to put a big bowl on the table to catch all the empty shells. Also, remember that white wine that I used early on in the recipe? - now is a good time to pour a glass and enjoy with dinner…and don’t forget to tear up some pieces of the baguette to help soak up some of the sauce. 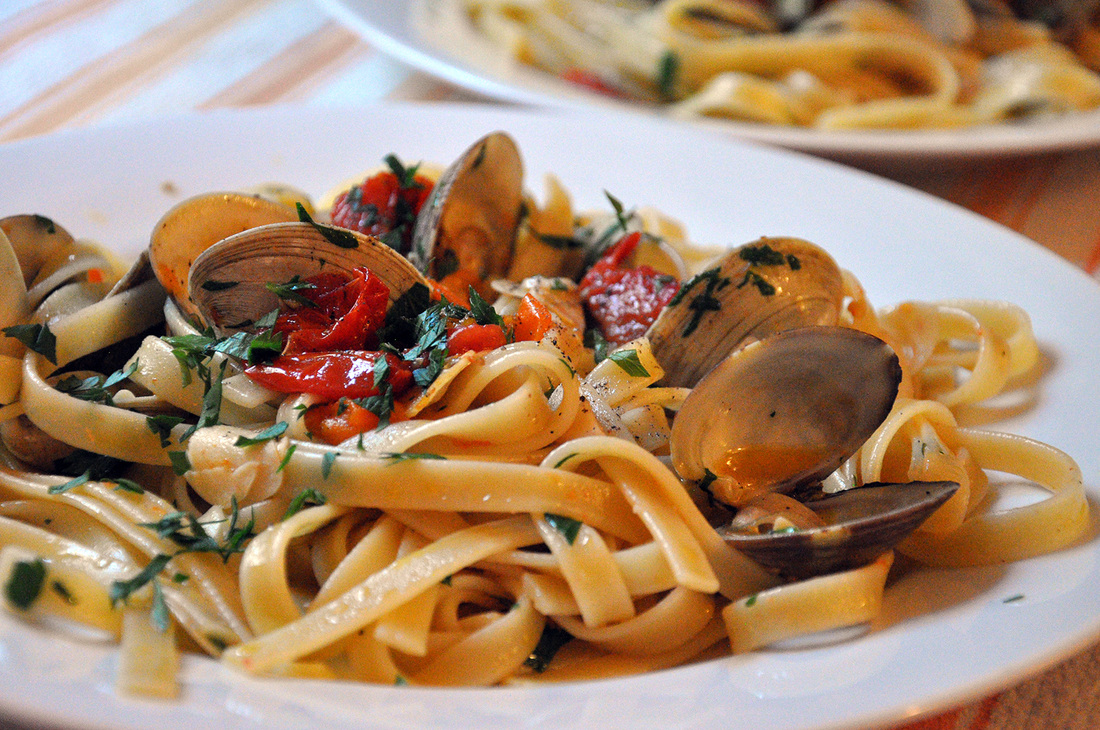 |
All
Stuff I follow...
Not Without Salt
My New Roots Sprouted Kitchen Thug Kitchen Lady and Pups A CUP OF JO The Daily Meal Melissa Clark ...always 3191 Miles Apart The Sartorialist Garance Dore The Nourished Kitchen Archives
October 2014
|


 RSS Feed