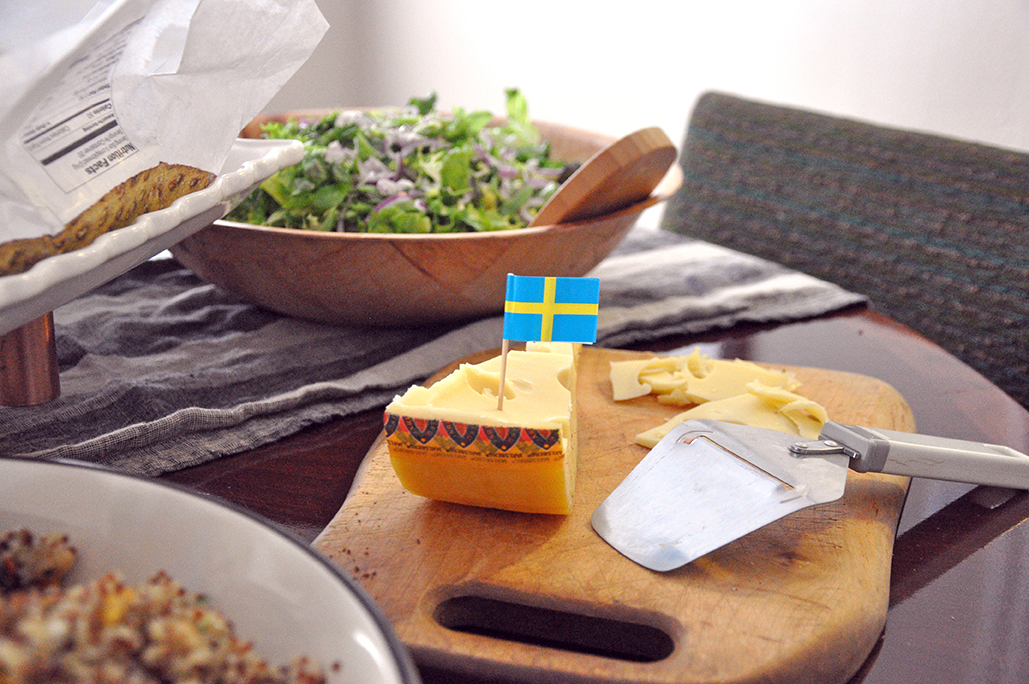
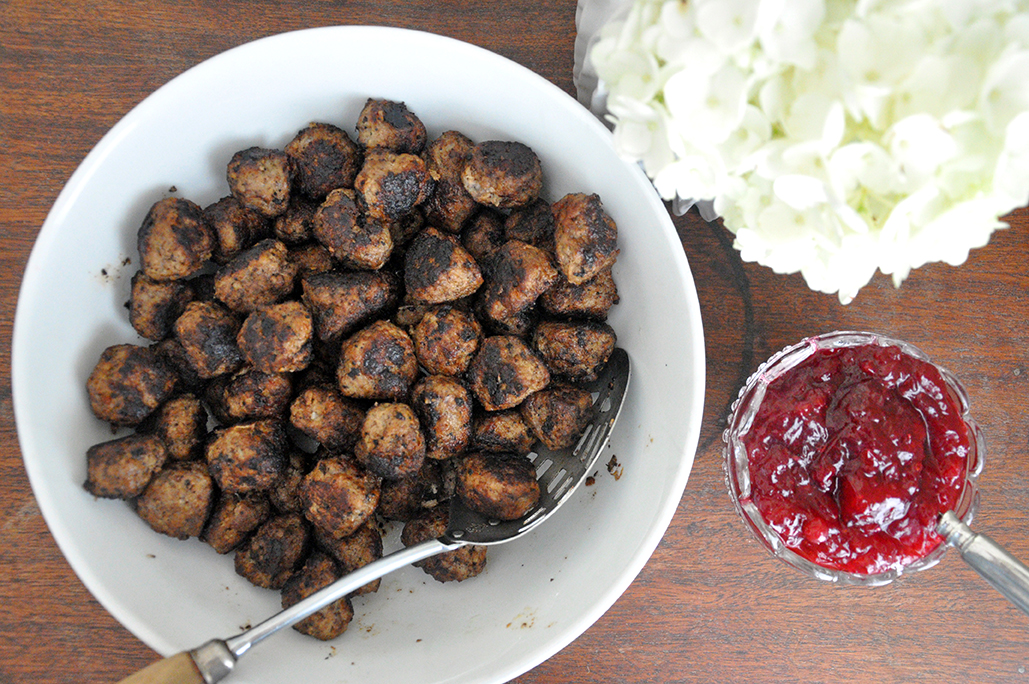
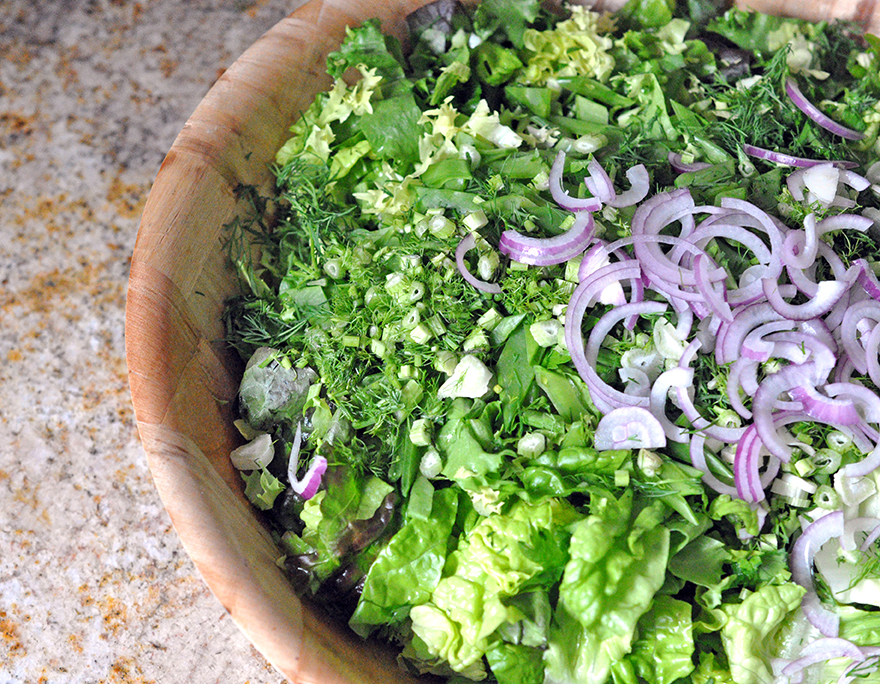
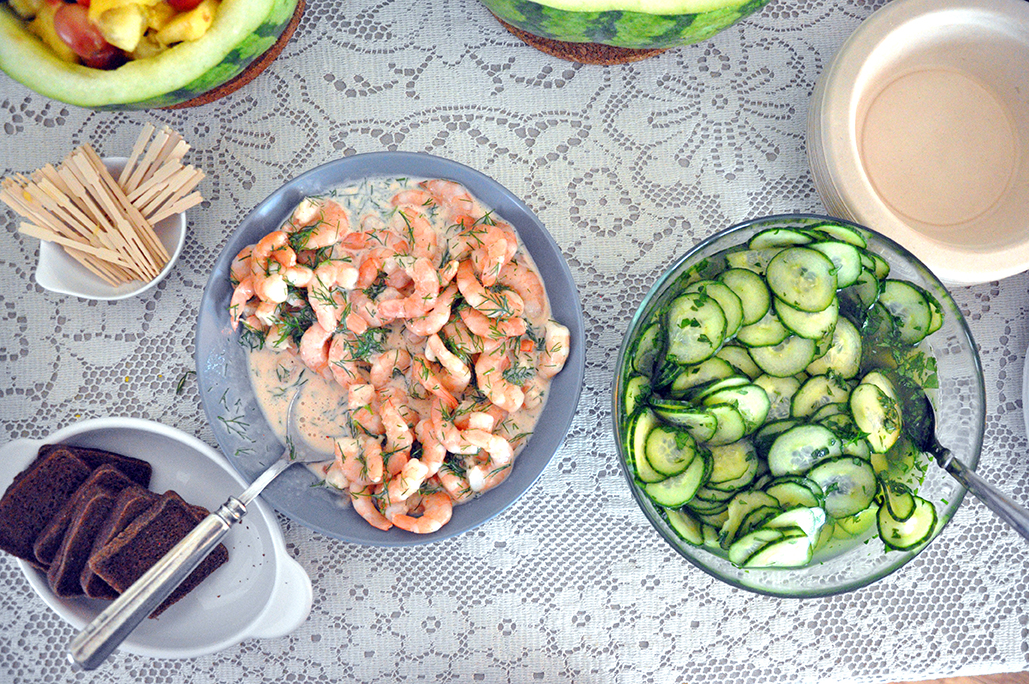
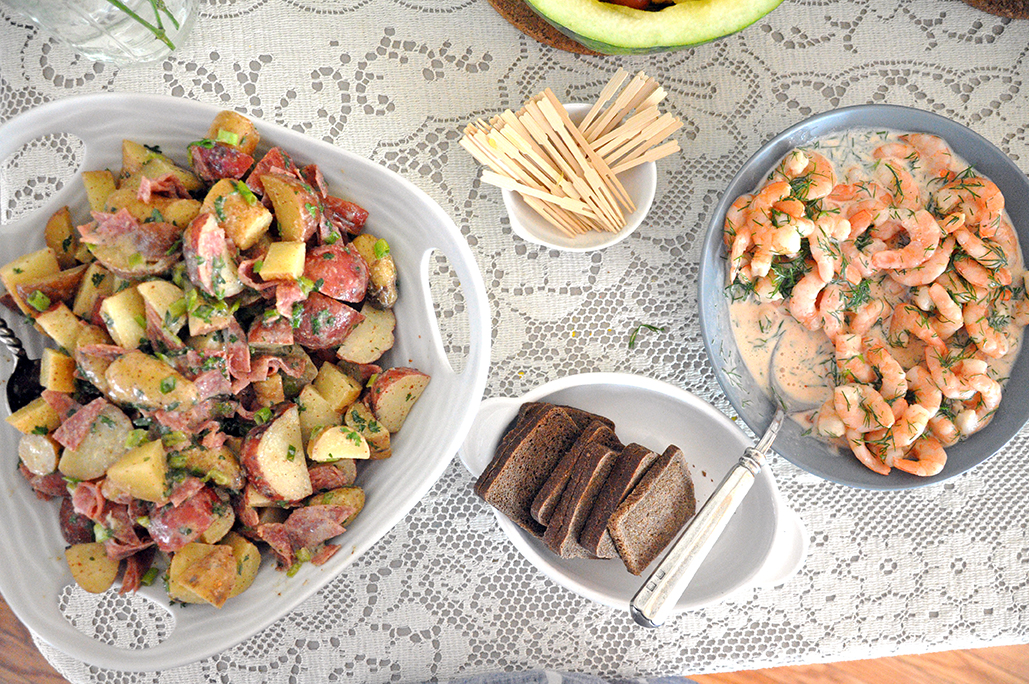
 We all have those cringe-worthy holiday family traditions - great Aunt Bethany’s jello molds at Christmas or being forced by your parents to wear lederhosen in family photos. Sometimes they are founded in fact or history, many times they remain shrouded in mystery…yet we still accept them. Why? Because it’s tradition! As children we sighed and stomped and tried to run away from them, not taking part because it was our moral obligation not to. But then we realized that we miss these silly rituals, we no longer live at home or no one makes the effort anymore because we are all adults…and soon you fear they may be forgotten. Of course some people may never even consider this, but being the nostalgic sucker that I am, I do. In fact I am the unrelenting family member encouraging a constant stream of new traditions; the few days before Christmas have become the felt decoration making time [well it happened one year]. Making cocktails with my sister and mother, any time we see each other – yes let’s turn that into tradition too! So I guess I should get to the point. When I was a little girl, my sister and I would go with my mother to Stockholm in the summer. We were visiting her sister and would get to experience the awesomeness that is Midsummer, or Midsommar as they say. It happens all over Sweden on the third Friday of June, the eve of Midsummer’s Day…whole towns of towheads in traditional Folk dress, flowers in hair, jumping dancing running around a green leafy maypole, while singing in a language I still don’t know that well – never quite understanding what was going on, but wanting to be a part of the celebration, this is Midsummer to me. It is a celebration of light, of the longest, sunniest day of the year. For Swedes it is a magical day filled with wild flowers, aquavit, herring and fresh picked strawberries – a weekend long celebration really. But no, this was not really my tradition growing up, but it was my mother’s and so by proxy over the years I have taken it on. So when my good friend and fellow foodie said she wanted to have a summer solstice party – I said, Yes! Midsommar! It happened and it was awesome. We sang Swedish drinking songs and sipped caraway flavored Aquavit, poked at Swedish meatballs with Swedish flag toothpicks. We ate pickled herring and snacked on knäckebrot with jarlsberg cheese. Why did everyone join me so wholeheartedly? Well, because it’s tradition. Just a few links in case you're curious... Swedish Midsummer Traditions A Midsummer Night's Feast at The Tasting Table Nordstjernan - Most popular Swedish Drinking Song Helan Går NYTimes 36 Hours in Stockholm 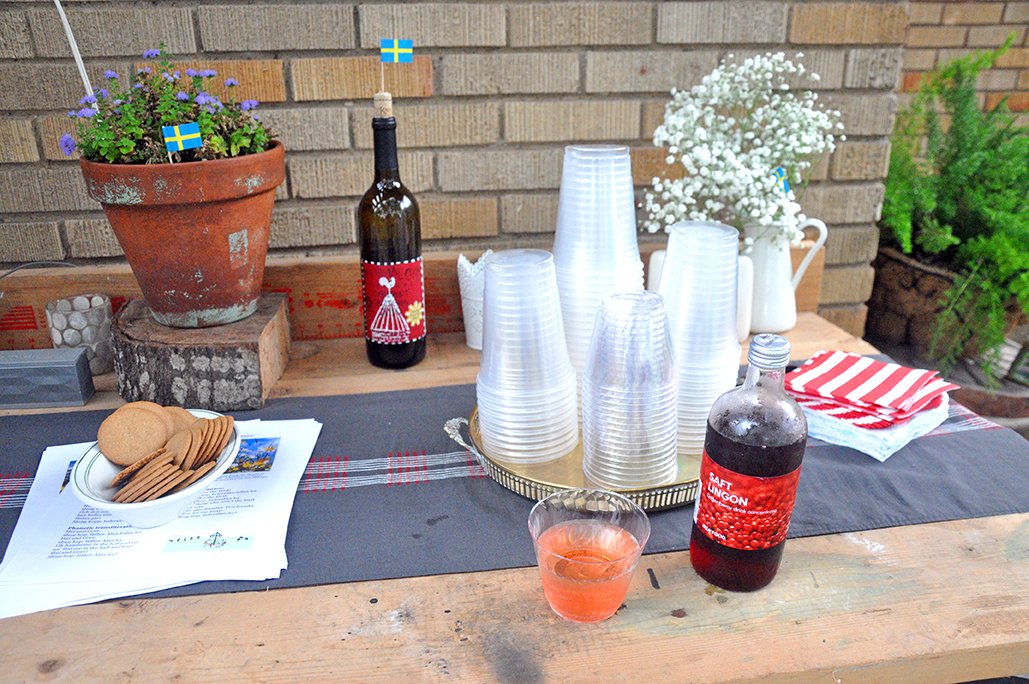 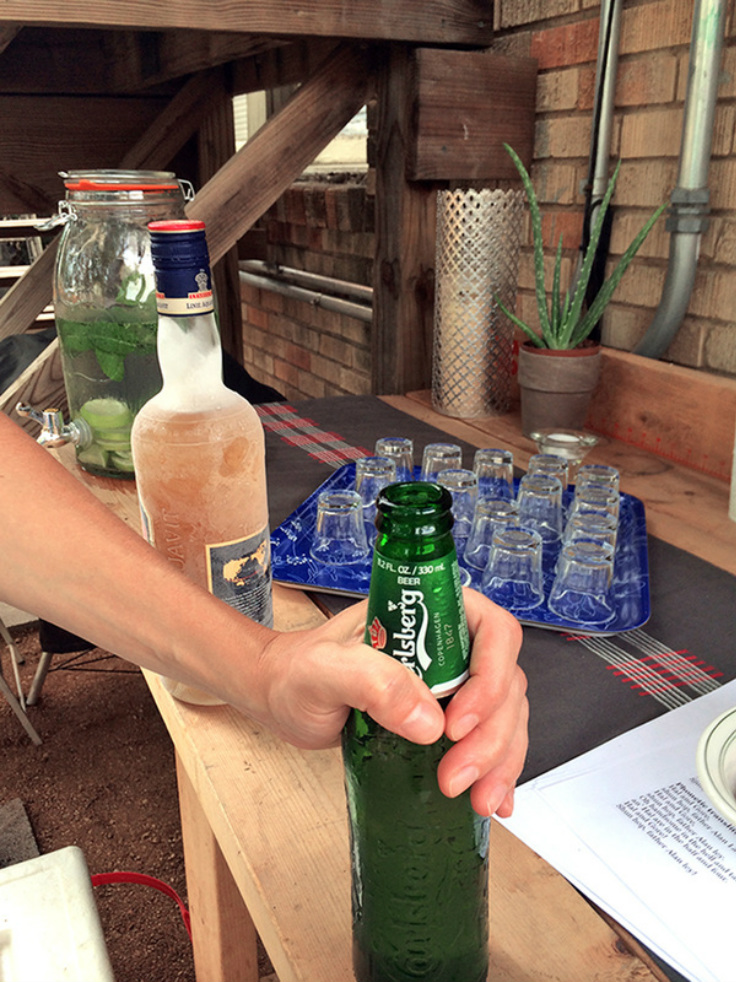 Photo by Brandon Thibodeaux  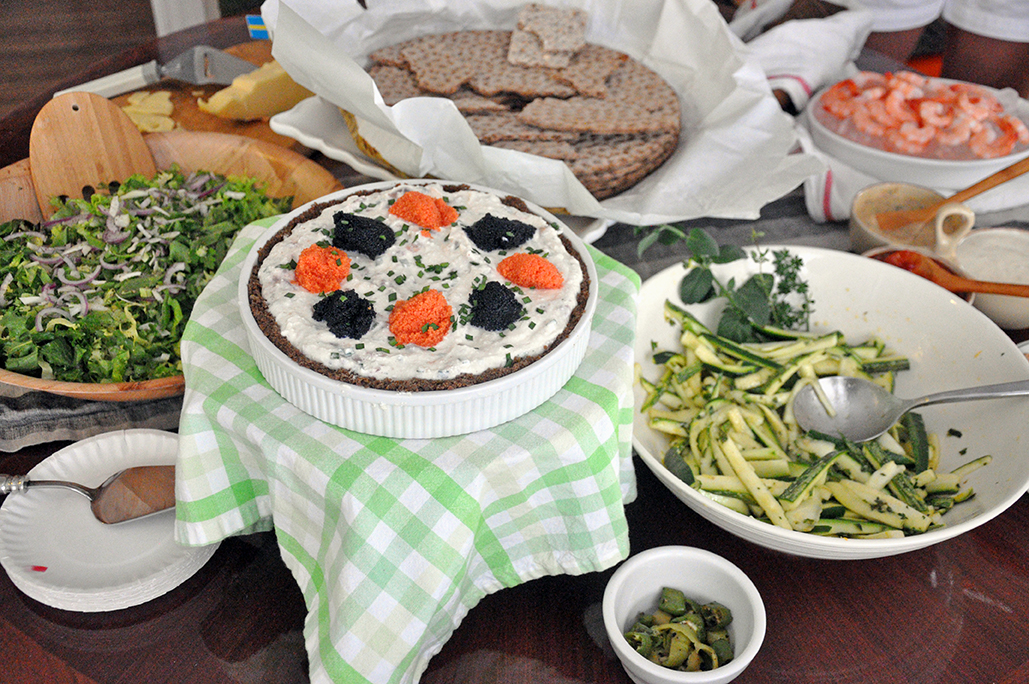 
1 Comment
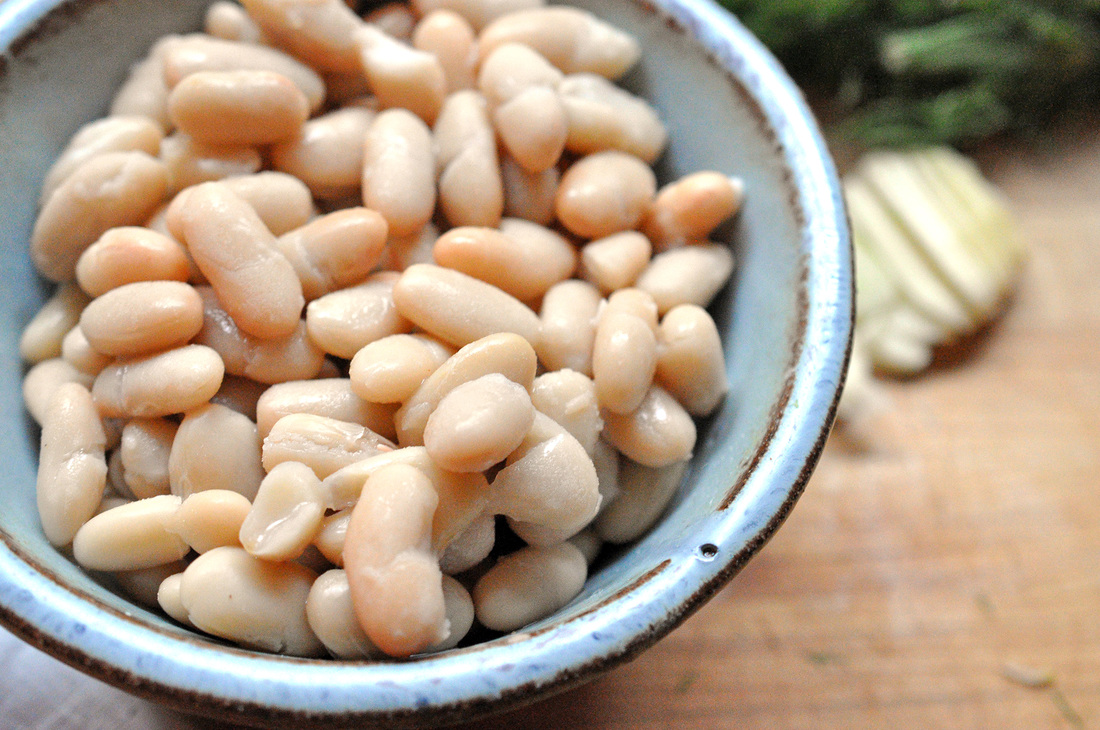
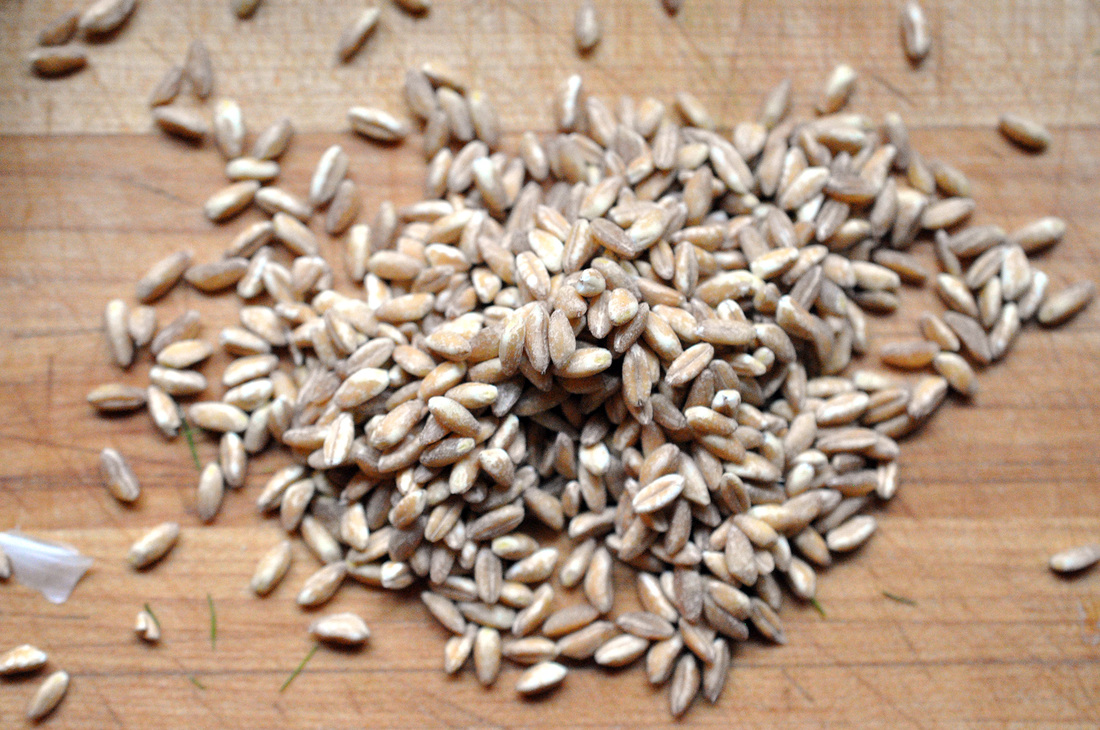
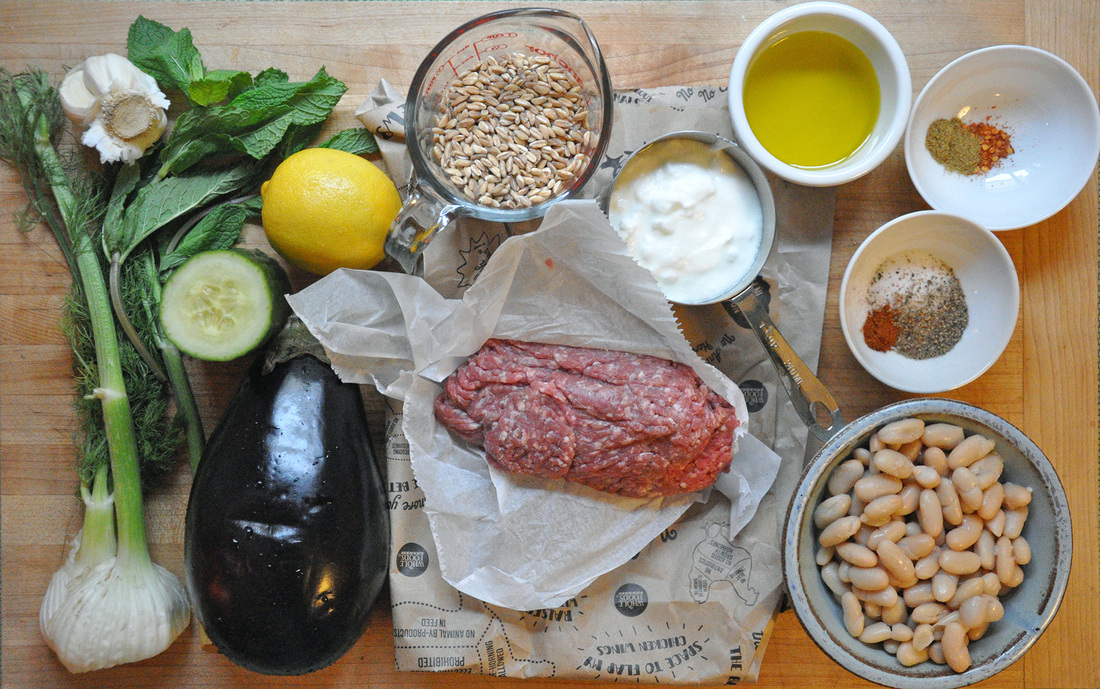
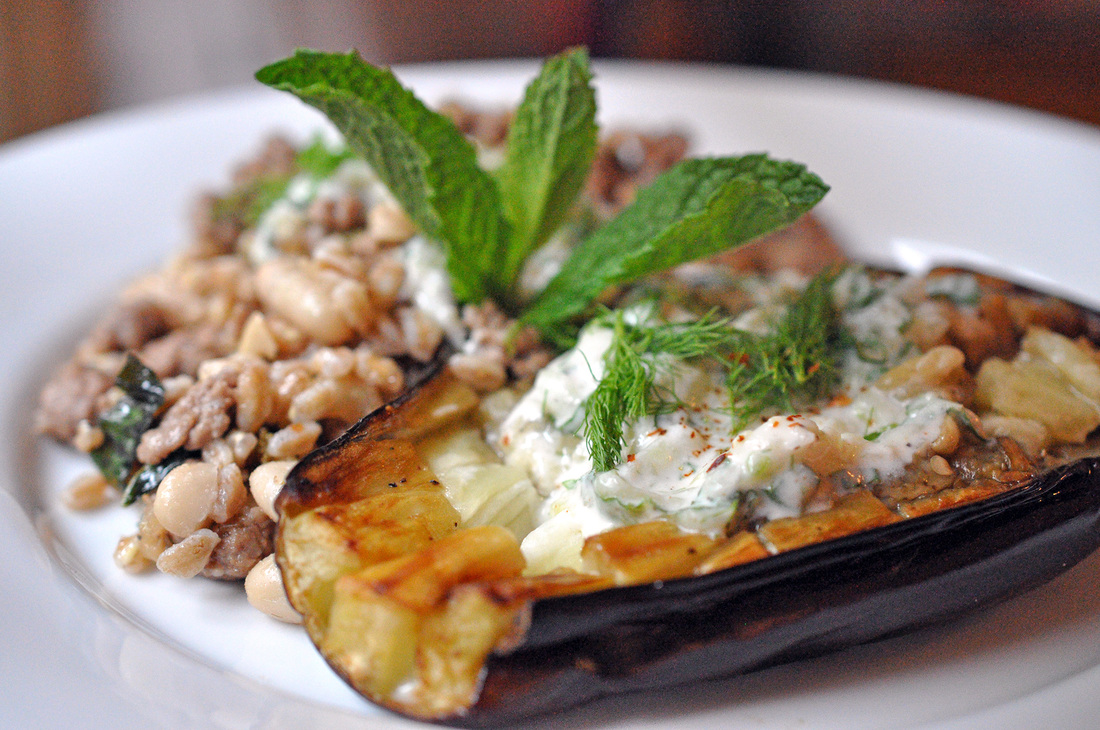 I haven’t cooked meat in a while…for no reason in particular, but it is hard to photograph. I mean a big hunk of juicy meat doesn’t always look as good as it sounds. I also try and stick to what I crave [I suppose I should add here “in moderation” for health’s sake] which tends to be pasta, noodles, sandwiches…with lots of veggies and maybe [absolutely] a smidgeon [a good amount] of cheese. I like to make aiolis, sauces, and dressings, and there’s always a batch of pesto of some sort hanging around in my fridge or freezer. Recently though a good friend of mine told me straight up that I needed to do another meat dish for my blog. So what did I do? I came up with something that I could slather in a sauce – cause that’s my comfort zone. I had an eggplant in my fridge and in my mind that lead to tzaziki and that made me feel a little Mediterranean and then bingo…I arrived at lamb…but it didn’t stop there…I then thought of mint and finally - mint tzaziki! Not every recipe I come up with makes a whole lot of sense – but this one did. I was pretty happy with myself when I went to the supermarket to pick up the lamb. But then I walked by a can of beans, cannellini beans, and knew that they had to be added in. I also wanted to add a little texture and for some reason my mind kept going to faro, subtly nutty with a nice bite. I realized now that my dish was taking a weird turn, but all the ingredients sounded so good together – and I usually go with my gut, which almost always tells my mind what do to. So yeah, that’s usually how my process works. 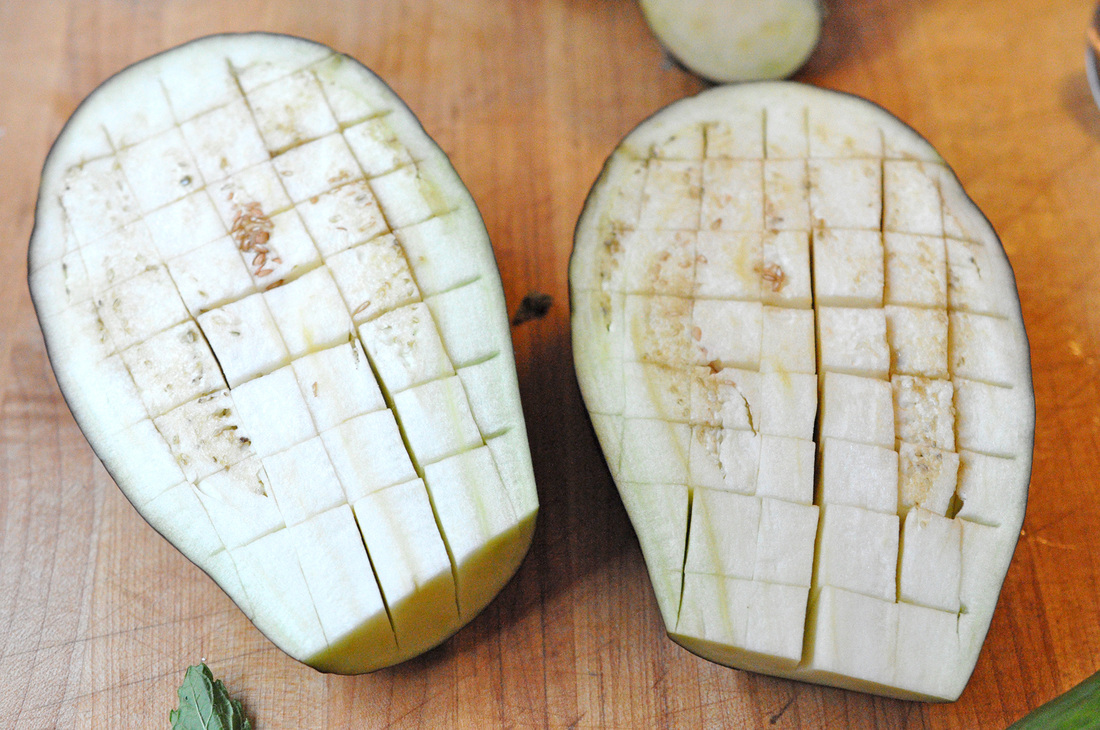
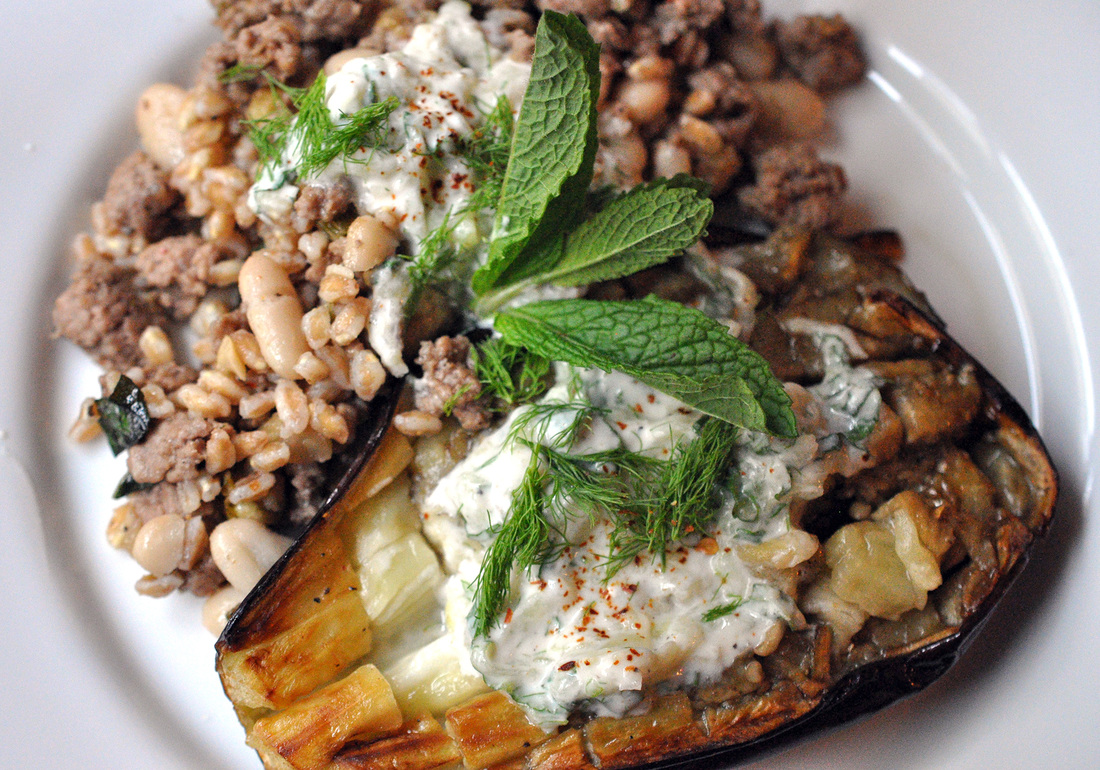
    Ground Lamb and Roasted Eggplant with Mint Tzaziki PRINT RECIPE [Prep: 15mins / Cook: 45mins / TOTAL: 1hr] [4 servings]
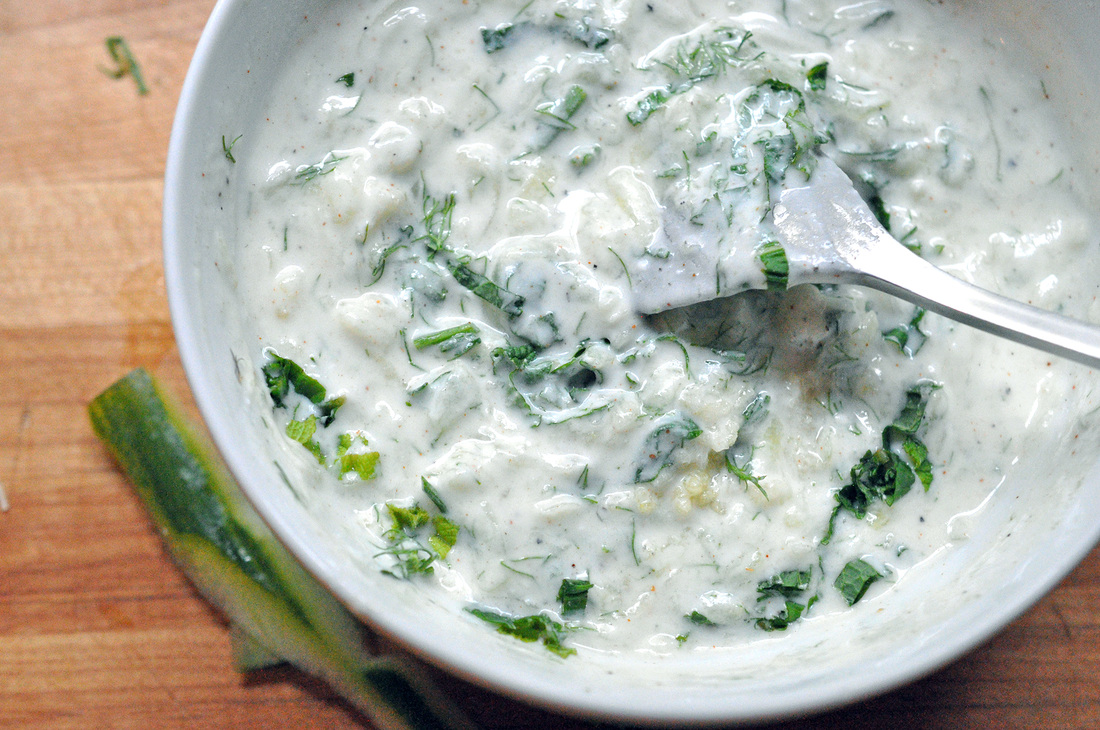
Mint Tzaziki [Prep: 10 mins, included above] [Yields about 1 1/3 cup]
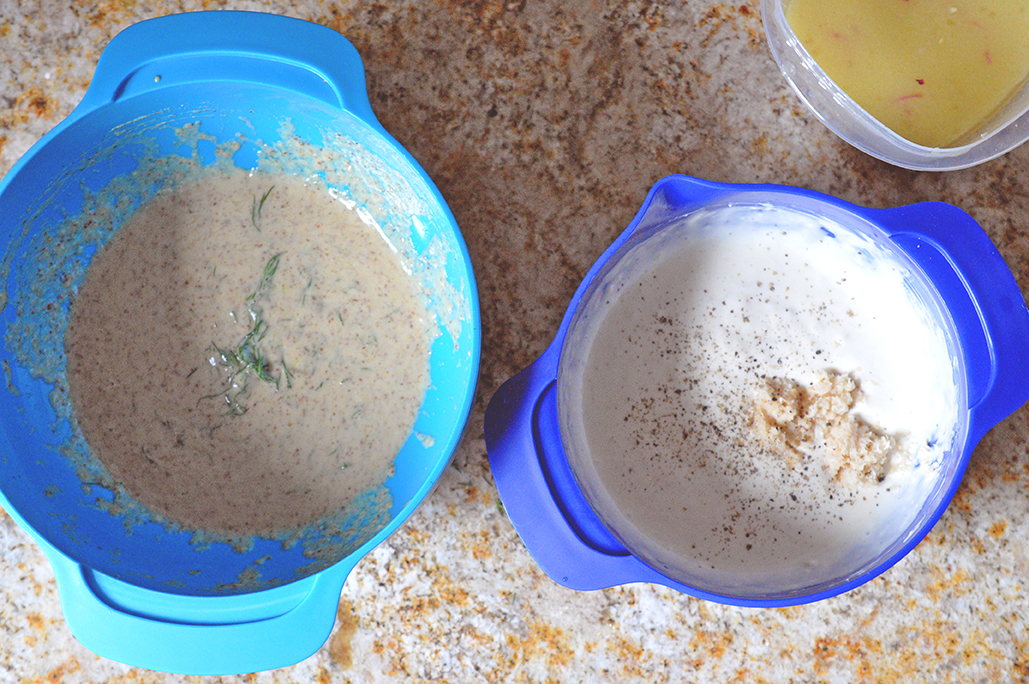
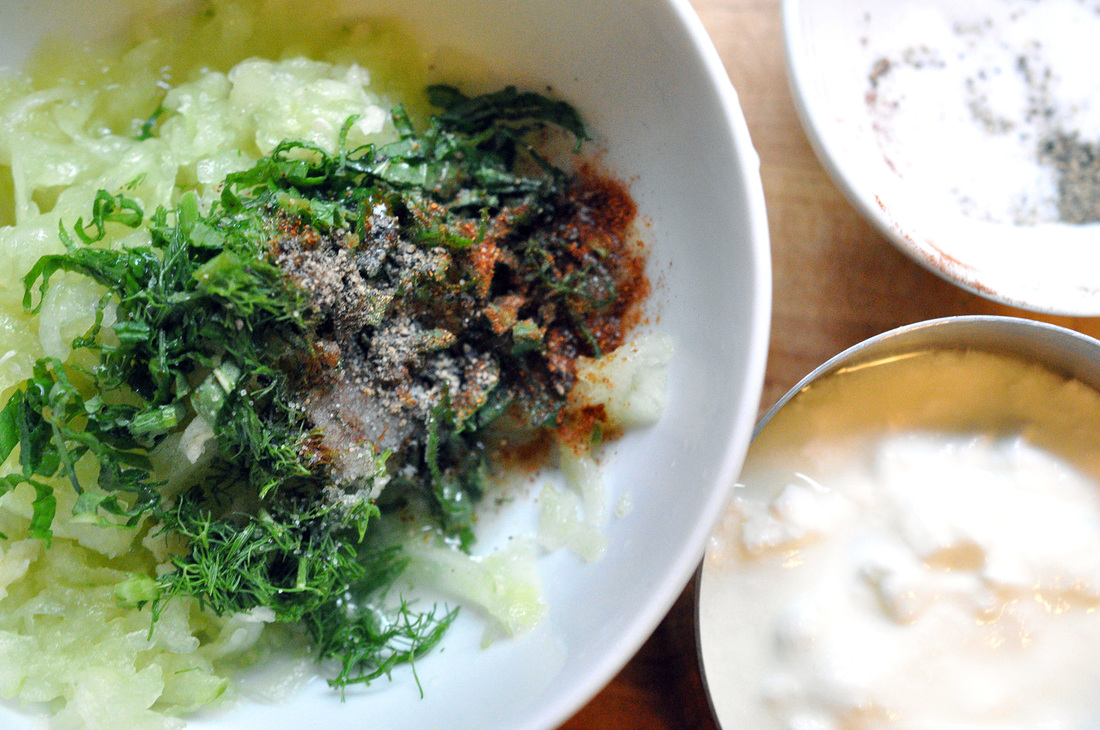
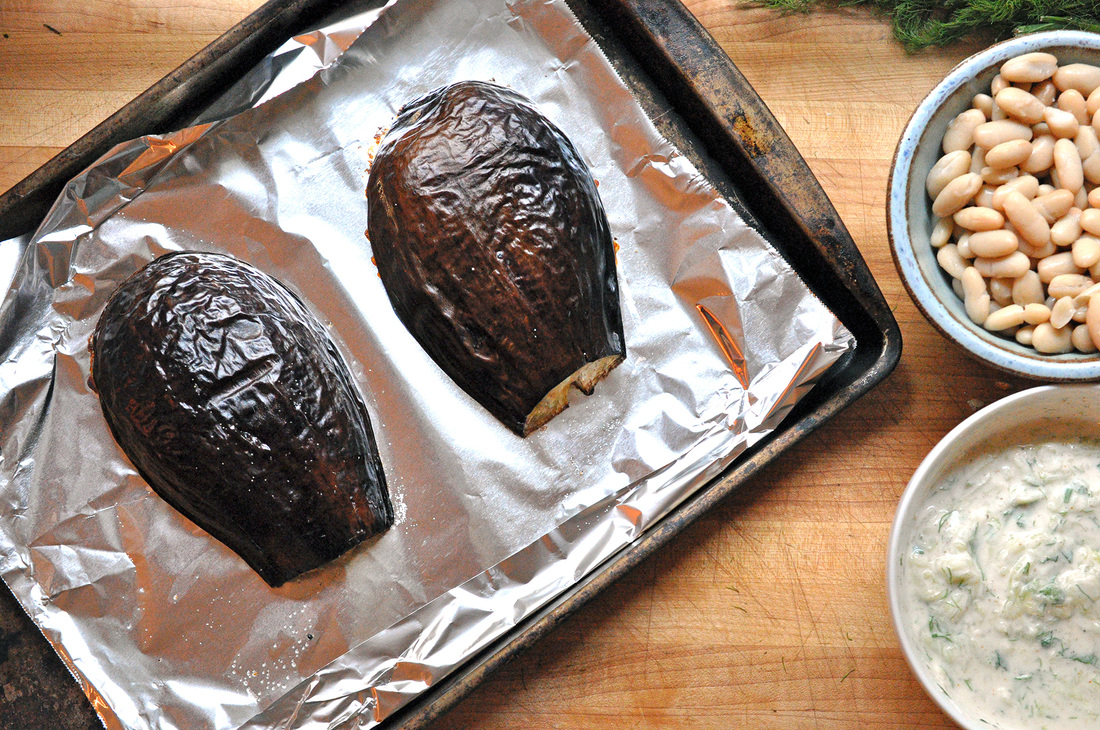
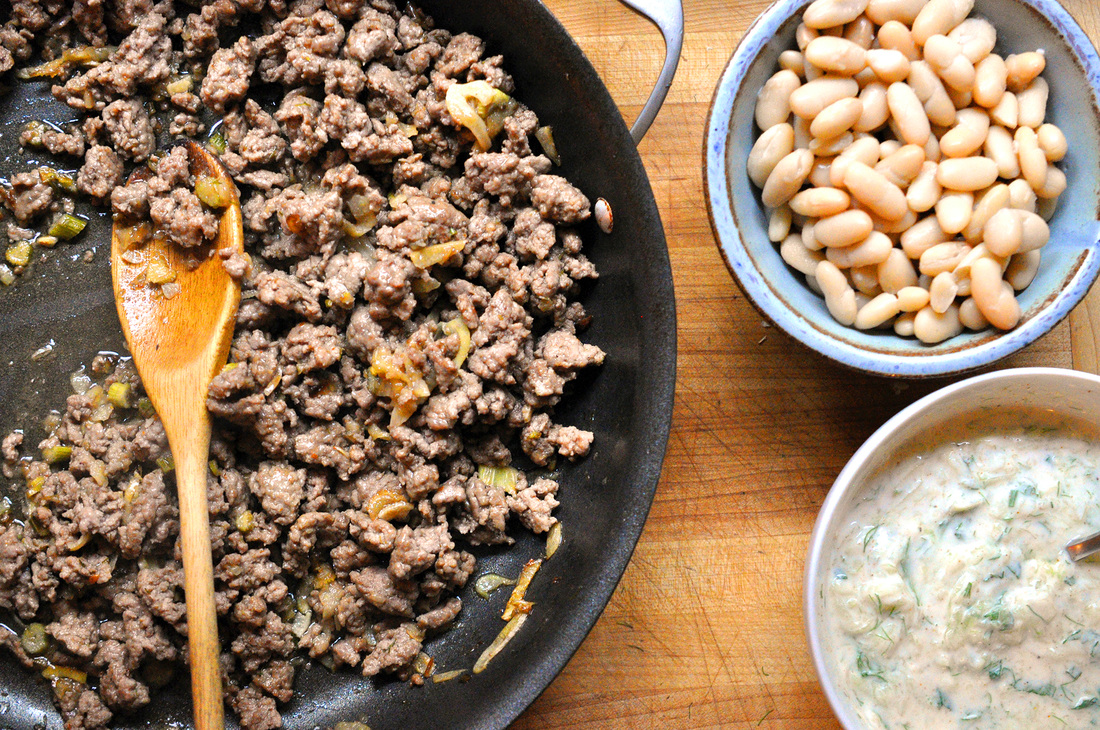
Preheat oven to 400°. The eggplant needs about 40-45 minutes to roast so lets start with that. After it’s been washed and the cap trimmed off, slice the eggplant in half lengthwise and score the flesh, making sure not to pierce the skin. Drizzle about a 1/2 tablespoon, some fresh cracked pepper and a few dashes of salt over each half. Roast face down on top of foil in on a baking sheet for 40-45 minutes. You’ll know the eggplant is finished when the skin becomes wrinkled. Meanwhile you can make the mint tzaziki. Measure out 1 cup plain yogurt into a small mixing bowl, discarding any liquid. To this add, 2 pressed garlic cloves, juice from 1/2 lemon, the paprika, salt and cracked pepper. Roughly chop up about 1 tablespoon of the fennel fronds and 8 mint leaves and incorporate. Peel and grate the cucumber into a small mixing bowl. Spoon off any liquid, pressing down with the back of the spoon helps to squeeze out any excess, incorporate with the rest of the ingredients and mix well. If you are going to be using the tzaziki as soon as the eggplant comes out of the oven you can leave it out, if you are making it a few hours a head of time then it should be refrigerated. Into a small pot add 2 cups water, a dash of salt and 3/4 cups faro. Bring to a boil – this will take about 2-3 minutes. Once the water is boiling, turn the heat down to a simmer and cover the faro. It will need about 20 minutes to cook. Set a timer for yourself so you don’t forget about it during your next steps! Now onto the ground lamb. For some reason I didn’t use my cast iron skillet [stupid stupid…] it will really get you the best browning, caramelized flavor that you want. Take a well oiled cast iron skillet let it heat up over med-high heat. You’ll want to cook the meat in 2 batches, crowded meat doesn’t brown well – and here’s the trick, once you’ve put the meat into the skillet and broken it up a little, just let it sit…and sit without touching it. It’s hard I know, but this helps the meat caramelize and not end up a gray nondescript color (and flavor). Leave it for about 1 minute before flipping and you can begin to break it up more and season with salt [about 1/4 teaspoon] some fresh cracked pepper, 1/2 teaspoon cumin, and 1/4 teaspoon red pepper flakes. The whole process will take about 8-10 minutes each batch – of letting the meat brown and then mixing. When it is ready, remove the skillet from the heat and transfer the lamb to a small mixing bowl. Return the skillet to low-med heat and add 1 tablespoon butter and the sliced fennel. The fennel will take about 5 minutes to turn a nice golden color – stir occasionally so it does not burn. Once the fennel is nearly finished add the sliced garlic and cook for about 3 minutes longer. Remove the skillet from the heat and incorporate the mixture with the ground lamb. The faro should be finished by now, reserve 1/4 cup of the water and drain the rest. Add the drained and rinsed cannellini beans to the same skillet and keep the heat on low. Heat them up slowly, stirring occasionally. Incorporate the cooked faro and 1/4 cup reserved faro water into the skillet. Add the ground lamb mixture to the skillet and about 5-6 torn up mint leaves. The eggplant should be ready to come out of the oven. Carefully flip the halves with a spatula so that they skin side down, and transfer a half to each plate. Add a few spoonfuls of lamb mixture next to eggplant and top the dish off with the tzaziki and garnish with a few mint leaves and fennel fronds. Enjoy!
 Hankering for more meat based dishes? Here are two other recipes I've been meaning to try - they're good examples of how to caramelize ground meat. Lady and Pups is a fun [daring] food blog I follow and Melissa Clark always [always] gets it right!
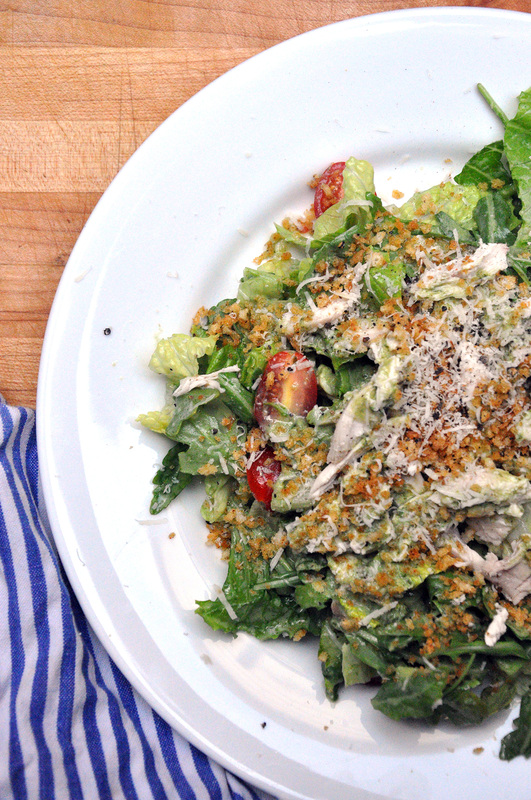 I apologize – I haven’t been posting recently, but I have been cooking and eating – a lot. You see that’s been the problem either I don’t stop to take photos for my blog, or I’m trying something out for the first time – either a random concoction of my own or someone else’s recipe that I just cant stop thinking about. I even tried my hand at home made pasta. Excuse # 3 is that my sister was visiting – just in time to catch the last weekend of the Texas State Fair and all the fried food you could dream up. Again, I was all set to take photos, but I quickly got distracted by said fried food, and my good intentions fell by the way side. Therefore I’ve decided to dedicate this post to left overs based on some killer recipes I’ve tried out. The first is a smoothie, the Green Machine Smoothie to be exact taken from Whole Living’s website, it yields about 3 cups worth of healthy goodness. It combines parsley, romaine, kale, pineapple and ginger perfectly – I know I’ve gone on about parsley before but who knew it could taste so good in a smoothie? The recipe also calls for mango, but I’ve subbed in apple juice and apricot juice, it’s just as good. Have coconut water hanging around, you could add a little of that too! So I’m getting off track and could very easily end up wandering into my kitchen and see what else I can throw into my blender. My point is that I have some romaine lettuce and purple kale in my fridge and whenever I have romaine I always want to make a creamy caesar salad. 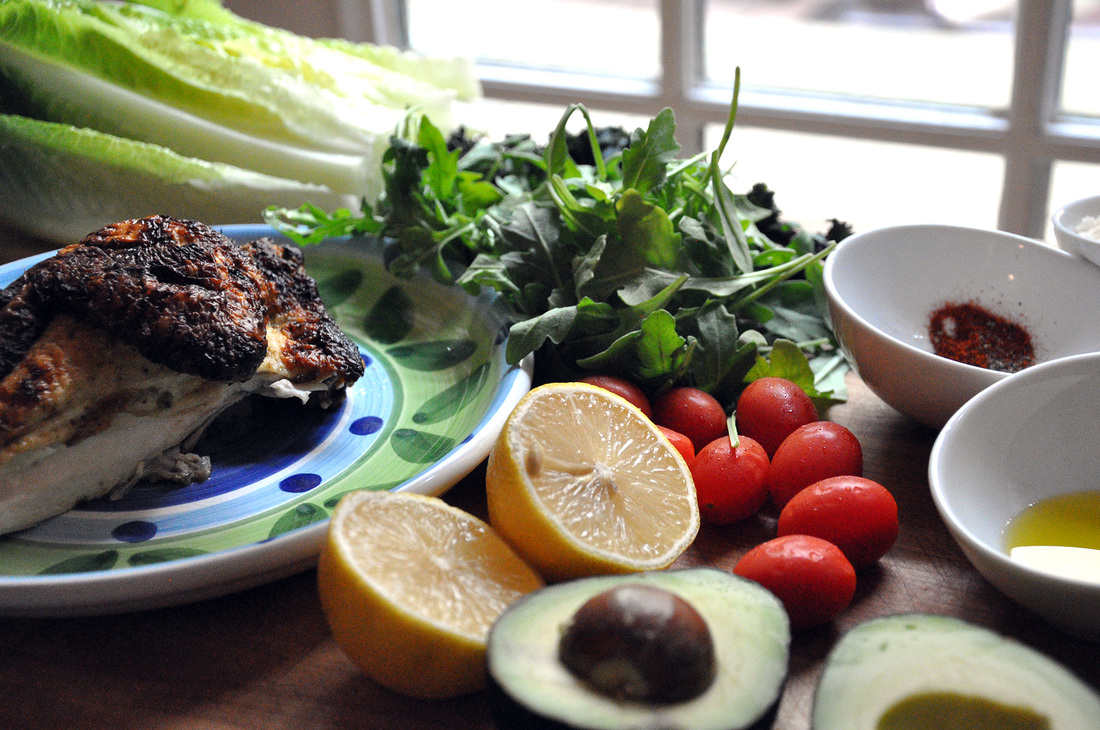 This brings me to the next recipe that I was literally talking about for days - Melissa Clarks’, Green Goddess Roasted Chicken from the New York Times. I don’t cook chicken often much less a whole chicken, but the photos from this NYTimes story where pretty ridiculous. All you had to do to was blend a few ingredients, Buttermilk, basil, chives, green onion, garlic, and a little salt and pepper, do a spatchcock number on that chicken [butterfly it] and let it marinate over night. Then roast in the oven for about 40 minutes at 500 degrees. You reserve a little of the marinade sauce at the beginning to drizzle on the finished bird and its pretty close to roasted chicken perfection. The only suggestion I would make is that if your bird is small enough after it’s been flattened, brown the underside in a cast iron skillet and then transfer it into the oven. Basically what I am left with is, some leafy greens, left over roasted chicken, and a badass basil chive buttermilk sauce. So yes, in my mind this equals a rockstar version of the good old traditional chicken caesar salad. 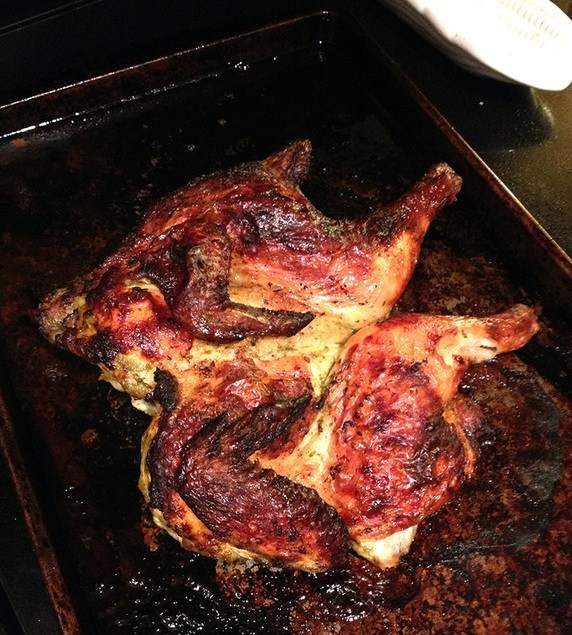
  Rockstar Chicken Caesar Salad PRINT RECIPE [Prep: 20 / TOTAL: 20] [Serving size depends on home much chicken is left over]
Dressing:
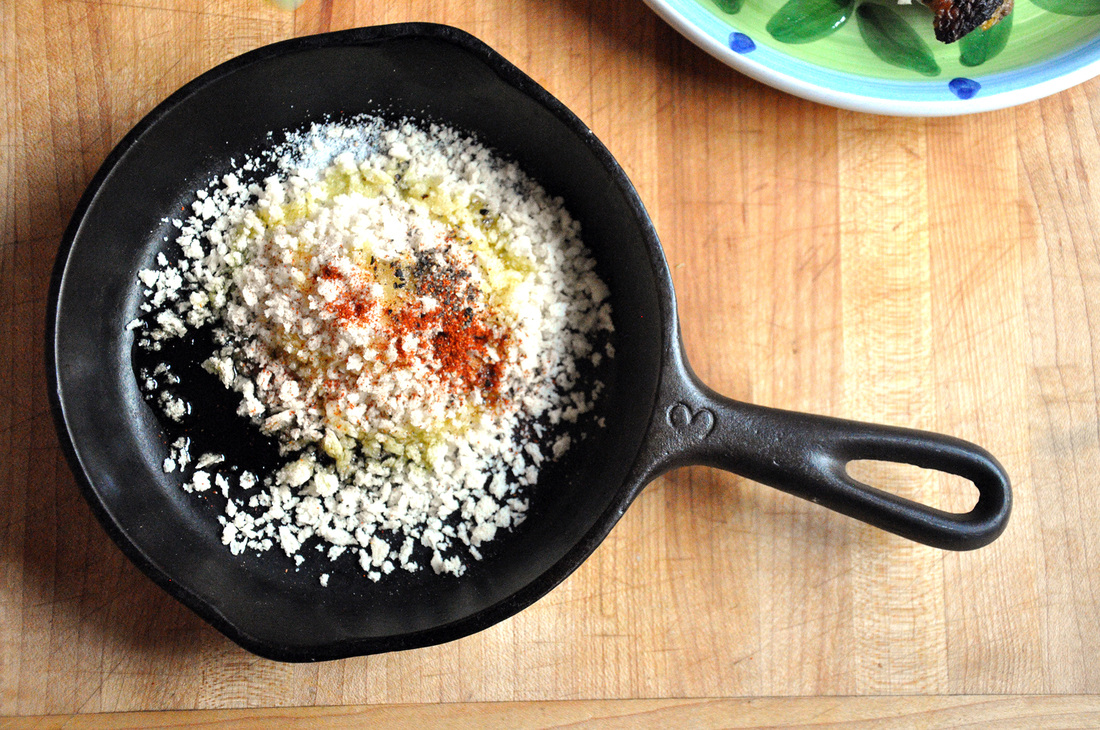
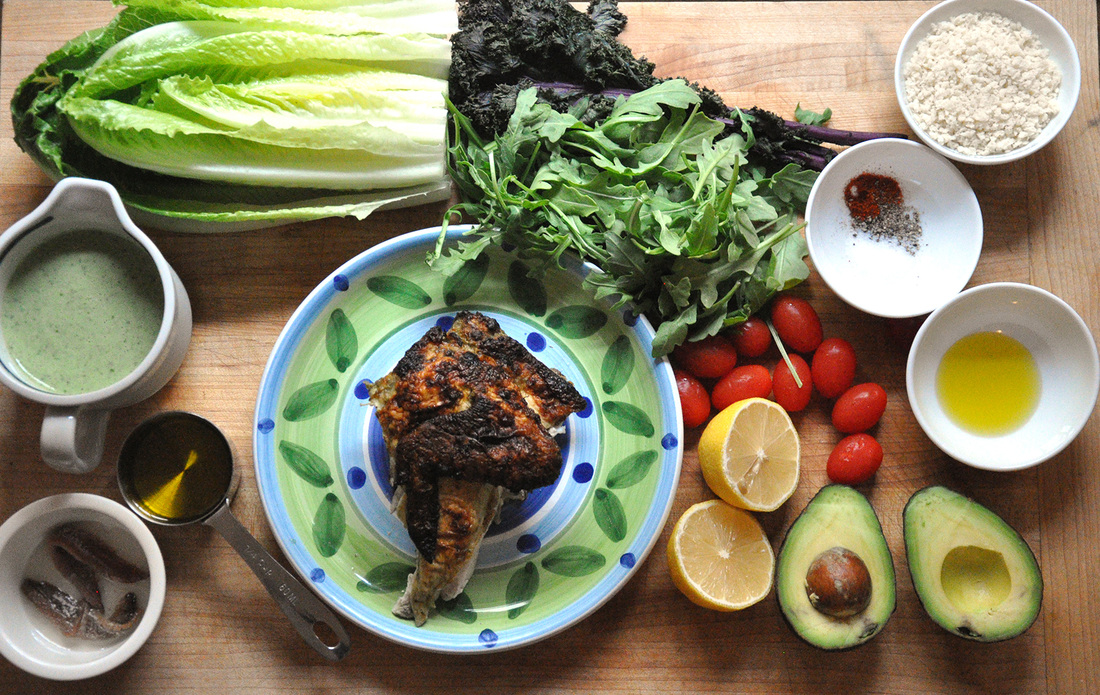
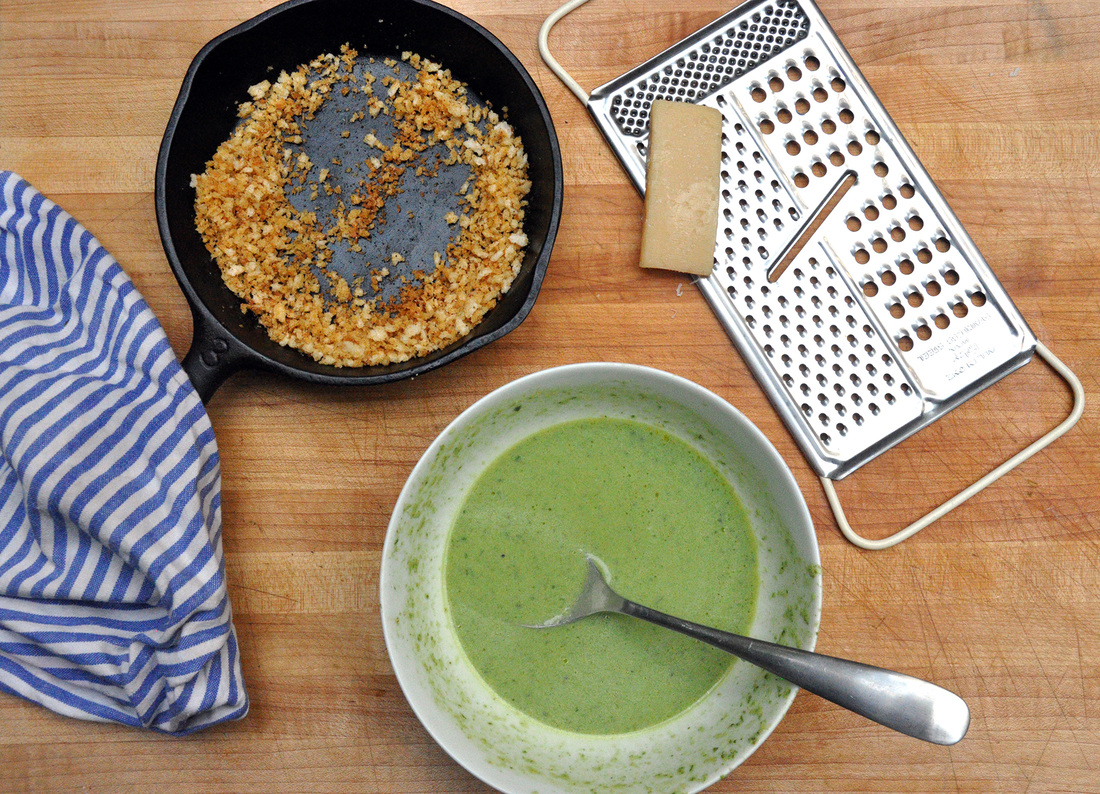 For the basil and chive buttermilk dressing, whisk all of the ingredients together in small bowl except for the olive oil. The oil you should slowly incorporate a little at a time while whisking, so it can emulsify and the dressing can become thicker. This dressing won’t become as creamy as a traditional caesar salad because of the volume of buttermilk already in the sauce – it will still taste darn good. To assemble the salad just wash and chop up the romaine, kale [stem it first] arugula and put into a large mixing bowl. Wash and halve the cherry tomatoes, pit and cube/slice the avocado and mix both in with the greens. Here you can pre-mix the salad with a few tablespoons of the dressing – just enough to coat everything. In small skillet or saucier pan toast a 4 tablespoons of panko crumbs on medium-high heat. Add a dash of olive oil, a pinch of salt, a little cracked pepper and a pinch of cayenne pepper. Toast for 4 minutes, stirring a few times so it doesn't burn. Pull the roasted chicken off the bones and slice it up. [You should save all the bones, skin and other inedible pieces from the whole roasted chicken, it will make killer stock. You can always save them in a Ziploc bag in the freezer until you are ready to make a homemade stock.] Plate the mixed salad and top with the sliced chicken. Drizzle more of the dressing on top and finish off with the toasted panko, the shaved parmesan and a few grinds of cracked pepper. 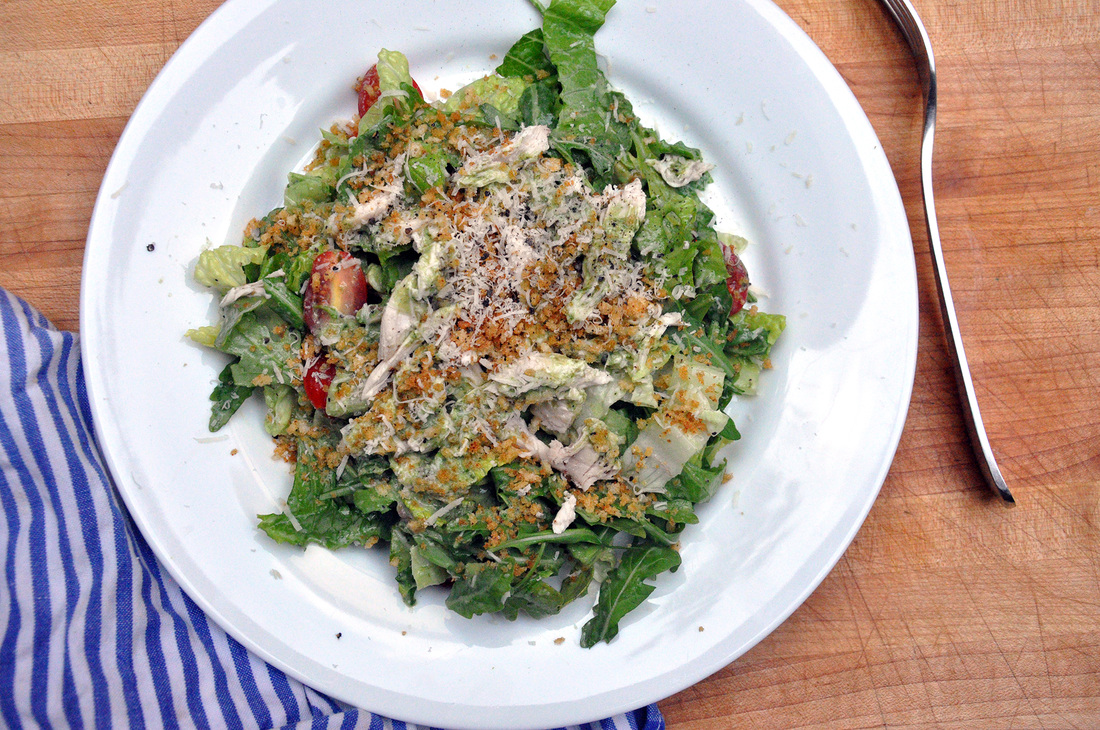 [If you see something missing in this photo it's because I had to ditch the purple kale, it smelled pretty bad – it had gone funky. It’s always a bummer when food goes to waste...] NOTE: If you have some leftover chicken but no buttermilk sauce (so sad) no worries, here’s a basic caesar dressing that’s easy to whip up:
Classic Caesar Dressing [Should make enough for 2-4 salads, depending on serving size]
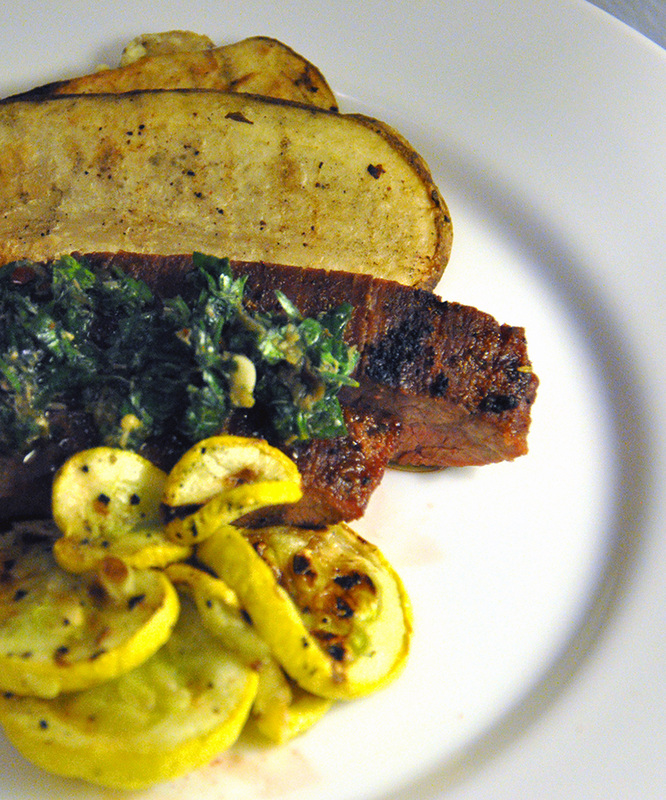
Blend all the ingredients together in small food processor, except the olive oil, or mash anchovies and pressed garlic together in a mortar and pestle and incorporate all the ingredients – again, except the olive oil. Transfer to a small bowl or measuring cup and slowly drizzle the olive oil while whisking the mixture. The slow drizzle will help the dressing come together and become creamy. If it becomes too thick for your liking you can always add a little water or vinegar to thin it out to be more like a vinaigrette.  It’s the end of August and hot and will be hot for probably another month. Have I told you yet that I live in Texas? Oh, well I do and it’s pretty much hot hot hot from late June though late September. The temperature slowly climbs each week, until it’s been 100° or more for a few days straight and you begin to long for those balmy days of 90°. You sit inside in the cold cold cold air conditioning at work, look out the window and see the sun shining through the fluffy white clouds in the big Texas sky – the trees swaying a little in the wind – and you say, screw it, I’m going outside, it looks so nice! Only when you do, you are confronted by a gust of hot air not much different from the rush of heat you’re hit with when opening a hot oven. You think, Ok, it’ll be Ok, I’ll just go to the pool. It will be lovely and refreshing. Only it’s not. Going in a pool in the middle of the summer in Texas is like going to the public baths. The water and air temperature are not far off from each other. I’ll stop here because you get the idea. Summers in Texas Do. Not. Make. Sense. But the weirdest thing is that you start to get used to it. It’s not natural, but then again how natural are the sub zero winter temperatures in the Adirondacks in upstate New York? It’s all relative. You start to notice that 75° is when you throw on a sweater and that wearing jeans when its 88° is totally normal. You realize that the tank tops and flip flops that you packed for your trip home to Long Island in late September was a mistake and you find yourself thinking why does fall start so early up north, it’s not natural… You either know what I’m talking about because you’ve lived in a place like this, or you don’t and you think I’m crazy - either way, its time to talk about food. You’d think a place as hot as this would shun heavy food in the summer. That fruit and salads would reign supreme. But people love their meat down here – year round. They love it pulled, bbq’d, smoked, slow roasted, deep fried and jerkied. They love it pretty much anyway you could imagine and it all tastes pretty much amazing. So in honor of Texas and meat and the hot summers here, I decided to have a little dinner party the other day. I was really going for it – everything cooked on the grill…outside. I was hankering for some Flank steak and grilled vegetables. I know by now that it doesn’t really cool down at night here and that the mosquitos come out to play at dusk, but I wanted to grill. So I bombed my back yard with [organic] mosquito repellent, covered myself in bug spray and went for it. It was great. I was hot of course, but amazingly my dear friends joined me outside as I grilled and we all stayed cool with homemade grapefruit cocktails and icy beer. So I may have dropped a few slices of squash into the grill or charred a few potatoes but the meat was perfect. 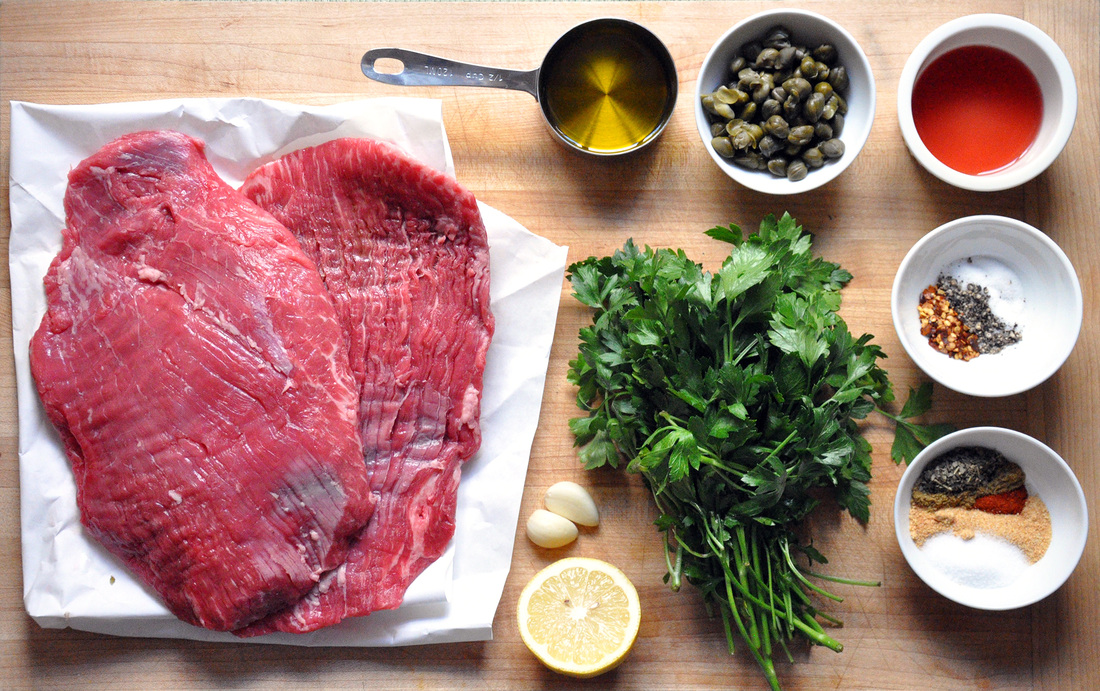 Dry Rubbed Flank Steak with Chimichurri Sauce PRINT RECIPE [Prep: 20 minutes / Grilling: 10-12 / TOTAL: about 30 minutes active, try to season meat up to 1 hour before] [Serves 6 dinner sized portions]
Grilled Summer Vegetables [Prep: 10 minutes / Grilling: about 15/ TOTAL: about 25 minutes] [You can pick any sort of summer vegetables that you like to go with the meat. In Texas the yellow summer squash is super sweet and fresh and russet potatoes work great on a grill – so these were two easy choices for me and just a suggestion for you.]
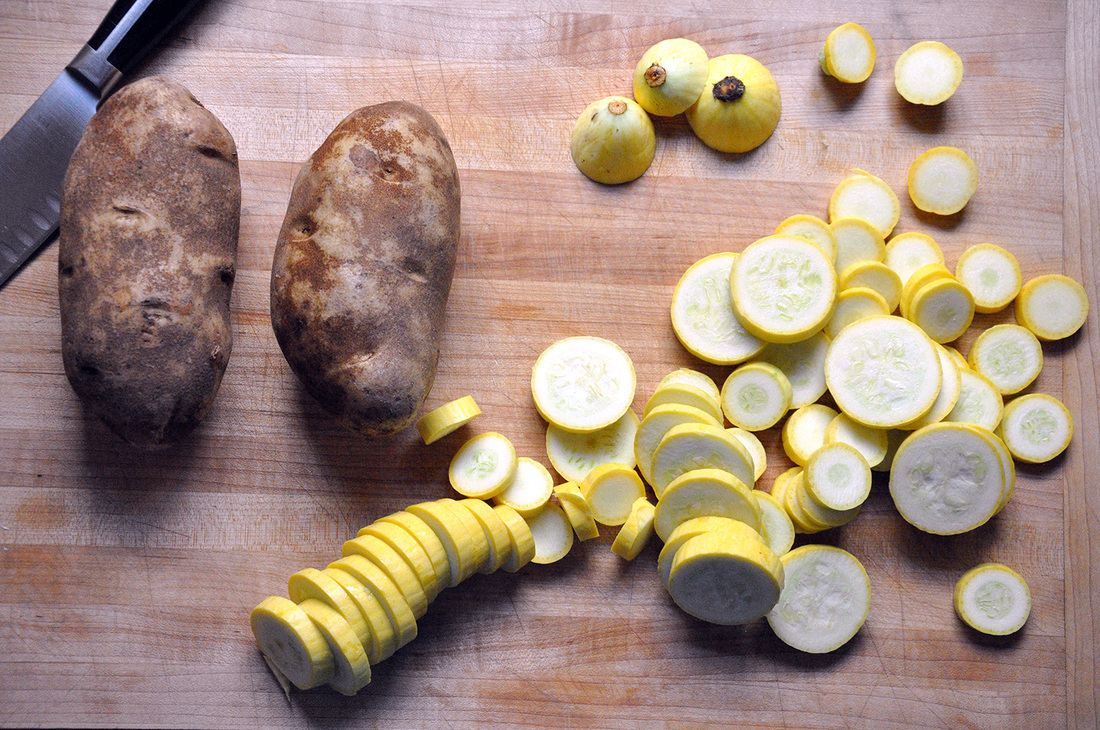 Flank comes as a long wide strip of meat, because of its length it usually packed folded or rolled. Since it is a tougher cut of meat I like to either marinade it first or put a dry rub on it and serve it with a sauce. The marinade would help break down the meat a little and the dry rub would help lock in some of the juices. Either way you can’t go wrong. This dry rub with chimichurri sauce is one of my favorites and it has always been a crowd pleaser. For this recipe I used two smaller steaks about 1.3 pounds each, when cooked the steaks will shrink up significantly. Ideally about an hour before you’re ready to start grilling you should prep the meat with the dry rub [its ok if you only really have a half hour]. Start by mixing the garlic powder, cayenne, salt, dried oregano, ground cumin and sugar together – I like to measure the ingredients out before and put them into a small bowl since I will be handling raw meat and wont want to be touching a lot of things in the kitchen. To get the meat ready lay it out on a large platter and pat it dry with a paper towel. Sprinkle half of the seasoning over the steaks and massage it in with your fingers, there should be enough to create a thin layer. Flip them over and repeat with the rest of the seasoning. [Make sure to wash your hands!] Meat tenderizes – breaks down – more quickly at room temperature can leave it out until you’re ready to grill it. The meat should never be cold when you put it on the grill. Now you can forget about the meat for a little and start making the chimichurri sauce! The way this sauce comes together is pretty amazing and always delicious. It really is the proverbial icing on the cake. Start by chopping up the washed and de-stemmed parsley. When I’m cutting up a large quantity of parsley like this recipe calls for I like to pack it into a tall water glass, take a pair of kitchen scissors, angle them into the glass and start cutting! Its speeds up the process and keeps the parsley contained. Take the drained capers and chop them finely and mince the peeled garlic. This is really the extent of the prep. Now you can combine the parsley, capers, garlic, salt, cracked black pepper, red pepper flakes, red wine vinegar and lemon juice in a medium sized bowl. I like to squeeze the lemon over my fingers – the juice slips through and I can catch any seeds in my hands – it’s a little messy but its quick and makes less clean up. Mix it all together and drizzle in the extra virgin olive oil while stirring. Feel free to taste it now – it should taste very bright – tart, garlicky and a little briny from the capers. The flavor will get better the longer it sits. You can leave it out until you are ready to serve it. The sauce will keep up to one week in the fridge, but it probably won’t last that long... 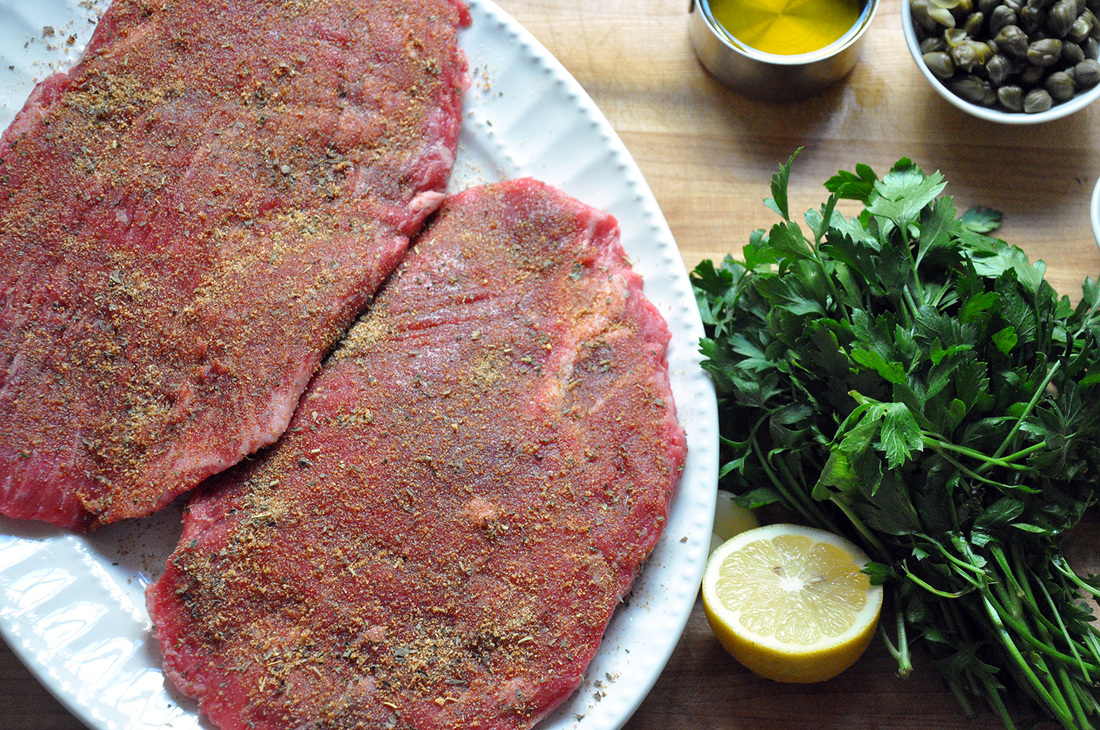 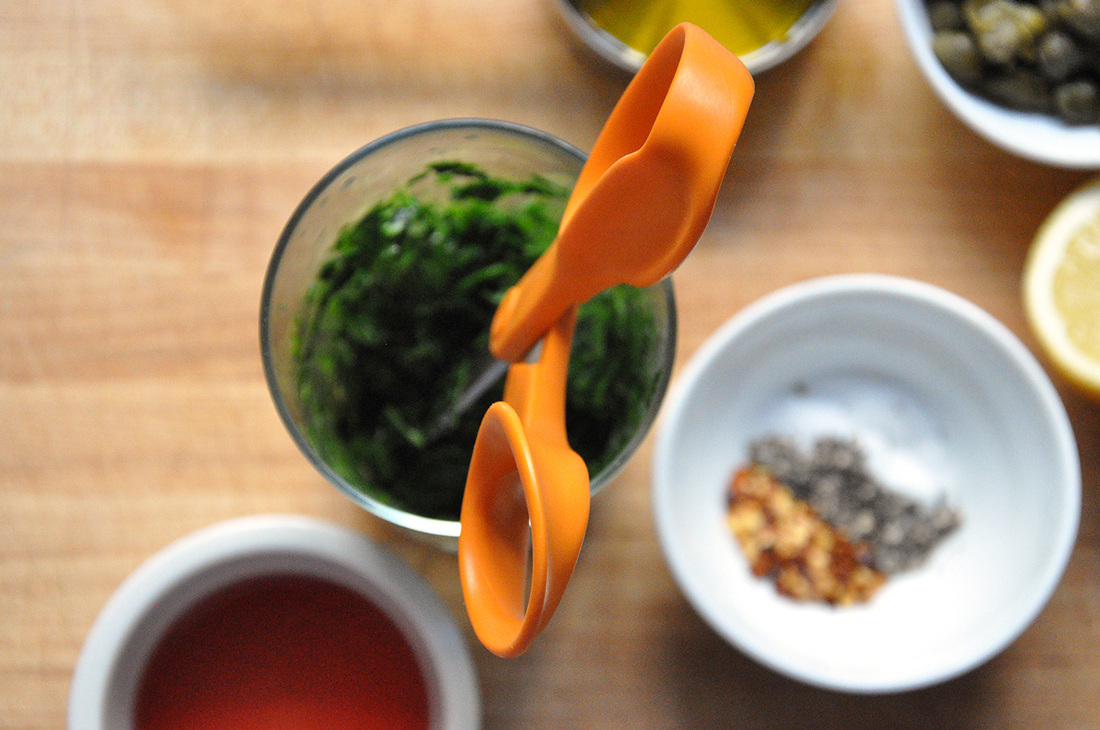 We should get started on the veggies. You’ll see in the ingredients above that I didn’t specify any measurement for the oil or seasoning. Basically you’ll just want to toss the veggies each in a separate bowl, coat with olive oil, about 1-2 table spoons for each, a few grinds of black pepper for each and about 1 teaspoon of salt for each, and a dash of the chili powder on the potatoes. Now get your hands in there and mix until all the veggies are coated. That’s it. It’s not an exact science; you’re just lightly seasoning because you still want the flavors of the squash and potatoes to come through. Ok so now you’re ready to get grillin, before you turn it on make sure to clean it off a little with the grill brush. I have a small gas grill that takes about 5 minutes to heat up, so put it on high and cover it. I do the potatoes first because they can sit in the oven on 175 and stay warm once you take them off. Right before you put the potatoes on turn down the grill to medium – you don’t want the flames to be too high and burn them. Put the cover down and check them in about 3 minutes. Depending on the way the heat is dispersed around the grill some may be ready to flip before others so keep an eye on them. They should need about another 3 minutes after they’ve been flipped. Have an ovenproof plate ready to too them onto as they are ready. The meat comes next. The meat should only take about 5 minutes each side – the thickest part will be medium-rare. Throw on the steaks and cover. Flip it and leave for another 5 minutes. You really don’t want to poke or prod the meat, you can peak at the underside before you flip it and make sure there’s a nice brown crust. After about 5-6 minutes per side take it off and cut into the thickest part a little to see how it’s cooked. If you like it medium-rare there should still be red in the middle. Remember once the meat is taken off it will keep cooking for a little. Also it’s easy to reheat the grill and cook it a little more – but you can’t fix overcooked meat! 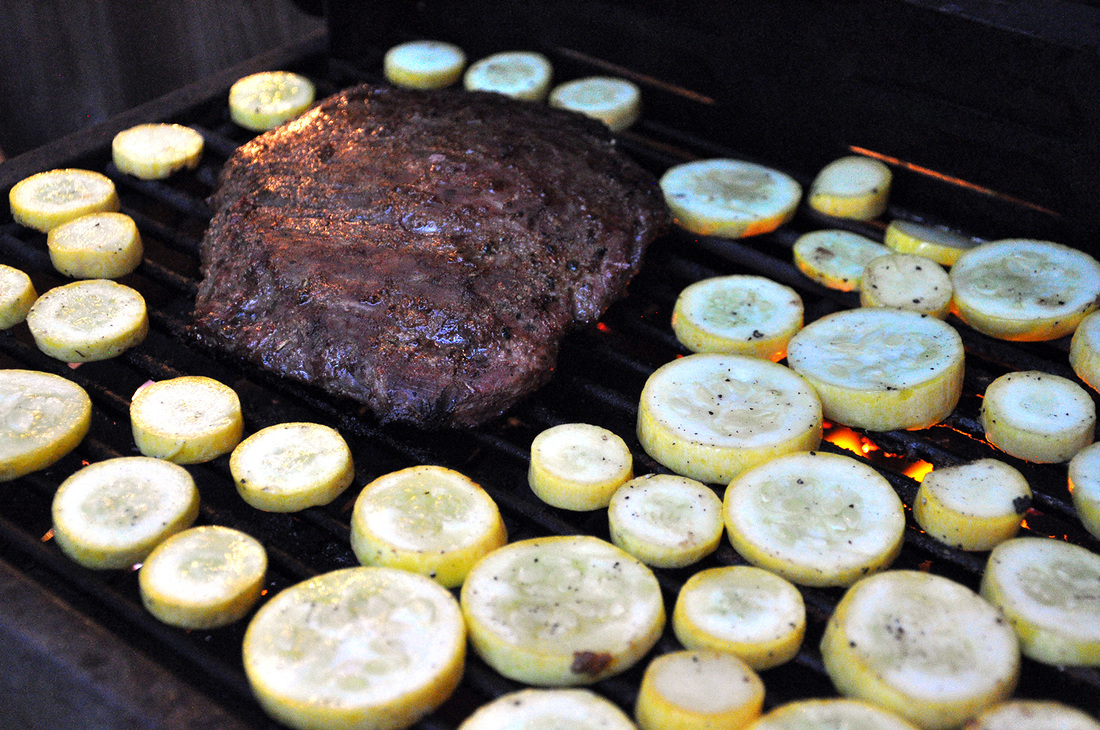 One of my steaks was done early. I left this one a little longer and started cooking the squash at the same time. Cover the meat with foil and leave to sit for a few minutes so the juices can settle. The squash really only needs about 4-5 minutes on the grill, that is about 2 minutes per side. I painstakingly placed each one the grill they looked great, but it is easier if you just popped them onto a metal skewer before putting them on the grill. Pull those potatoes out of the oven, toss the squash onto the same plate and slice up the meat – against the grain – into ½ inch slices and top off with the chimichurri sauce.
|
All
Stuff I follow...
Not Without Salt
My New Roots Sprouted Kitchen Thug Kitchen Lady and Pups A CUP OF JO The Daily Meal Melissa Clark ...always 3191 Miles Apart The Sartorialist Garance Dore The Nourished Kitchen Archives
October 2014
|


 RSS Feed