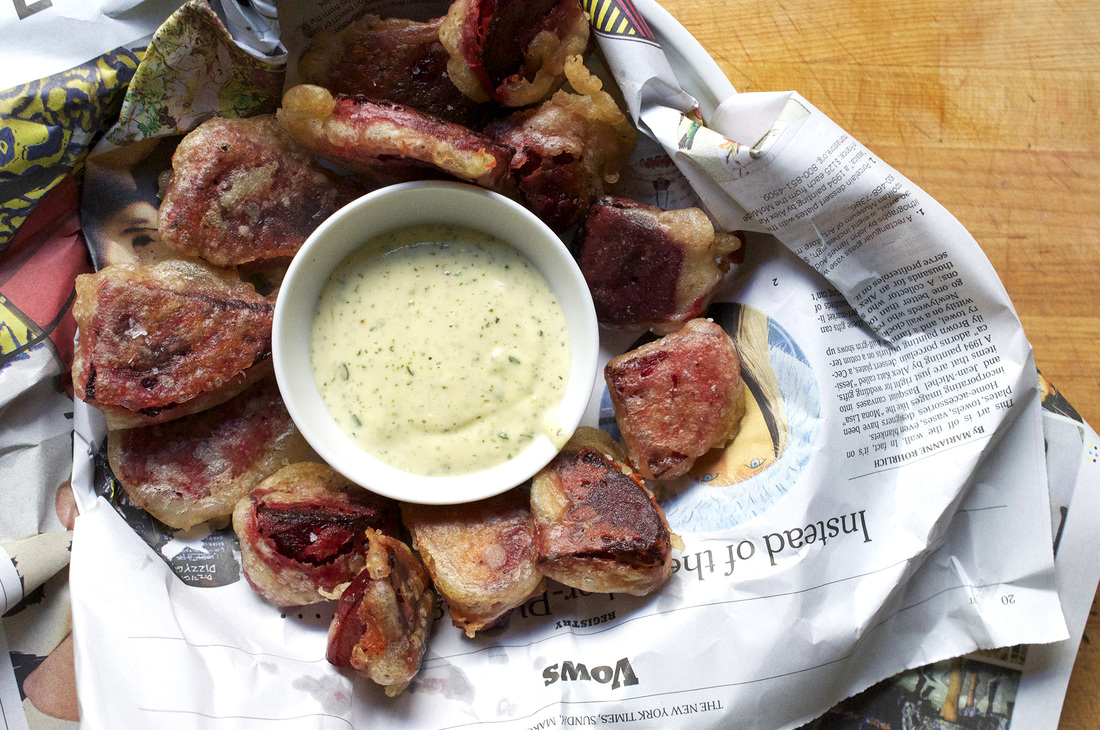
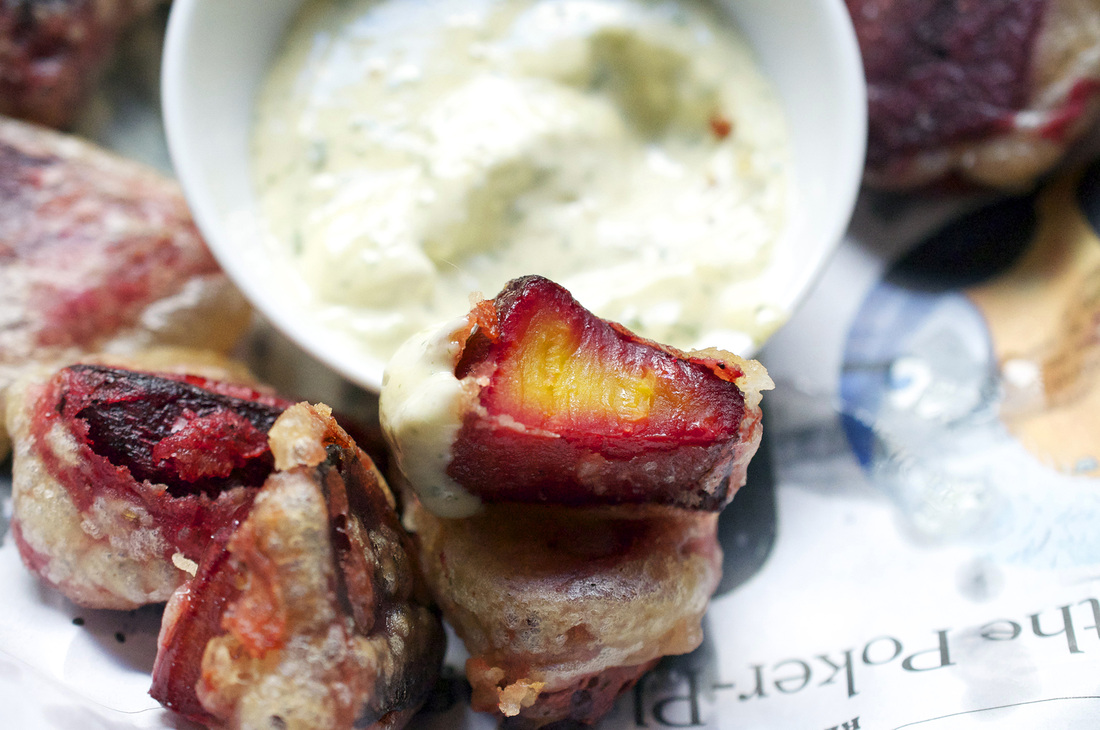
 If you didn’t know already, I live in Texas, and it’s taken some time [about 3 years] but I really like it [come on, I’m a New Yorker, it’s bound to take some time to adjust]. While I like to eat healthy I’ve learned that there’s something really special about freshly made fried food [stick with me here]. They do it all down here, especially around the time of the State Fair of Texas, held right here in Dallas. It’s held in the fall and you can pretty much get anything deep-fried. Oreos, butter, sandwiches, beer, burgers. You can also get a real huge turkey leg and walk around chomping on it like it’s no big deal. It’s a lovely lovely time usually followed by a detox. Anyways a little fried food never hurt anyone, especially when it’s homemade. So basically what I’m saying is that while I used to look at vegetable and think, hmmm, I bet I could roast or caramelize that, now I think, I bet I can fry that. Fried avocado, now that is good. Fried portabella’s – yum! Recently I was in Austin visiting a friend and came across fried beets. I was mesmerized. Beets? I’d come to love beets as an adult, but beets are for salads or for the hot pink risotto I make once a year around Valentine’s Day…Fried beets seemed…so weird, I had to try them immediately. They were so freaking good! And I have to admit, taking such a powerfully nutritious vegetable and turning it into a fried food felt sort of wicked, I loved it. It’s like when parents trick their kids into eating broccoli by smothering it in cheese…devious yes, but sometimes you’ve gotta go the distance to make a person eat a veggie. 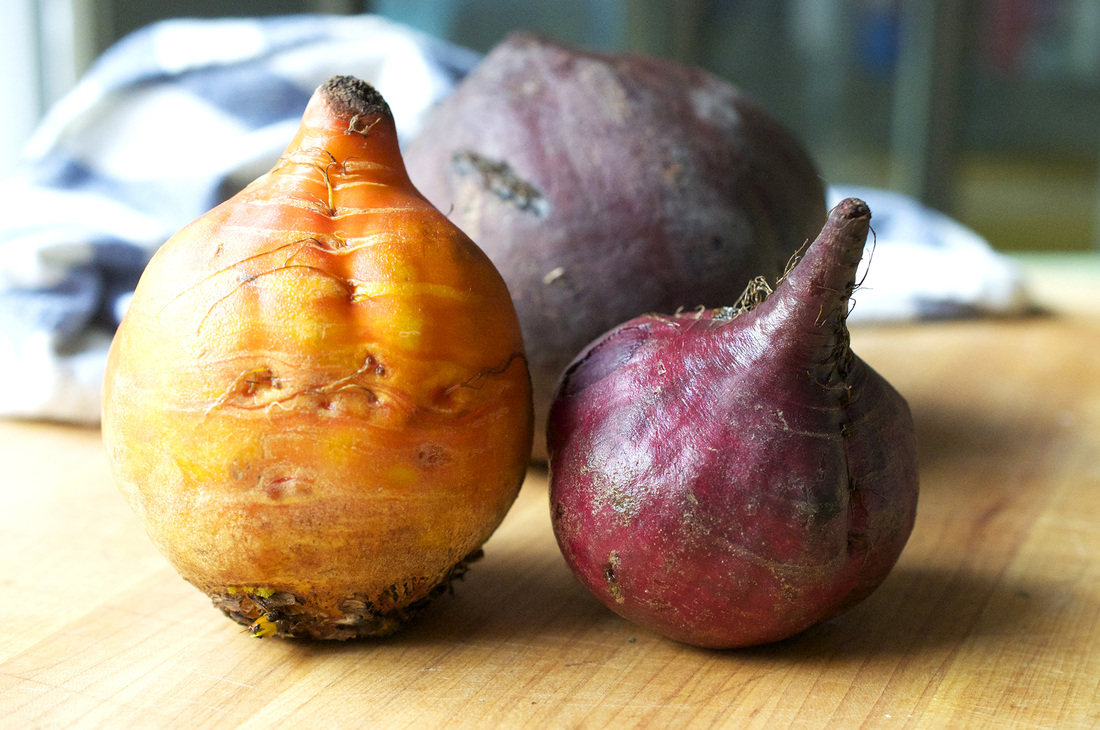 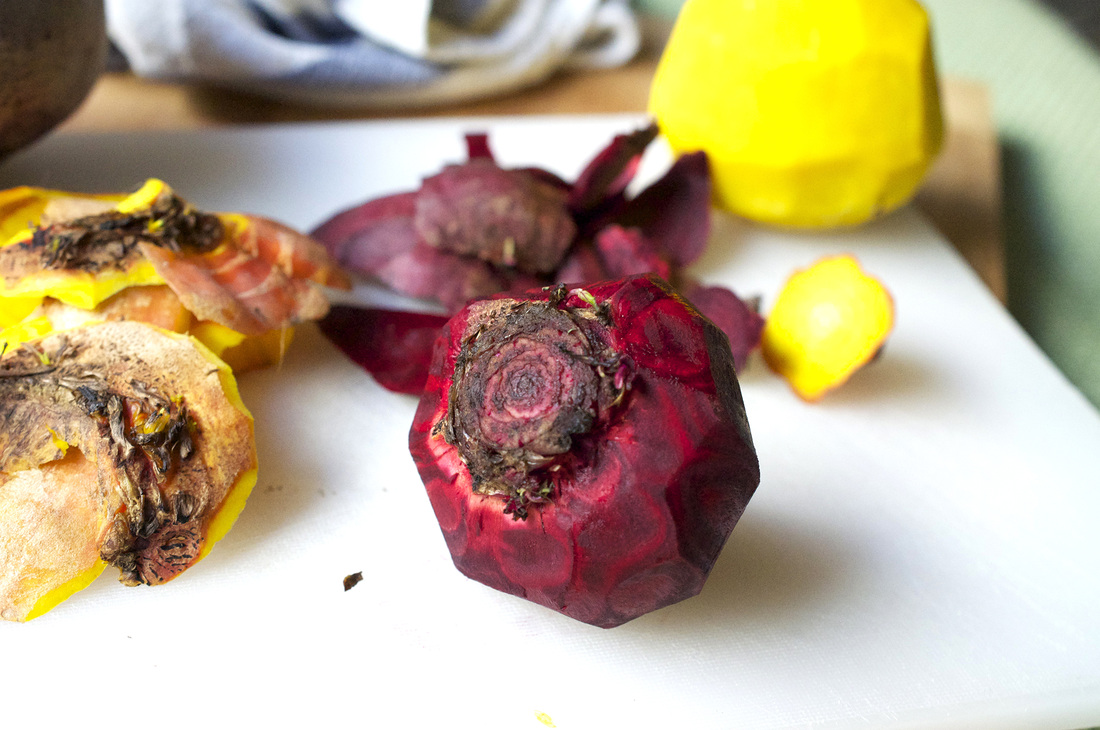 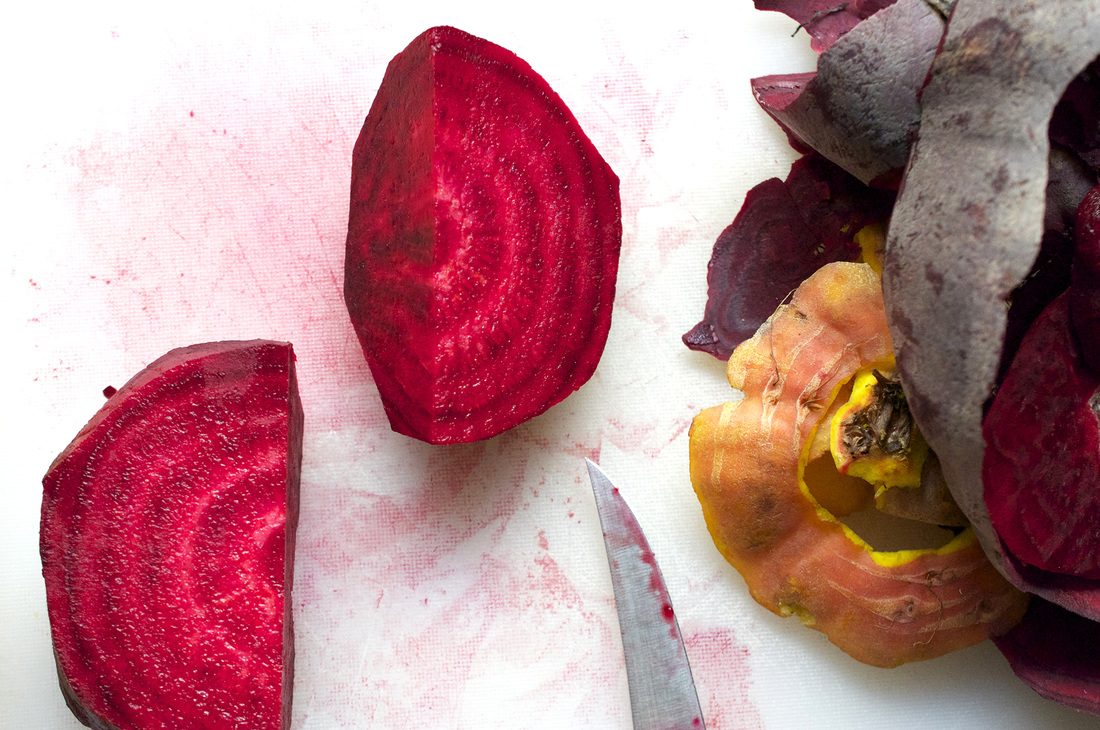 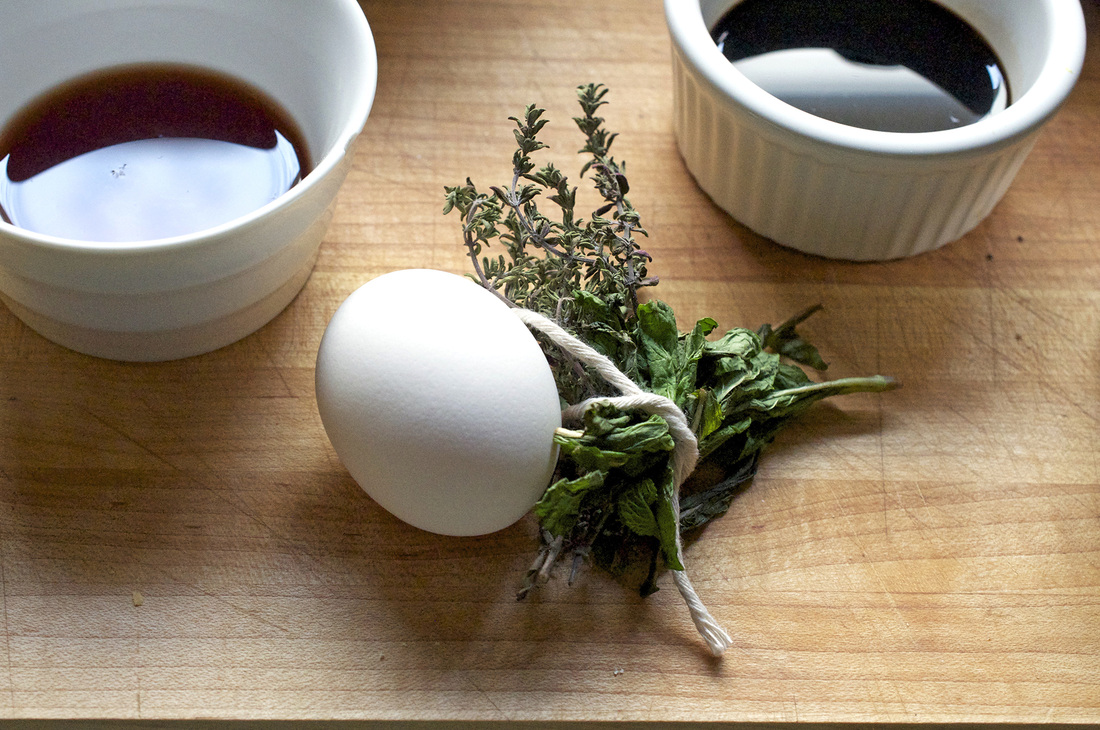 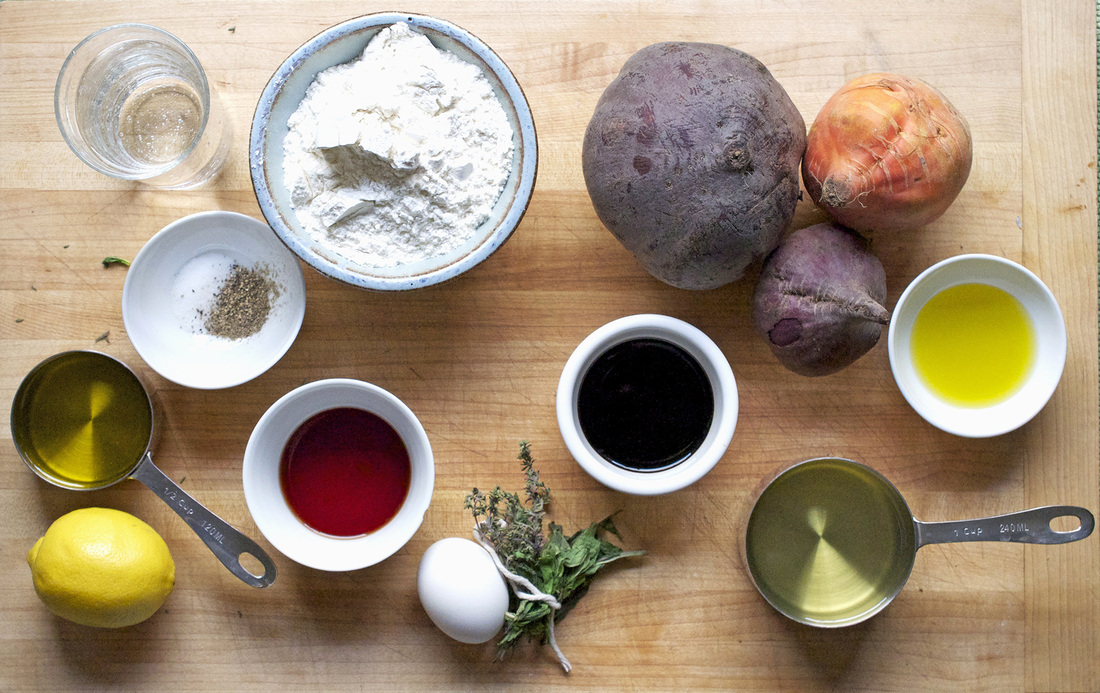 Fried Beets with Minty Thyme Aioli PRINT RECIPE [Prep: 10mins / Cook: 55mins / TOTAL: 1hr5mins [8 appetizer size servings]
Minty Thyme Aioli [Total: 5mins] [1 cup]
Start out by rinsing and peeling the beets. Your hands may turn a little (or a lot) pink, but it’s worth it. Chop the beets into large slices about 1/2 inch thick. Place them in a large skillet, toss with the balsamic vinegar, olive oil, 1/2 teaspoon salt, and a few grinds of fresh pepper. Add 1/2 cup water, cover and bring to a boil over med-high heat. Let boil for about 5 minutes, then lower heat to a simmer and cook until all the liquid has evaporated, about 35 minutes, stirring occasionally. While the beets are cooking you can make the minty thyme aioli. I usually do this in a small food processor, but you can also do it by hand…it just takes a little more patience and time. Roughly chop up the mint and remove the thyme leaves from their stems, mix together in the food processor with the lemon juice, red wine vinegar, egg yolk, salt and pepper. Slowly incorporate the oil a little at a time. The mixture should slowly emulsify. Refrigerate. Once the beets are done cooking [you can test them with a fork, they should pierce easily and slide off] remove them from the skillet, and let cool for about 5 minutes [until they are cool enough to handle]. While the beets are cooling off, rinse out the large skillet you were just using, making sure to wipe it dry, add 1 1/2 cups vegetable oil and put over med-high heat. In a medium bowl combine the flour and seltzer, salt, pepper and cayenne. The consistency should be like sour cream, if it’s too thin add a little more flour, if it’s too thick, a little more seltzer. The thicker the better it coats the beets. Prepare a plate covered in paper towels or newspaper. Add a few beats to the mixture making sure they are all evenly coated. When the oil it ready, you can [carefully] flick a little water and see if it sizzles – or to be extra sure you can use a "test" beet and see if the batter turns golden when added to the oil. Transfer beets to the oil in a slotted spoon. Repeat until skillet is full with beets, wait 1 minute and then start to flip them. Beets are finished when the batter has turned golden brown. Transfer to platter and let paper soak up some of the oil. Repeat until all beets are finished. Serve on a fresh platter with aioli. Enjoy! 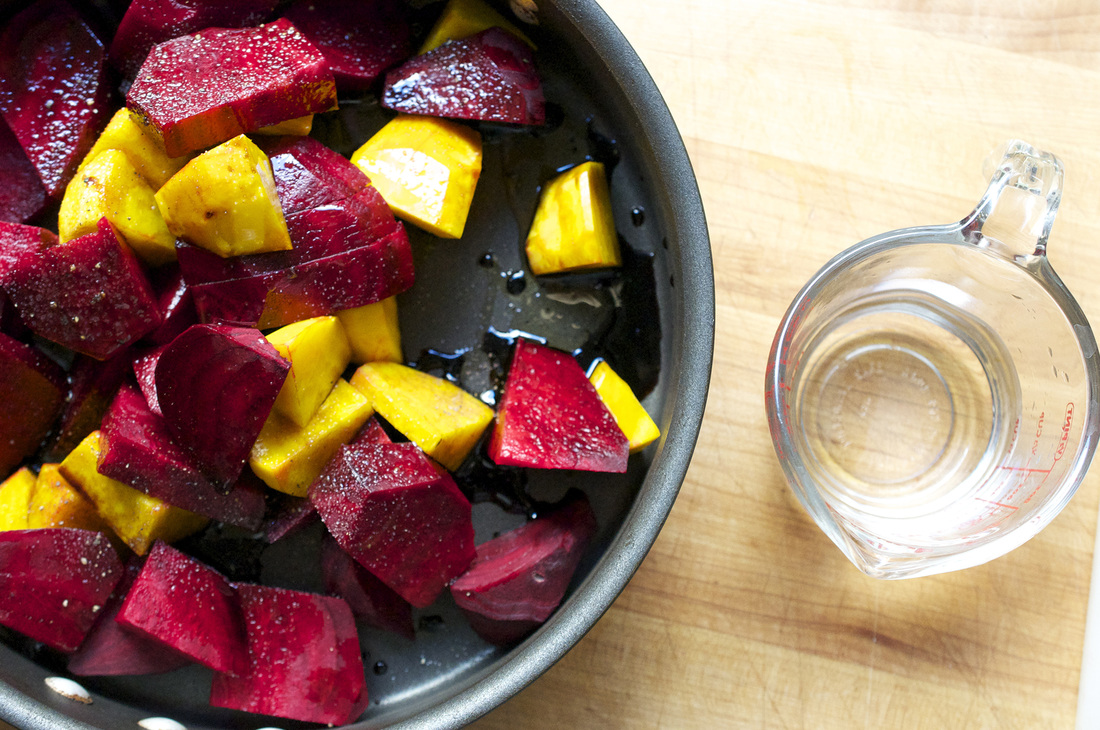 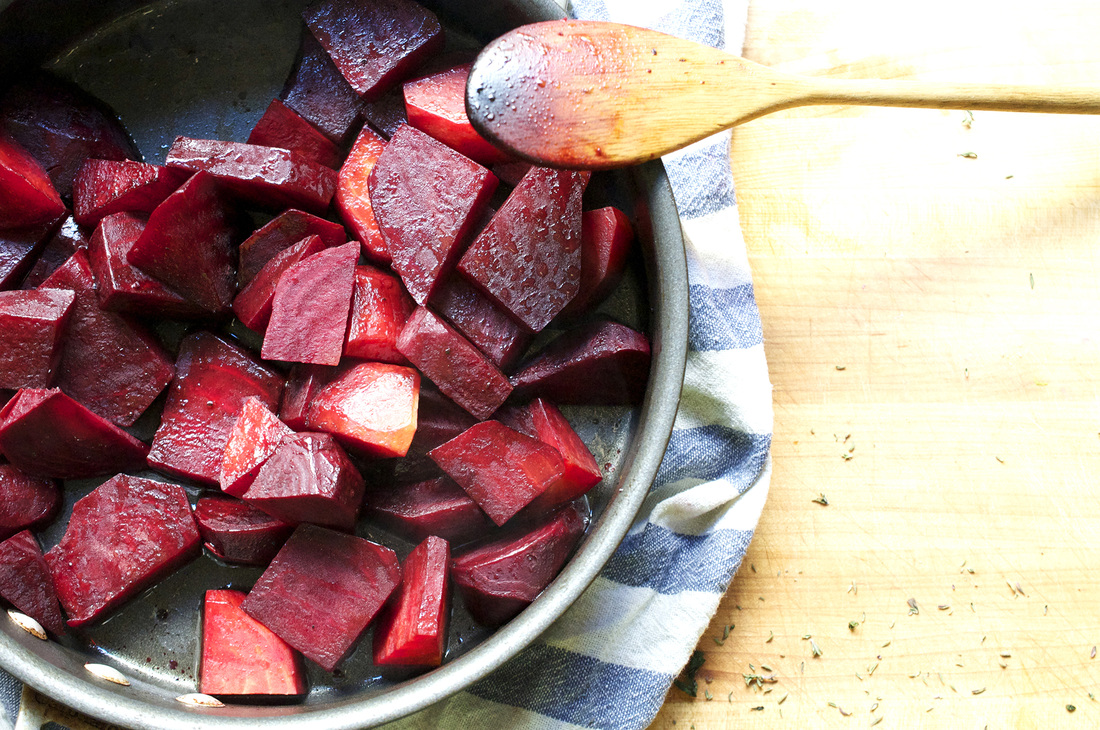
5 Comments
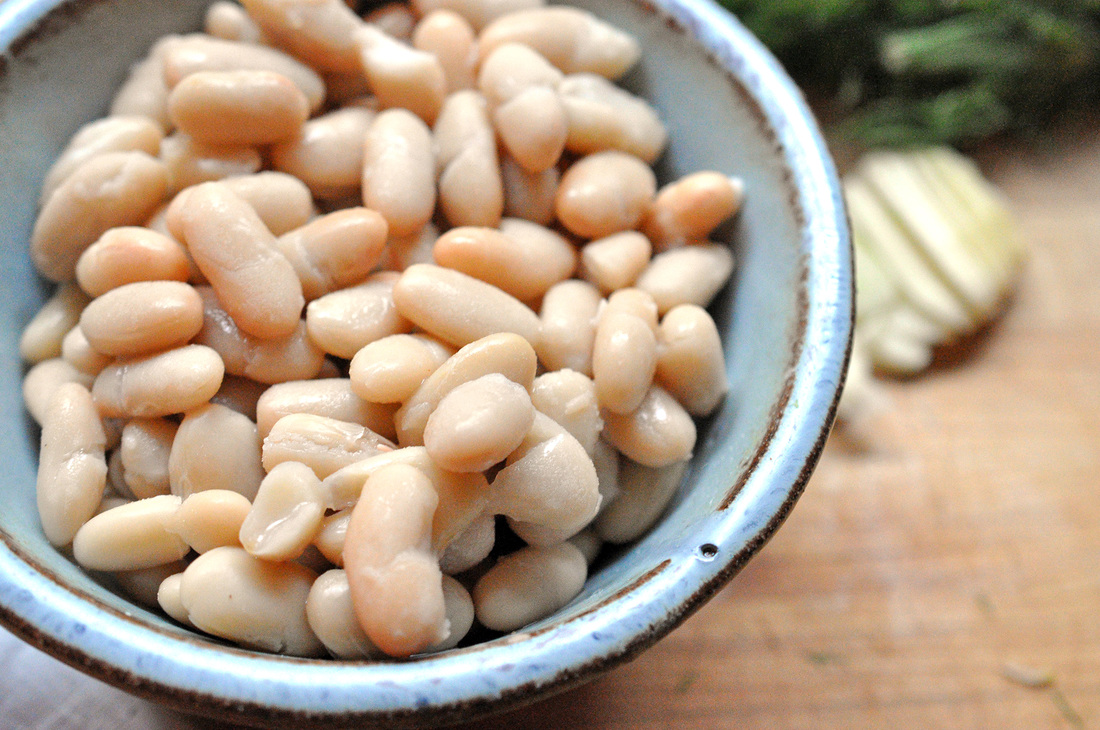
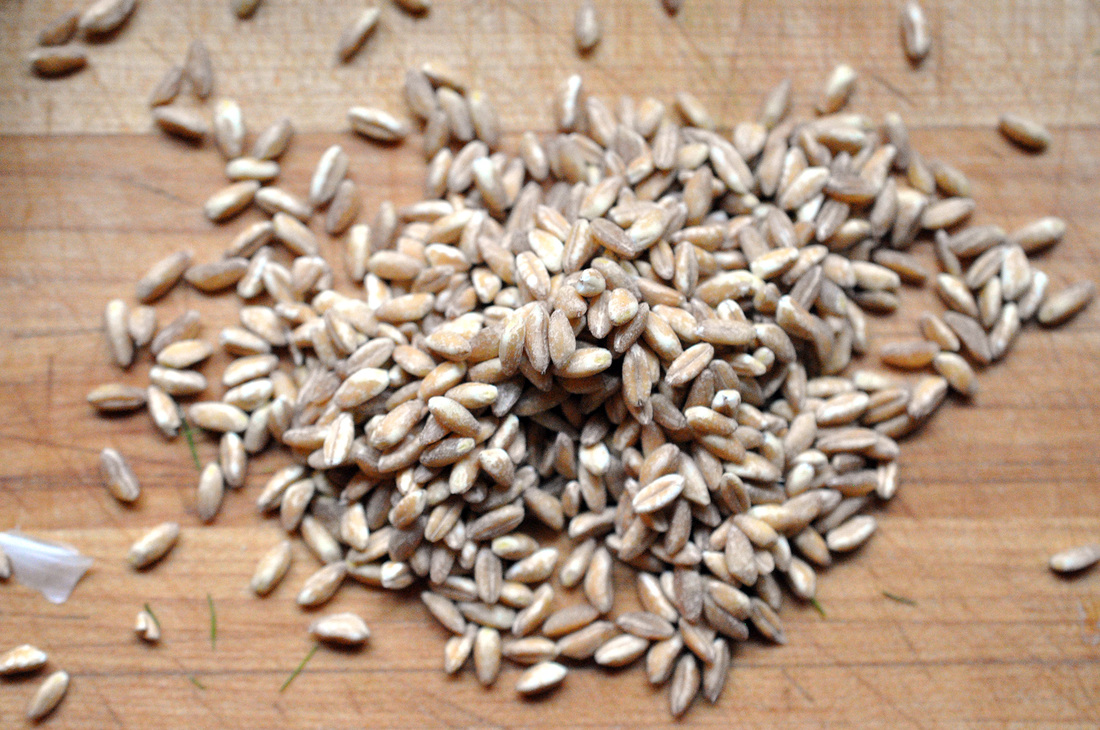
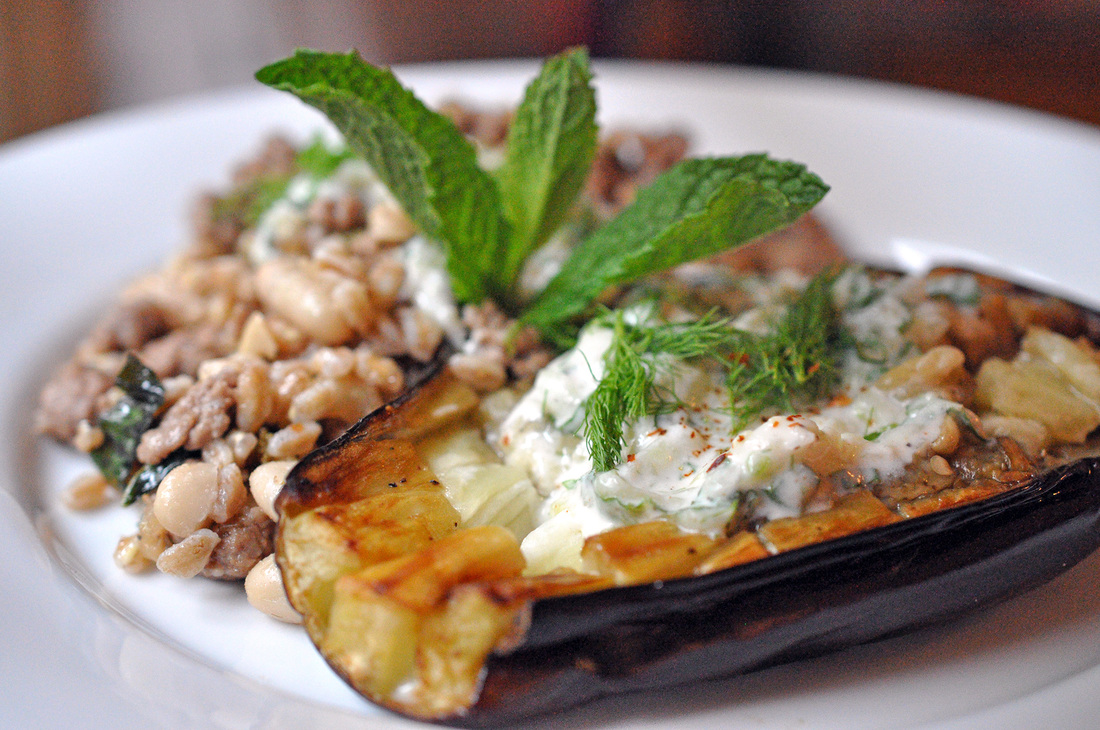 I haven’t cooked meat in a while…for no reason in particular, but it is hard to photograph. I mean a big hunk of juicy meat doesn’t always look as good as it sounds. I also try and stick to what I crave [I suppose I should add here “in moderation” for health’s sake] which tends to be pasta, noodles, sandwiches…with lots of veggies and maybe [absolutely] a smidgeon [a good amount] of cheese. I like to make aiolis, sauces, and dressings, and there’s always a batch of pesto of some sort hanging around in my fridge or freezer. Recently though a good friend of mine told me straight up that I needed to do another meat dish for my blog. So what did I do? I came up with something that I could slather in a sauce – cause that’s my comfort zone. I had an eggplant in my fridge and in my mind that lead to tzaziki and that made me feel a little Mediterranean and then bingo…I arrived at lamb…but it didn’t stop there…I then thought of mint and finally - mint tzaziki! Not every recipe I come up with makes a whole lot of sense – but this one did. I was pretty happy with myself when I went to the supermarket to pick up the lamb. But then I walked by a can of beans, cannellini beans, and knew that they had to be added in. I also wanted to add a little texture and for some reason my mind kept going to faro, subtly nutty with a nice bite. I realized now that my dish was taking a weird turn, but all the ingredients sounded so good together – and I usually go with my gut, which almost always tells my mind what do to. So yeah, that’s usually how my process works. 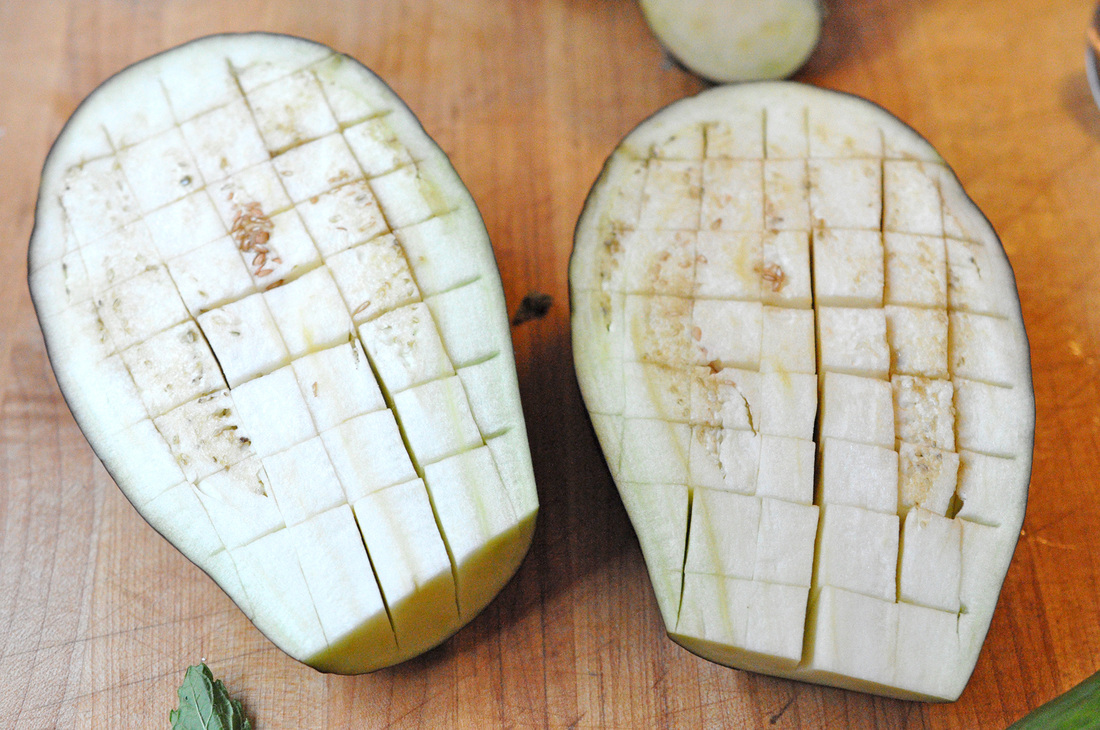
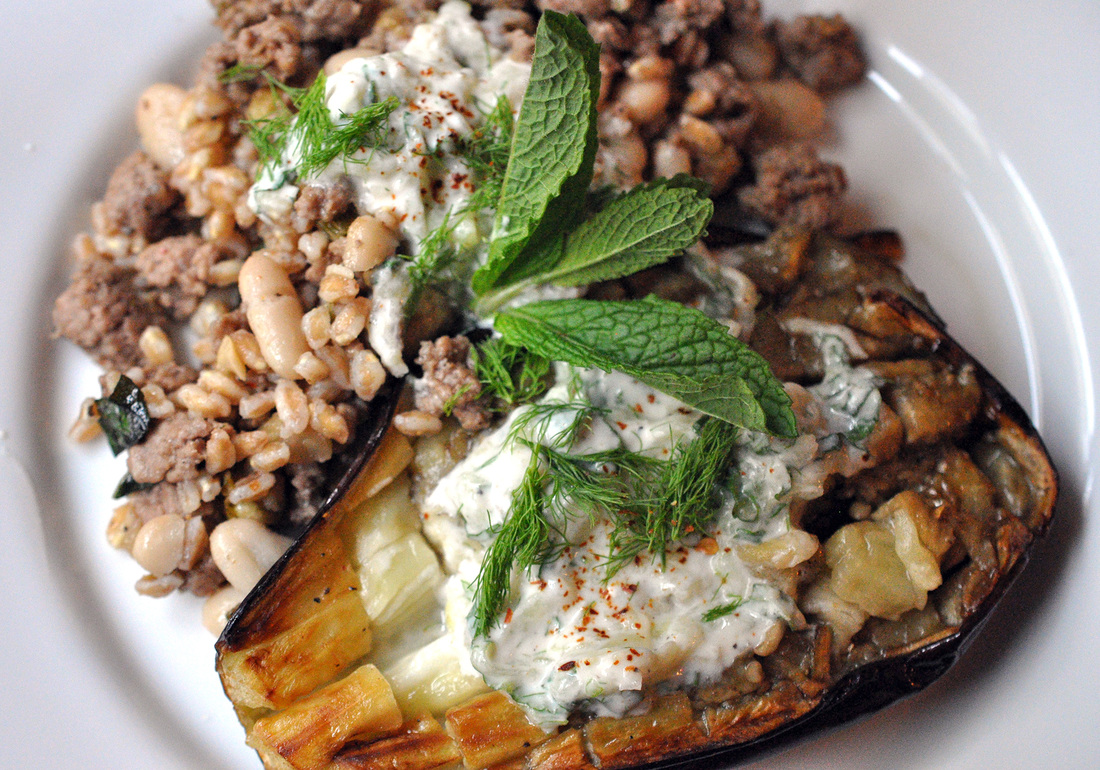
   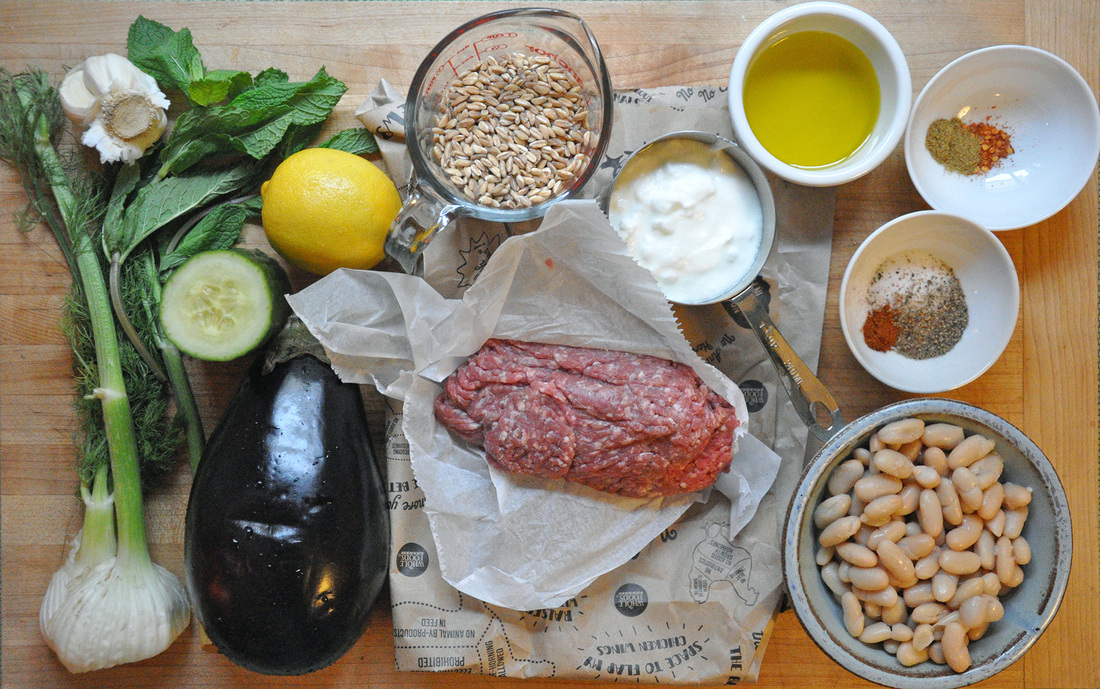 Ground Lamb and Roasted Eggplant with Mint Tzaziki PRINT RECIPE [Prep: 15mins / Cook: 45mins / TOTAL: 1hr] [4 servings]
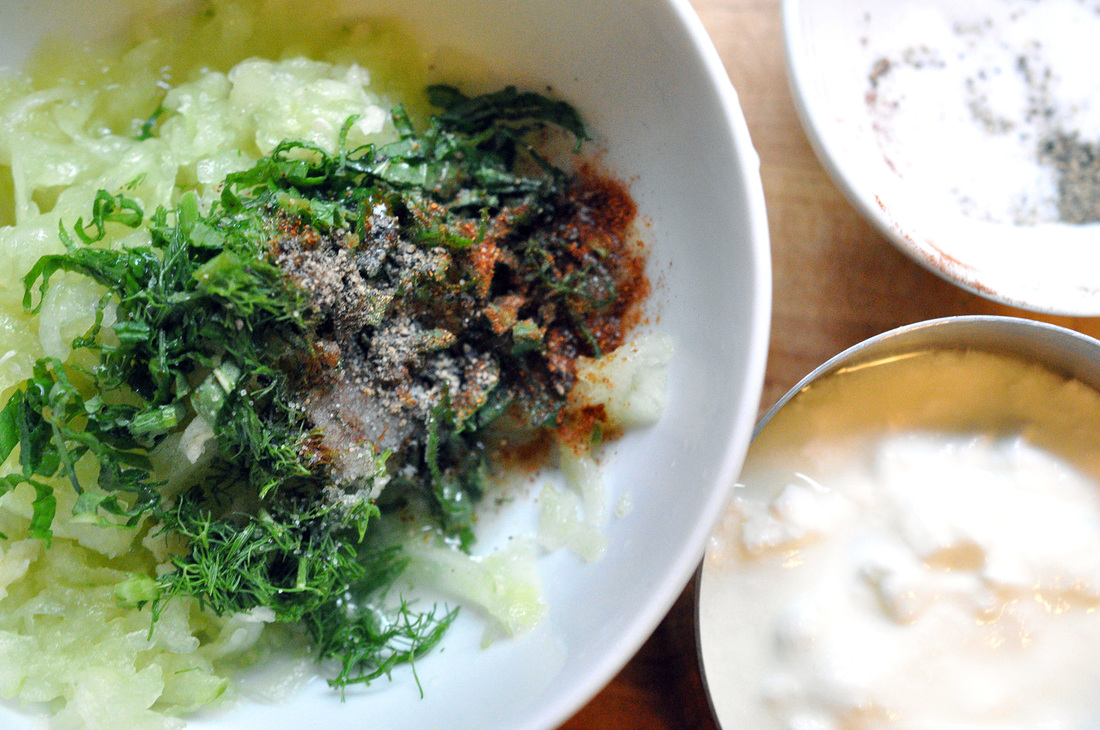
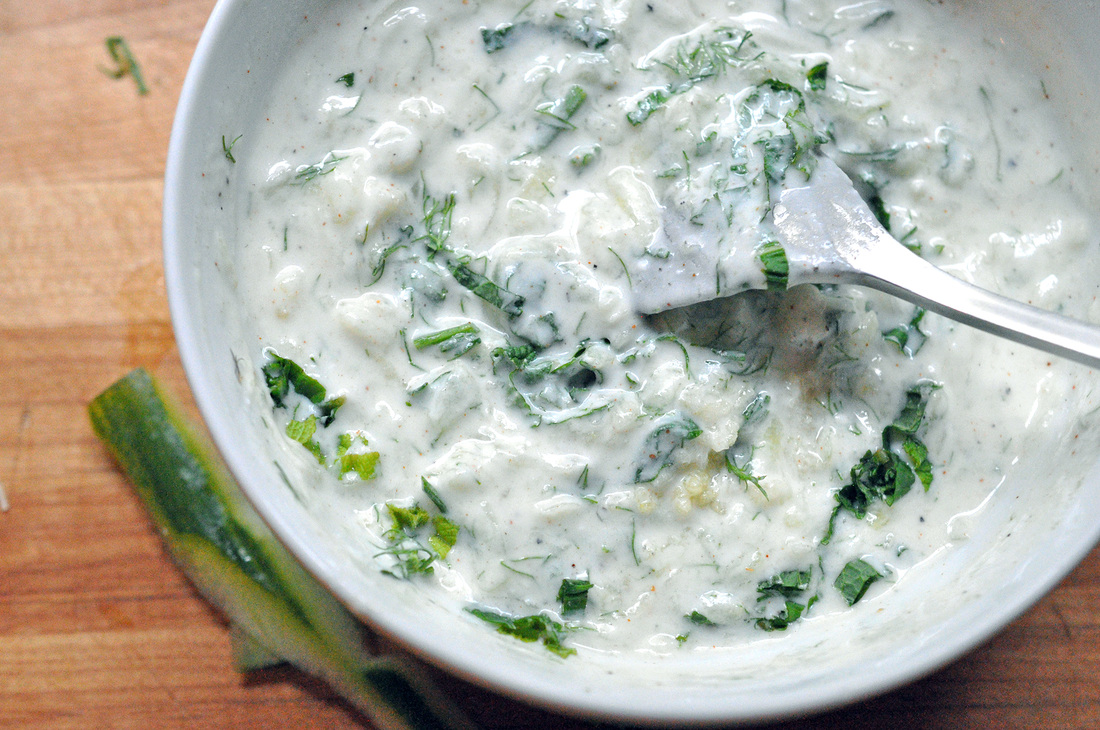
Mint Tzaziki [Prep: 10 mins, included above] [Yields about 1 1/3 cup]
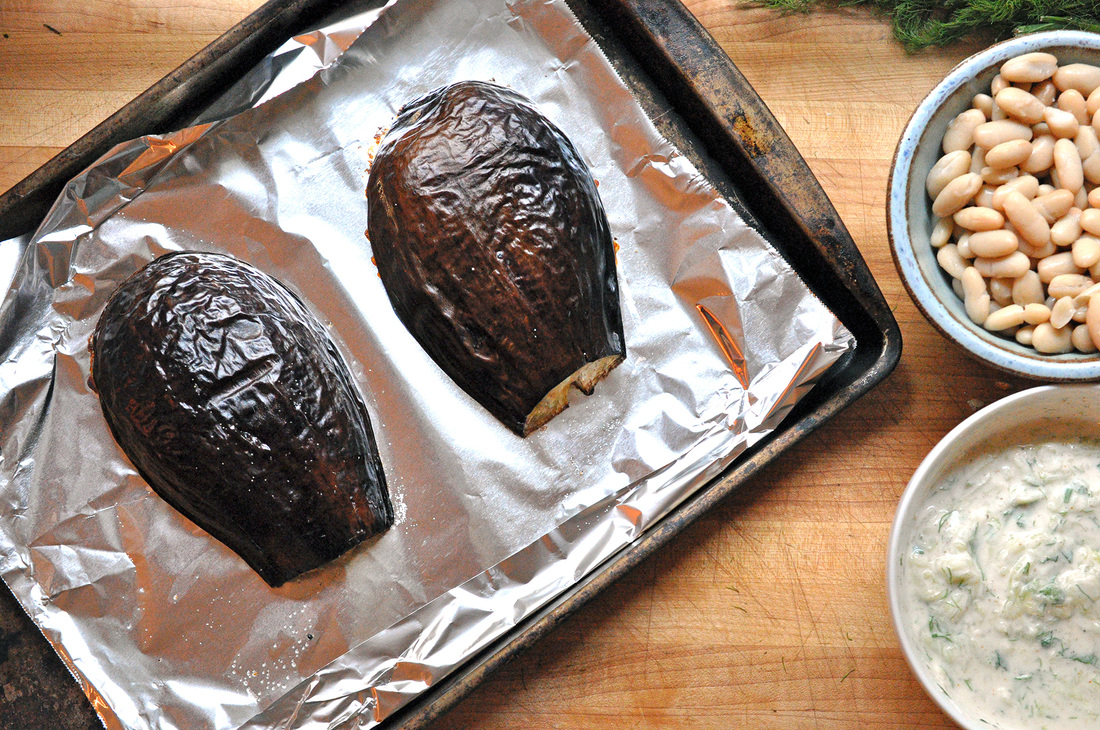
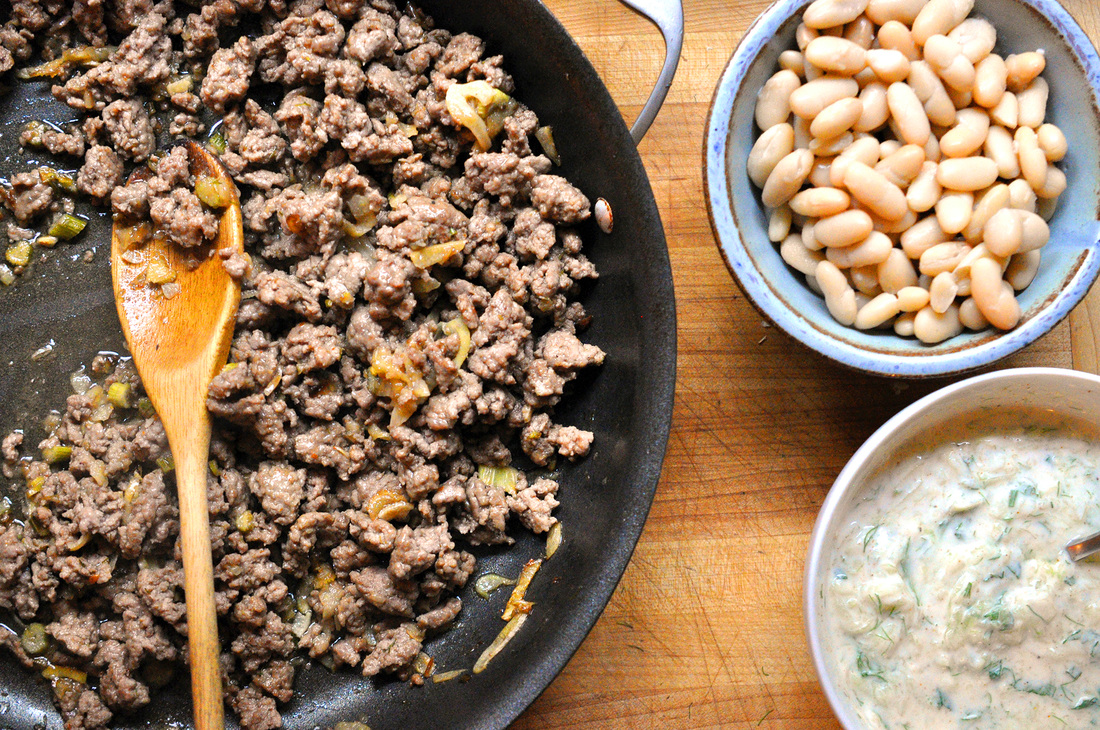
Preheat oven to 400°. The eggplant needs about 40-45 minutes to roast so lets start with that. After it’s been washed and the cap trimmed off, slice the eggplant in half lengthwise and score the flesh, making sure not to pierce the skin. Drizzle about a 1/2 tablespoon, some fresh cracked pepper and a few dashes of salt over each half. Roast face down on top of foil in on a baking sheet for 40-45 minutes. You’ll know the eggplant is finished when the skin becomes wrinkled. Meanwhile you can make the mint tzaziki. Measure out 1 cup plain yogurt into a small mixing bowl, discarding any liquid. To this add, 2 pressed garlic cloves, juice from 1/2 lemon, the paprika, salt and cracked pepper. Roughly chop up about 1 tablespoon of the fennel fronds and 8 mint leaves and incorporate. Peel and grate the cucumber into a small mixing bowl. Spoon off any liquid, pressing down with the back of the spoon helps to squeeze out any excess, incorporate with the rest of the ingredients and mix well. If you are going to be using the tzaziki as soon as the eggplant comes out of the oven you can leave it out, if you are making it a few hours a head of time then it should be refrigerated. Into a small pot add 2 cups water, a dash of salt and 3/4 cups faro. Bring to a boil – this will take about 2-3 minutes. Once the water is boiling, turn the heat down to a simmer and cover the faro. It will need about 20 minutes to cook. Set a timer for yourself so you don’t forget about it during your next steps! Now onto the ground lamb. For some reason I didn’t use my cast iron skillet [stupid stupid…] it will really get you the best browning, caramelized flavor that you want. Take a well oiled cast iron skillet let it heat up over med-high heat. You’ll want to cook the meat in 2 batches, crowded meat doesn’t brown well – and here’s the trick, once you’ve put the meat into the skillet and broken it up a little, just let it sit…and sit without touching it. It’s hard I know, but this helps the meat caramelize and not end up a gray nondescript color (and flavor). Leave it for about 1 minute before flipping and you can begin to break it up more and season with salt [about 1/4 teaspoon] some fresh cracked pepper, 1/2 teaspoon cumin, and 1/4 teaspoon red pepper flakes. The whole process will take about 8-10 minutes each batch – of letting the meat brown and then mixing. When it is ready, remove the skillet from the heat and transfer the lamb to a small mixing bowl. Return the skillet to low-med heat and add 1 tablespoon butter and the sliced fennel. The fennel will take about 5 minutes to turn a nice golden color – stir occasionally so it does not burn. Once the fennel is nearly finished add the sliced garlic and cook for about 3 minutes longer. Remove the skillet from the heat and incorporate the mixture with the ground lamb. The faro should be finished by now, reserve 1/4 cup of the water and drain the rest. Add the drained and rinsed cannellini beans to the same skillet and keep the heat on low. Heat them up slowly, stirring occasionally. Incorporate the cooked faro and 1/4 cup reserved faro water into the skillet. Add the ground lamb mixture to the skillet and about 5-6 torn up mint leaves. The eggplant should be ready to come out of the oven. Carefully flip the halves with a spatula so that they skin side down, and transfer a half to each plate. Add a few spoonfuls of lamb mixture next to eggplant and top the dish off with the tzaziki and garnish with a few mint leaves and fennel fronds. Enjoy!
 Hankering for more meat based dishes? Here are two other recipes I've been meaning to try - they're good examples of how to caramelize ground meat. Lady and Pups is a fun [daring] food blog I follow and Melissa Clark always [always] gets it right!
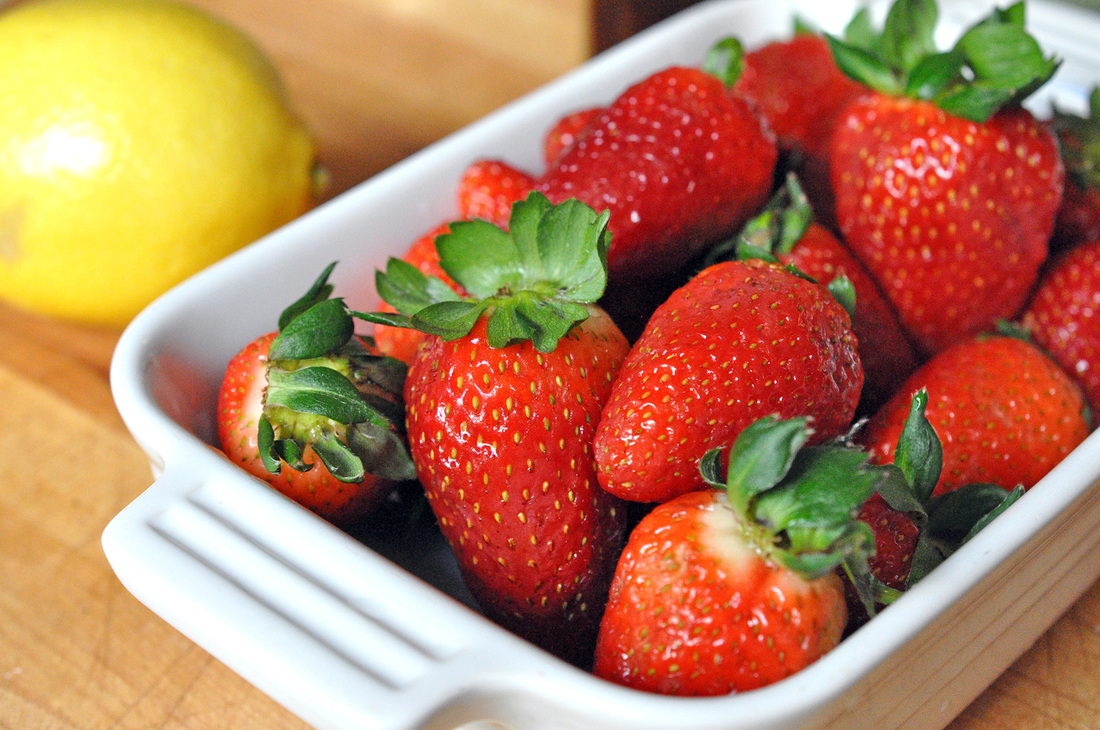
 I established in my first post from last summer that I wasn’t a baker. This fact shouldn’t be confused with me not liking to eat baked goods. Because I do. A lot. I just happen to be lucky enough to have found a guy who likes to bake - and who eats sweets more than anyone else I know. Seriously. He has a weakness for donuts and cheese filled danishes. I also do my fair share of sweet treat eating – my weakness though, definitely cinnamon buns. The problem with a lot of baking and pastry making is that there are so many steps to follow, in a very specific order, in very specific measurements to be conducted at very specific temperatures. I just can’t do it…so I try to stick to the basics and make them nice and flashy so you don’t notice how easy it was to do. When I came across a recipe for Clafoutis last summer [pronounced Cla-foo-tea, not Clawfoodie, like I had originally thought…], I was so happy because I could make it! I knew I could and it wouldn’t take me all day. Clafoutis is a French dessert originally baked with whole cherries, but you can swap the cherries with pretty much any ripe seasonal fruit. Essentially it’s a fancy pancake with fruit cooked into it, topped off with sugar, either confectioners or granulated, and finished with a dollop of whipped cream. I mean come on… I’ve tried making it with cherries, I’ve tried it with fresh figs [YUM], but right now, other than citrus, it’s sort of slim pickins down in Texas, so I found some good looking strawberries and went at it. I think this dessert – or breakfast, is a true show stopper. It looks all puffed and golden brown when it comes out of the oven and once you dust it with sugar it looks so darn pretty. I think it’s probably the near instant satisfaction of this dessert that wins me over. 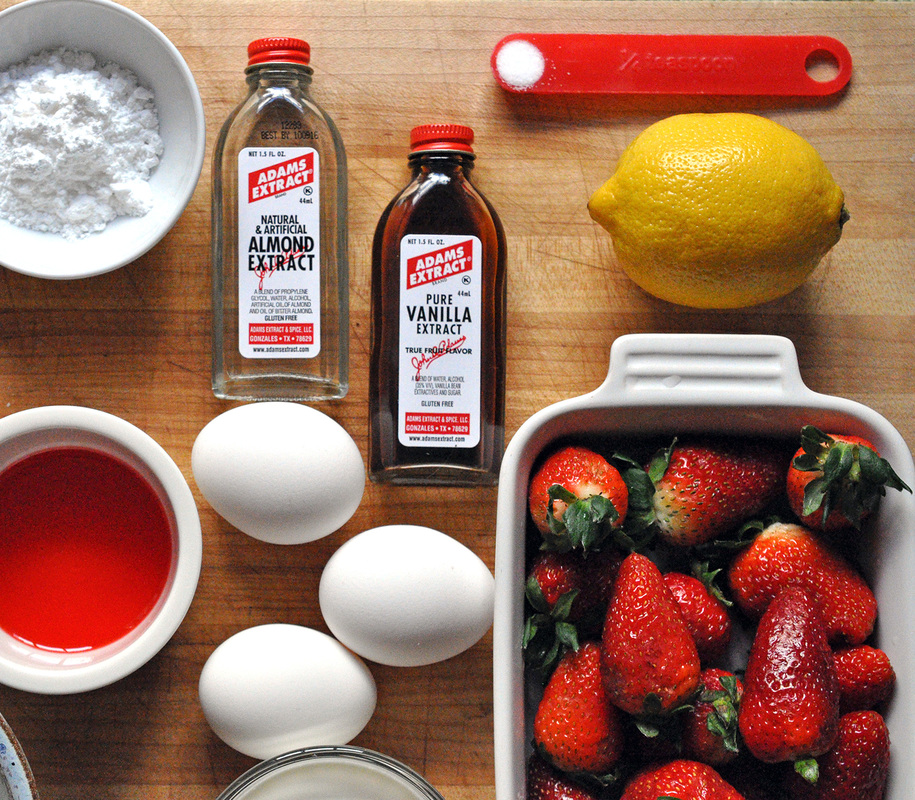
   Strawberry Clafoutis with Grenadine Cinnamon Whipped Cream PRINT RECIPE [Prep: 20mins / Cook: 40mins / TOTAL: 1hr [8 servings]
Grenadine Cinnamon Whipped Cream [Total: 3 mins] [3/4 cup]
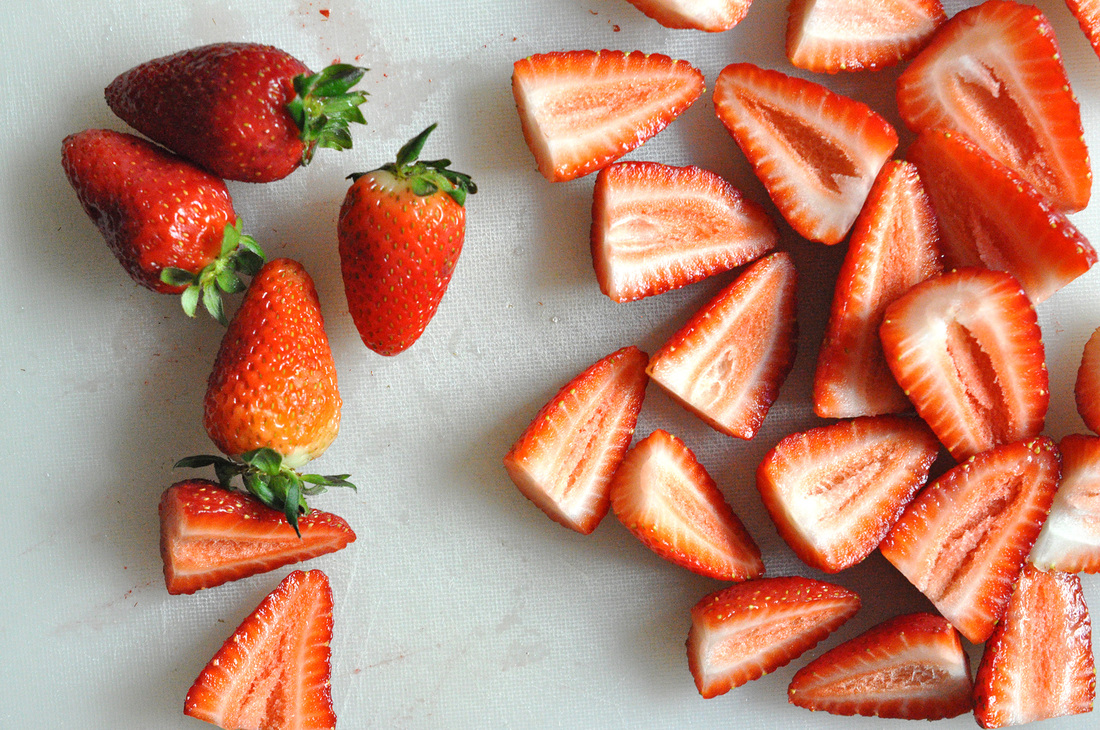
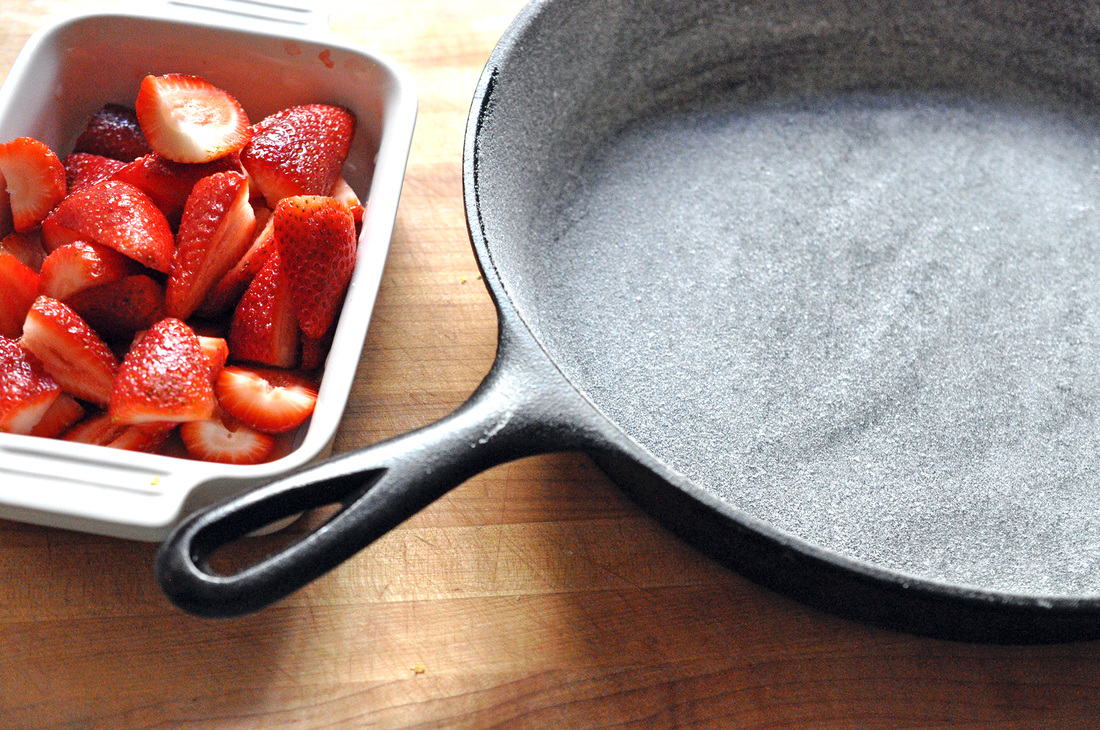
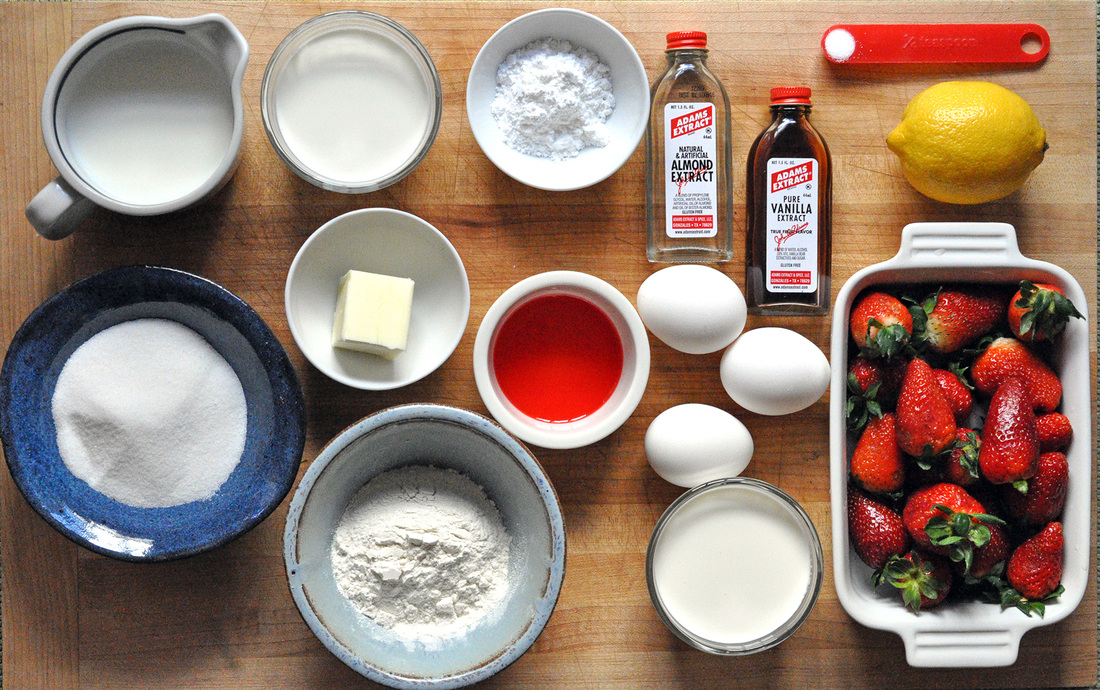
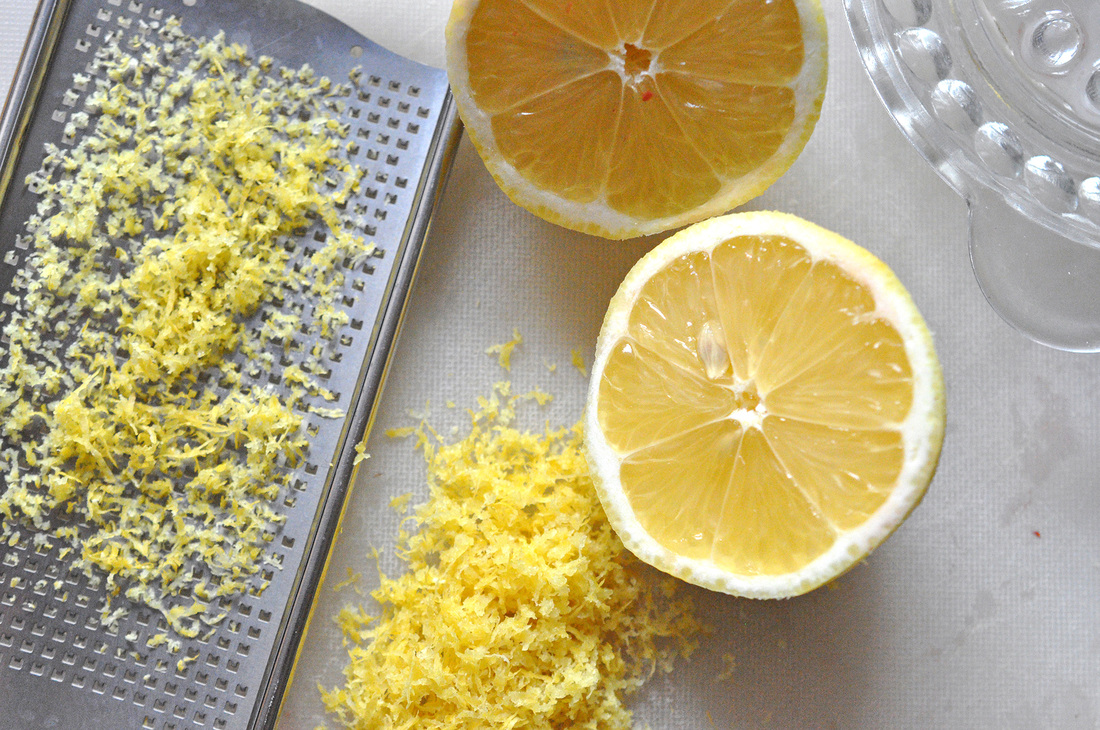
Zest the lemon and melt the butter [microwave it for 20-30 seconds]. Combine milk, heavy cream, granulated sugar, flour, eggs, melted butter, vanilla and almond extract, salt and lemon zest [reserve a pinch of zest for the whipped cream] into a blender or food processor and mix for 1 minute. Let this batter sit for 20 minutes. Rinse and stem the strawberries and cut in half lengthwise. In a small mixing bowl add the berries, 1/2 tablespoon granulated sugar and 1 tablespoon lemon juice, mix well. Preheat oven to 425°. Butter 9 -10 inch cast iron skillet or baking dish, including sides and coat with granulated sugar. It’ll take about 1 1/2 tablespoons. [If using a skillet make sure the handle is oven-proof.] Place strawberries in the skillet, spacing them out evenly. After batter is done resting, add to the skillet and put it into the oven. Bake for 15 minutes at 425°, then lower heat to 375° and bake for 20-25 minutes more. The clafoutis is finished when it is a dark golden brown at the edges. While the clafoutis is baking, combing remaining cream, lemon zest, 1 tablespoon grenadine and ¼ teaspoon cinnamon in a small mixing bowl. Beat until stiff peaks form. If using an electric blending this will happen quite fast, if beating by hand it will take about 3 minutes. When the clafoutis is done baking let it rest for a few minutes. [It is best served warm, but if served right out of the oven it looses its shape.] When ready to serve, dust the cake with the confectioners sugar and add a dollop of whipped cream to each portion. Enjoy!
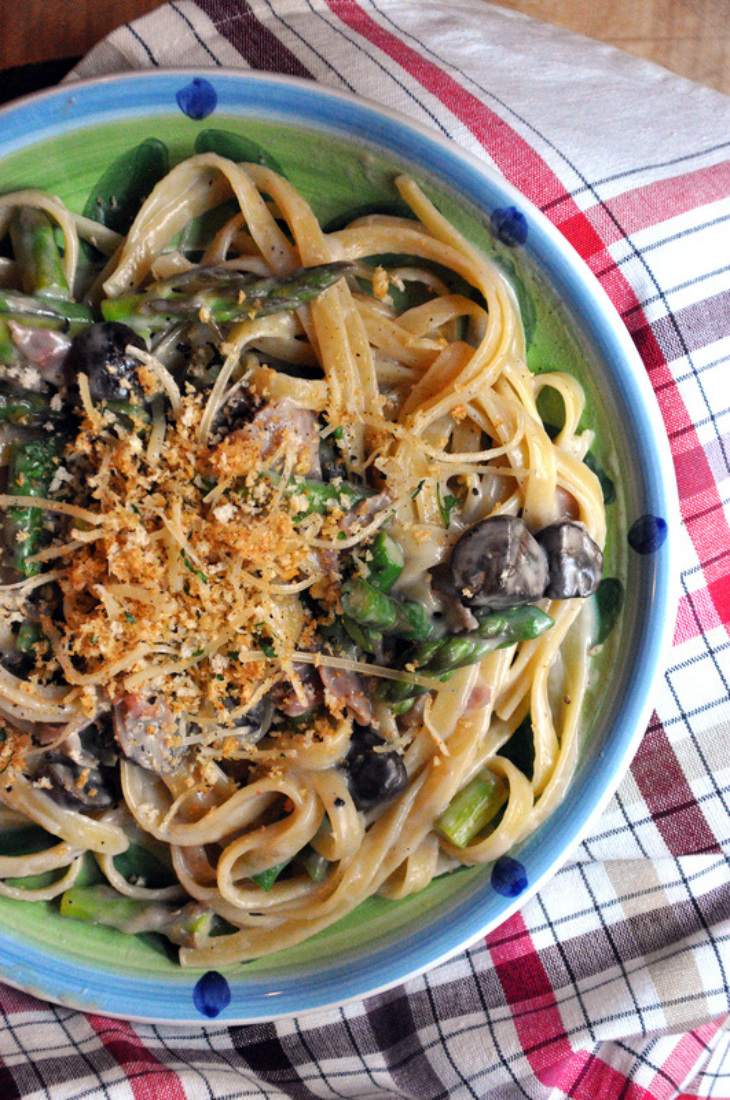
It’s sort of fun to see how much ones tastes change depending on the weather. Bright sunny days make you want to start anew and eat something healthy. Juice smoothies anyone? Rainy days are often cookie days. And cold weather…I don’t think I’ve ever heard someone say, man this cold weather is making me hanker for a garden salad with dressing on the side. No. We want stews, and steaks. We want pizzas and pastas. Oven roasted tasties, sweet and savory. So needless to say (or as I’m always thinking in my head “needles to hay”), the transition from winter to spring is a confusing time. The temperature fluctuations, pretty much all across the country, will make your head spin. Most nights what I end up eating is concocted on my bike rides home from work (when I’m not planning a meal a head of time) and recently I’ve been all over the map. One day I’m riding in a sweatshirt giddy with anticipation for spring, the next I’m hunkered down in my ski parka, ski mittens, a fleece lined hat and neck warmer. I could go on, but lets talk food. What I really wanted to talk about is this magic thing called a roux. Now it’s not very nutritious or glamorous. It’s not some new superfood. It’s nothing really, just a little butter, flour and milk full of old fashioned charm. I think it’s magical. Add some spices, infuse the milk with an herb, throw in a little cheese…and now you have a bonafide fancy cream sauce, a faux-alfredo sauce. You don’t need mountains of cheese or heavy cream, just a few basic pantry items. Now I’m not trying to label this pasta recipe as “healthy” but it does have some veggies in it, and it’s way lighter than some other cream sauces that I’ve come across. It’s still a comfort dish and I think we’re all in need of a little comfort to battle this cold winter. 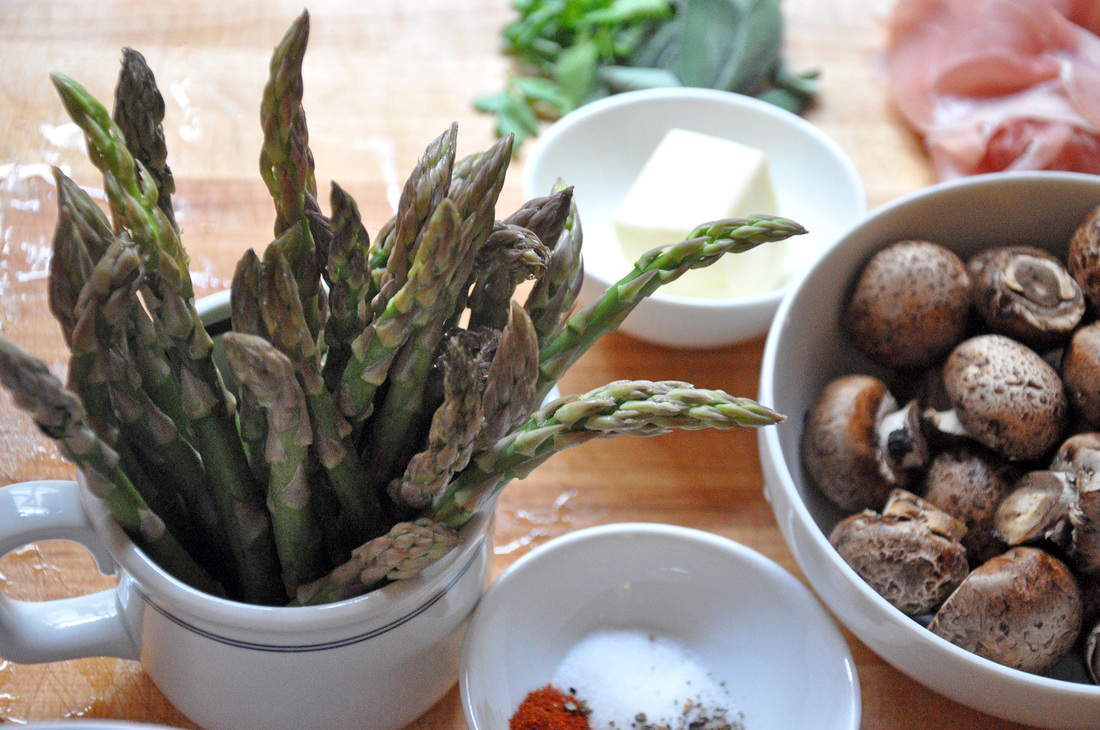

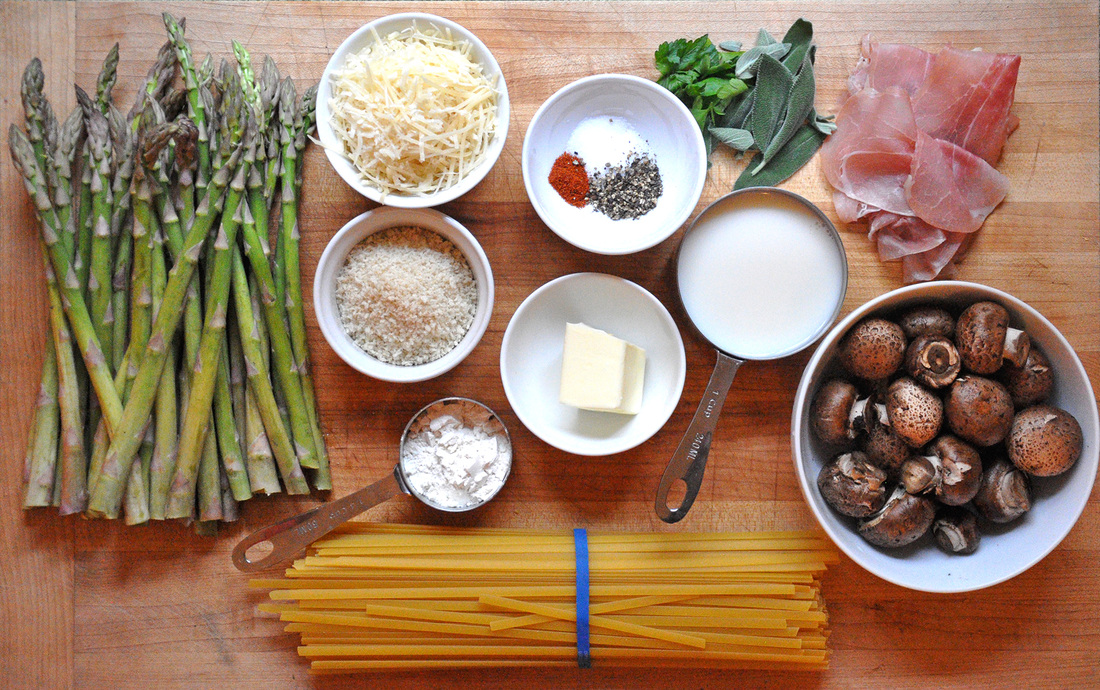
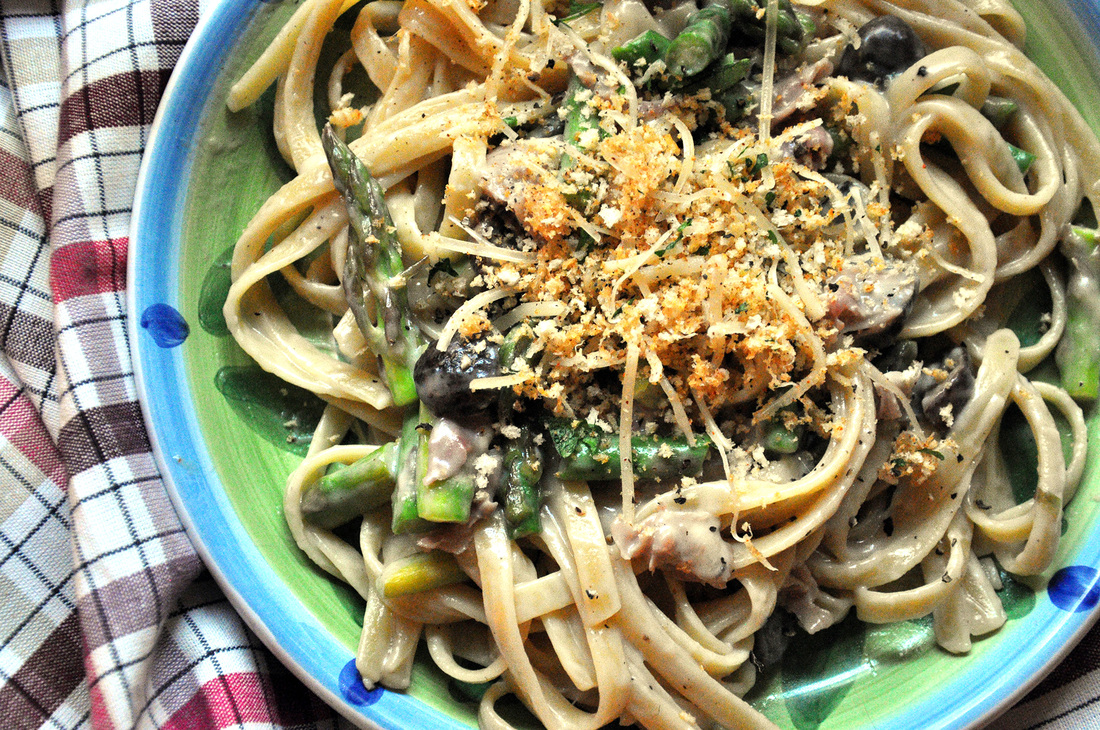
Faux Alfredo with Asparagus, Mushrooms and Prosciutto PRINT RECIPE [Prep: 10mins / Cook: 25mins / TOTAL: 35mins [4 servings servings]
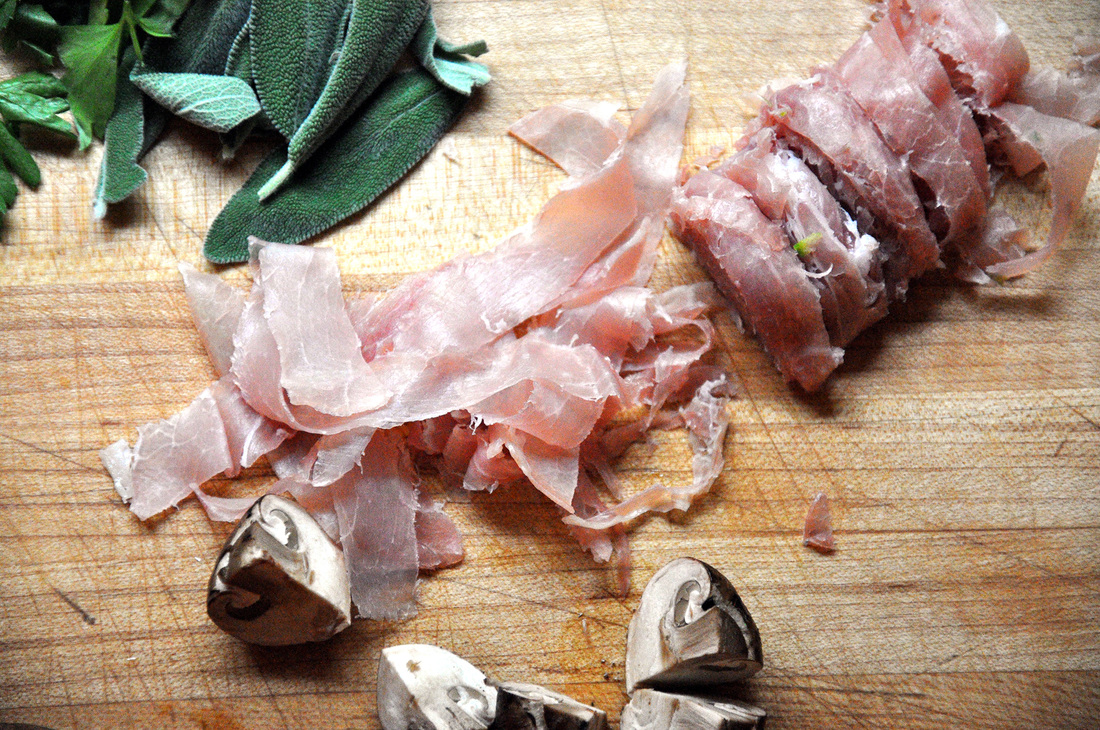
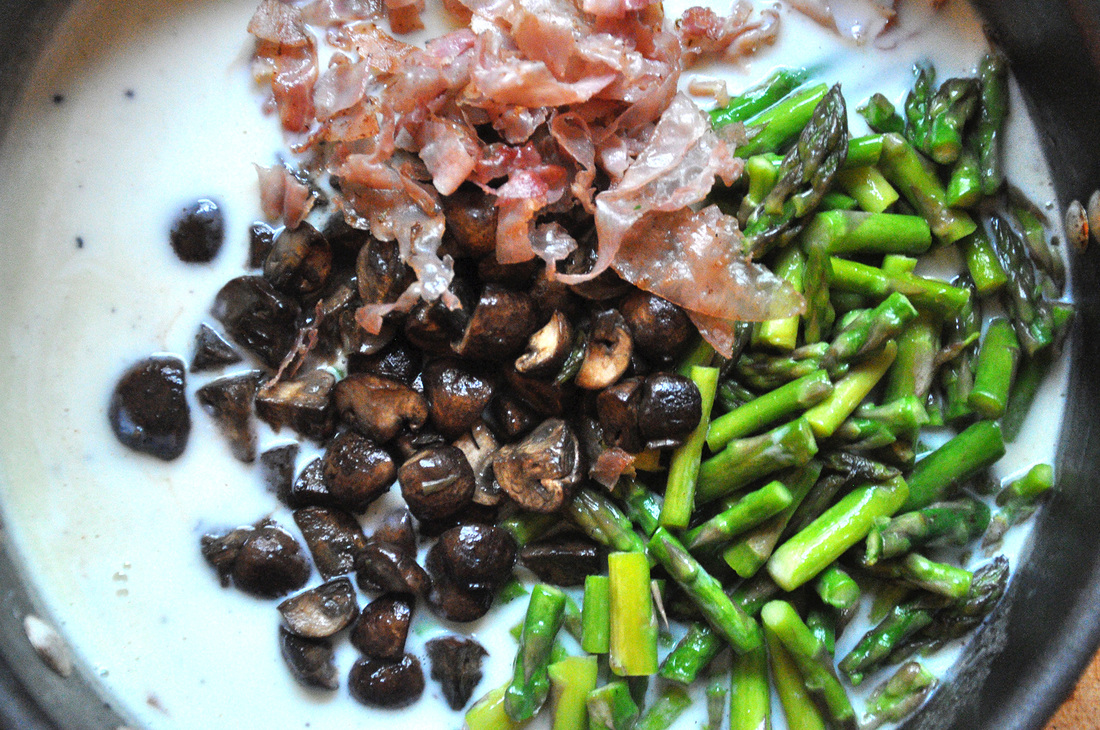
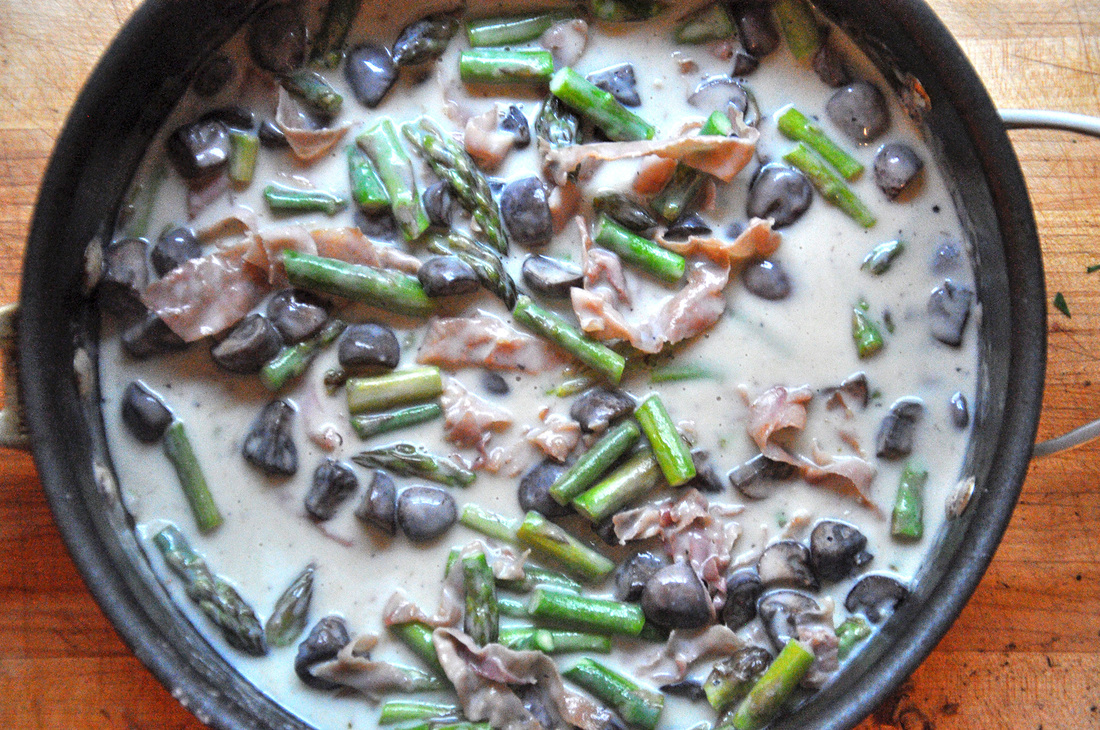
Put a large pot of salted water over high heat and cover, it should take about 10 minutes to boil. During this time you can start prepping the ingredients. Into a small skillet or saucier pour 1 ¼ cup milk, add the sage leaves and bring to a slow simmer over med heat. You’ll want to whisk the mixture so the milk doesn’t burn and stick to the bottom of the skillet. After a few minutes of simmering turn the heat to low and let sit for 5 minutes. Pour off the milk mixture into a small container, there should be about 1 cup remaining. Rinse and dry off the skillet – you can reuse it to toast the panko. While the milk is simmering you can get started on the veggies and prosciutto. Rinse the asparagus, snap off the bottoms - discard, and cut the remaining pieces into 1 ½ inch spears. Rinse the mushrooms, trim the stems and quarter. Layer the prosciutto slices on top of each other and roll tightly lengthwise. Cut into ½ inch strips. Unroll and pull strips apart. Heat a large skillet over med-high heat. Add ½ tablespoon butter, asparagus and a dash of salt. Let sauté for about 5 minutes, stirring a few times. Remove asparagus and add the mushrooms to the same skillet. Add ½ tablespoon more of butter and let mushrooms sit undisturbed for the first minute. Add a dash of salt and stir mushrooms a few times, after 5 minutes remove them from the skillet. Add prosciutto strips to the skillet, let sit for 1 minute undisturbed. Stir a few times and let cook for about 5 minutes or until crisp. The pasta water is probably boiling at this point. Add 1 box of fettuccine – or any other pasta that you have chosen, I think bowties would work really well this recipe – and bring back to a boil. If you are using fettuccine set your timer to 10 minutes. Now onto the last two elements of the dish. To toast the panko, just add a little pad of butter to the small skillet and put the heat on medium. Once it’s melted add the panko, a dash of salt, a few grinds of fresh black pepper, and 1 /4 teaspoon cayenne pepper. Let it toast for about 5 minutes, stirring occasionally so the panko doesn’t burn. Once it is finished, pour toasted panko into a small bowl and add 1 tablespoon of the grated parmesan cheese, mix well. (I had a sprig of parsley I wanted to use up so I chopped that up and added it in to the mix) The base of this “cream sauce” is the roux. To begin, melt 2 tablespoons of butter in the large skillet over med-high heat, whisk in the 2 tablespoons of flour. The mixture should be smooth, thick and start to bubble. Remove it from the heat and whisk in the sage infused milk. Put it back over the heat, but lower it to medium. Season with a little salt, some fresh black pepper, and a pinch of cayenne. Gently whisk roux until it thickens – about 2-3 minutes. Add vegetables, prosciutto and parmesan. Mix well until everything is coated. The pasta should be finished about this time. Reserve ¼ cup pasta water. Drain and add pasta to the large skillet. Mix well add a little of the reserved pasta water, cover and let sit for 2 minutes. Serve and top off with the panko mixture and enjoy!
|
All
Stuff I follow...
Not Without Salt
My New Roots Sprouted Kitchen Thug Kitchen Lady and Pups A CUP OF JO The Daily Meal Melissa Clark ...always 3191 Miles Apart The Sartorialist Garance Dore The Nourished Kitchen Archives
October 2014
|


 RSS Feed