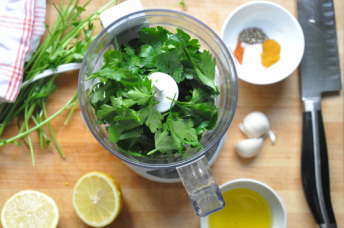
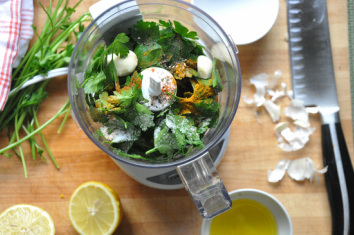
 Another day another dinner…honestly that’s sometimes how I feel. Luckily, on those days I have a wonderful guy to pick up the slack and who can whip something yummy up from the dredges of our fridge and small pantry. Other times, I have planned dinner out to a “T” for the whole week and get annoyed when he uses something up, that (in my mind) I had dibs on. It gets complicated…In the summer though, I get inspired by all the colorful produce and try to do as minimal cooking as possible – essentially leaving the veggies raw, enhancing them with some salt and pepper and fresh herbs. The veggies stay vibrant and presentation can be pretty spectacular without a ton of effort. It’s easier to do than you think, it keeps the kitchen cool (keeping the cook happy) and is super fast…you can make soups, salsas, salads, and pestos galore! I’d been hearing about green goddess dressings a lot recently - I can personally vouch for this one by Melissa Clark - and then a few weeks ago I saw a recipe for a red goddess salad dressing - which I have yet to try, but think looks pretty awesome – which got me to thinking about how my pestos are always green – delicious, but unfailingly green. So why not try a red one, I thought and why not make your first time doing it for your blog…so foolish of me. However, dressings and pestos are sort my thang, my niche, my comfort zone, so I forged ahead and thought the results were quite tasty. This recipe yields about a cup of pesto, more than you probably need for the dish, and if you don’t end up finishing it in a few days, you should freeze it. Then some day when you are spent and have no interest in cooking and are complaining that the fridge is empty anyways, your other (slightly more resourceful) half can pull it from the depths of the freezer and make something annoyingly impressive with it. 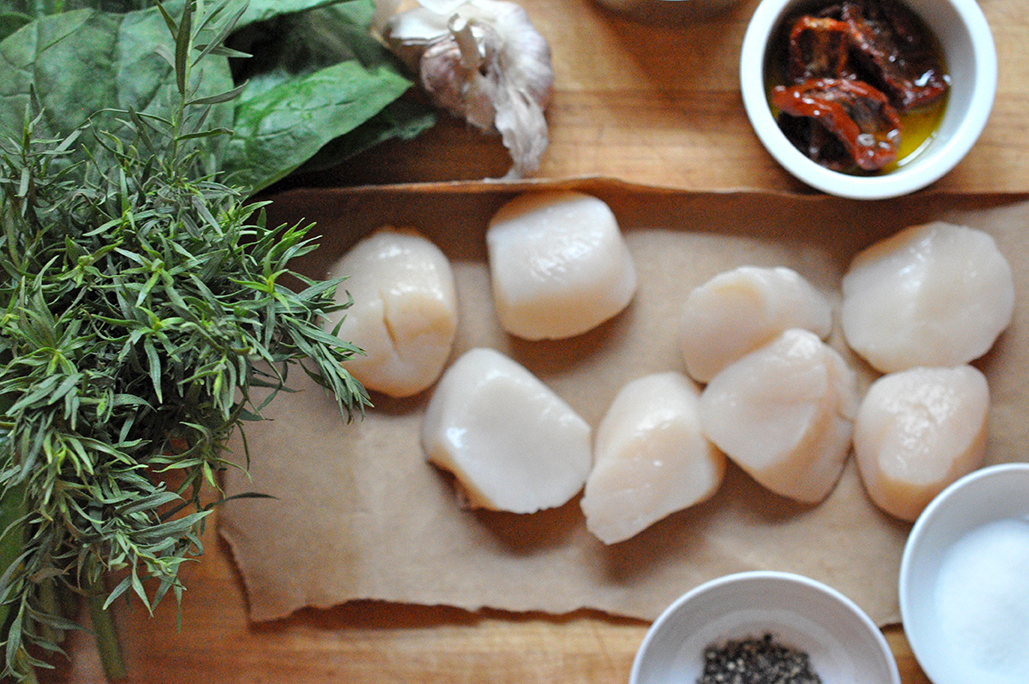 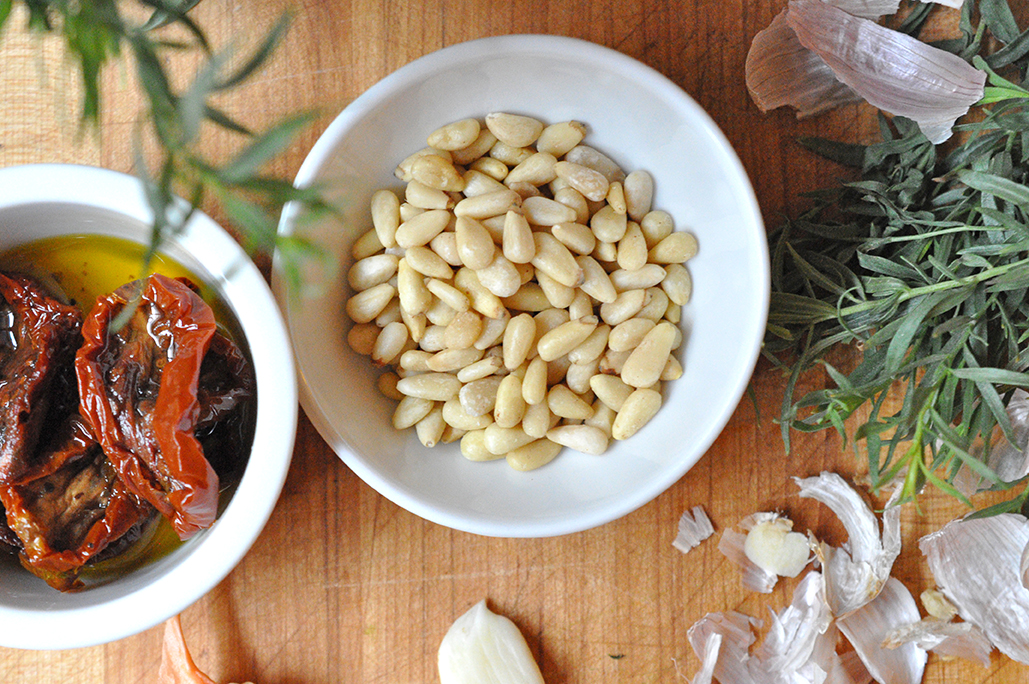
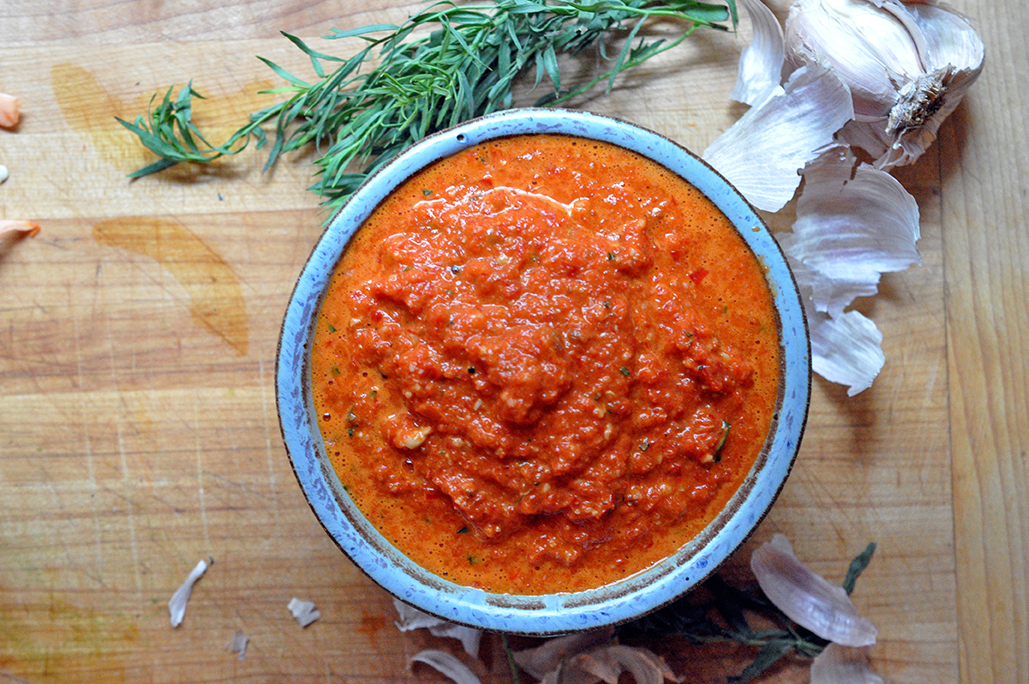
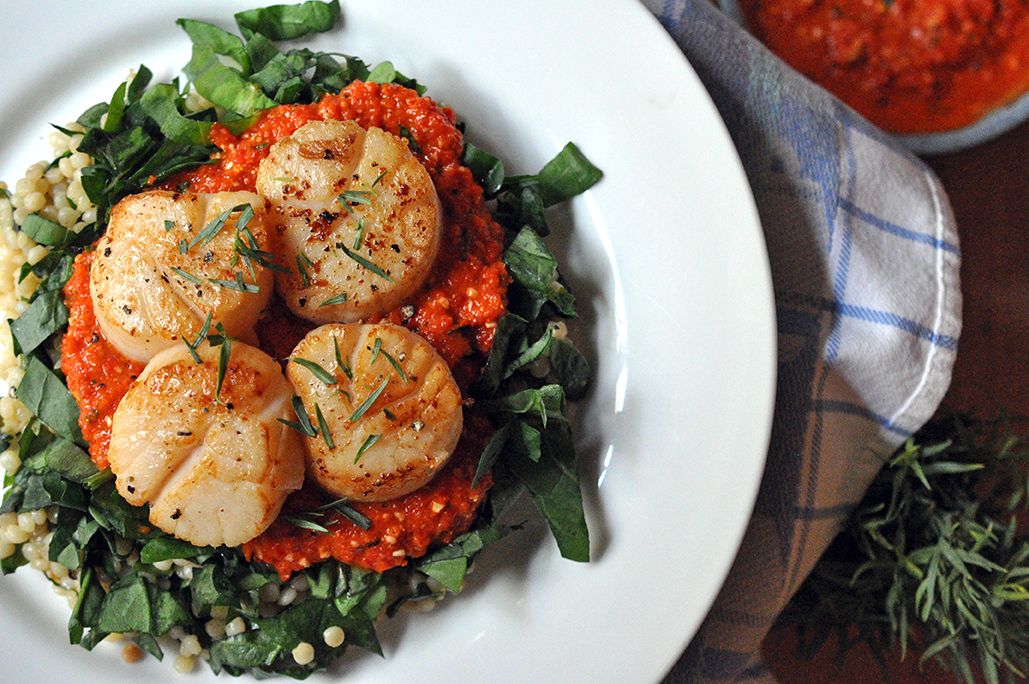
  Red Pesto + Sea Scallops Salad PRINT [Prep: 15 mins / cook time: 25min / TOTAL: 40 mins] [Serving size: 2 dinner portions, 4 app portions]
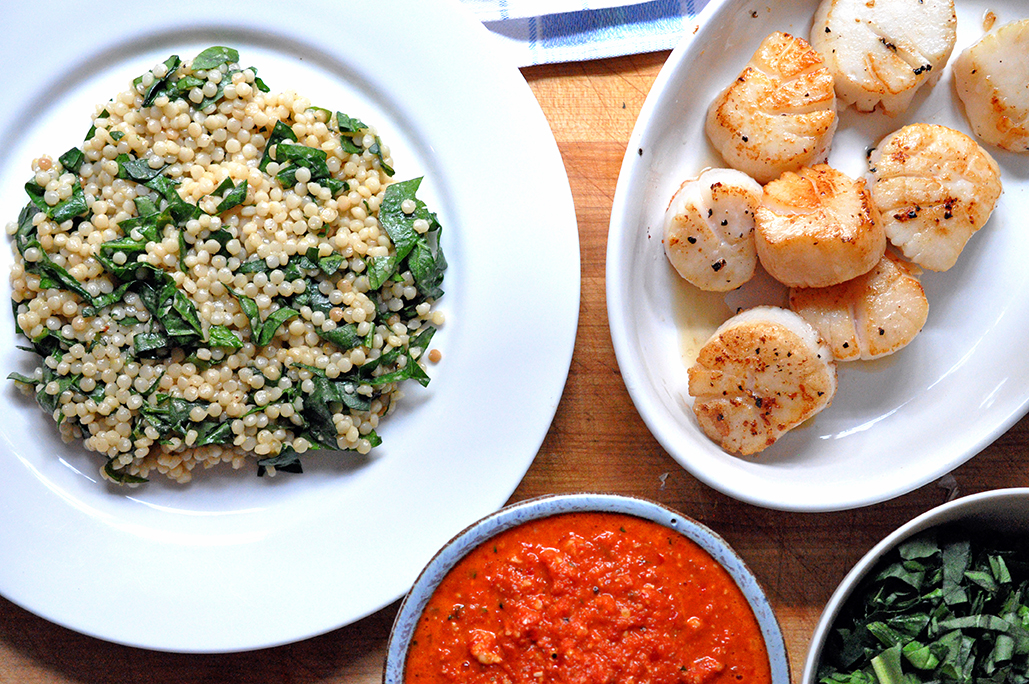
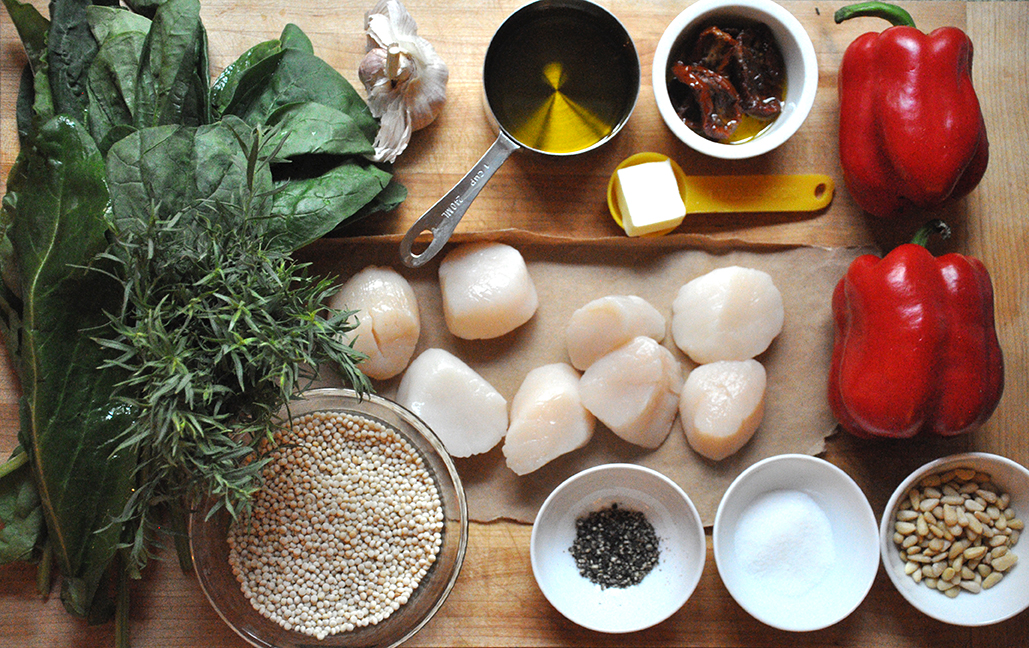
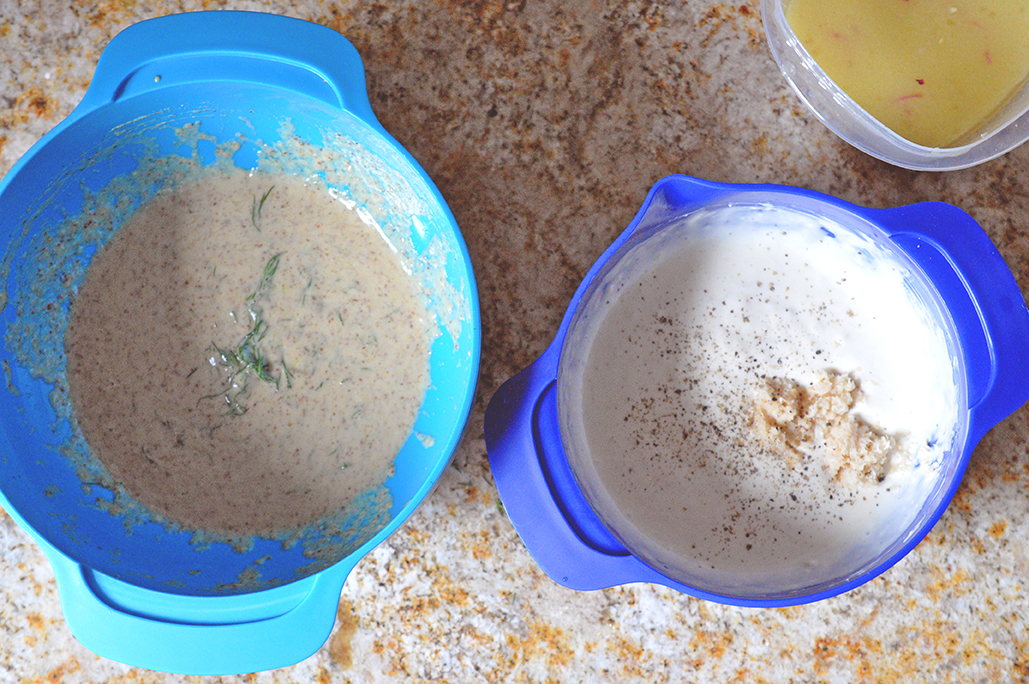
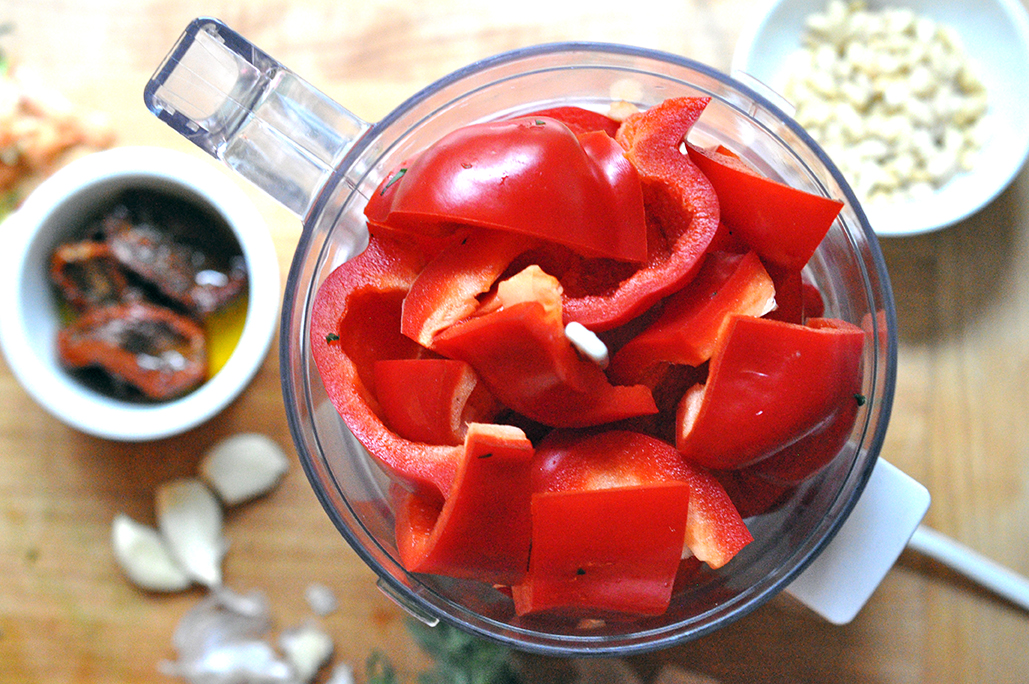
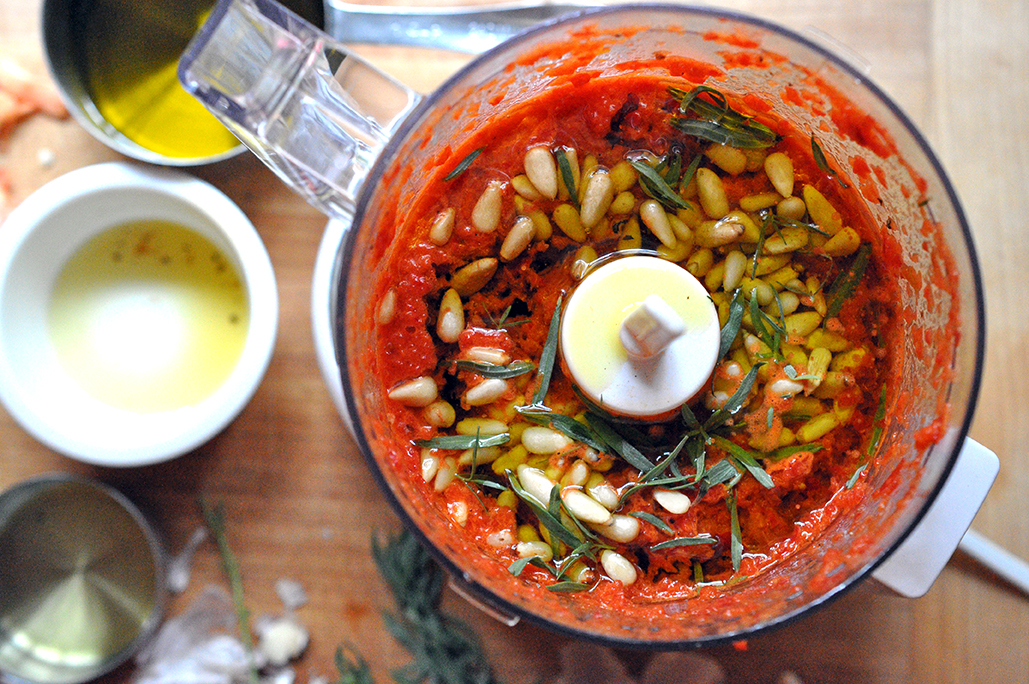
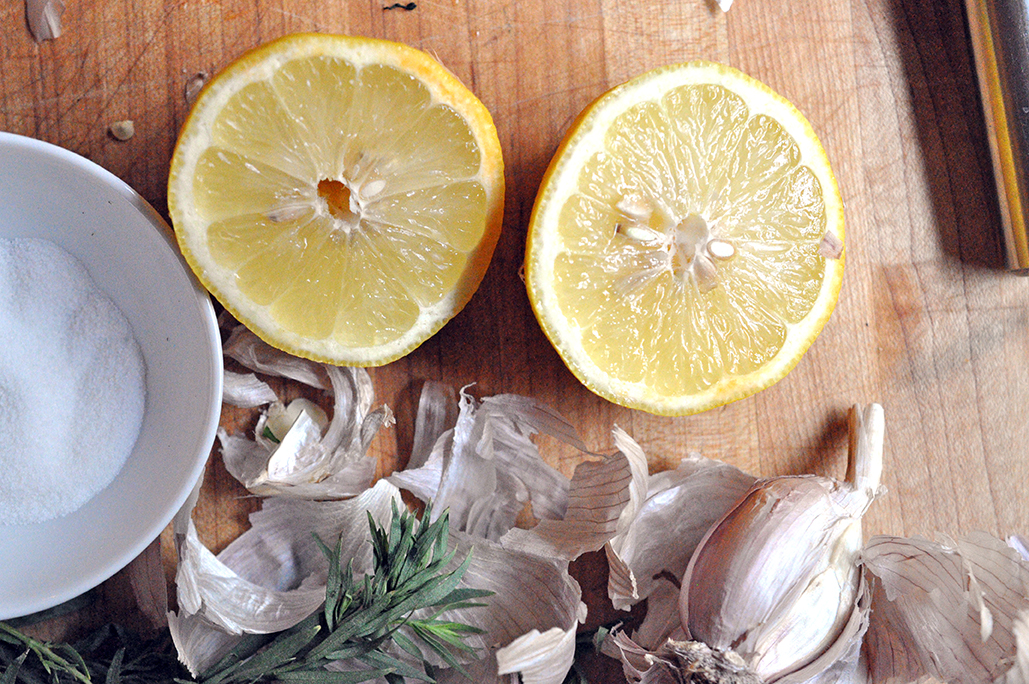
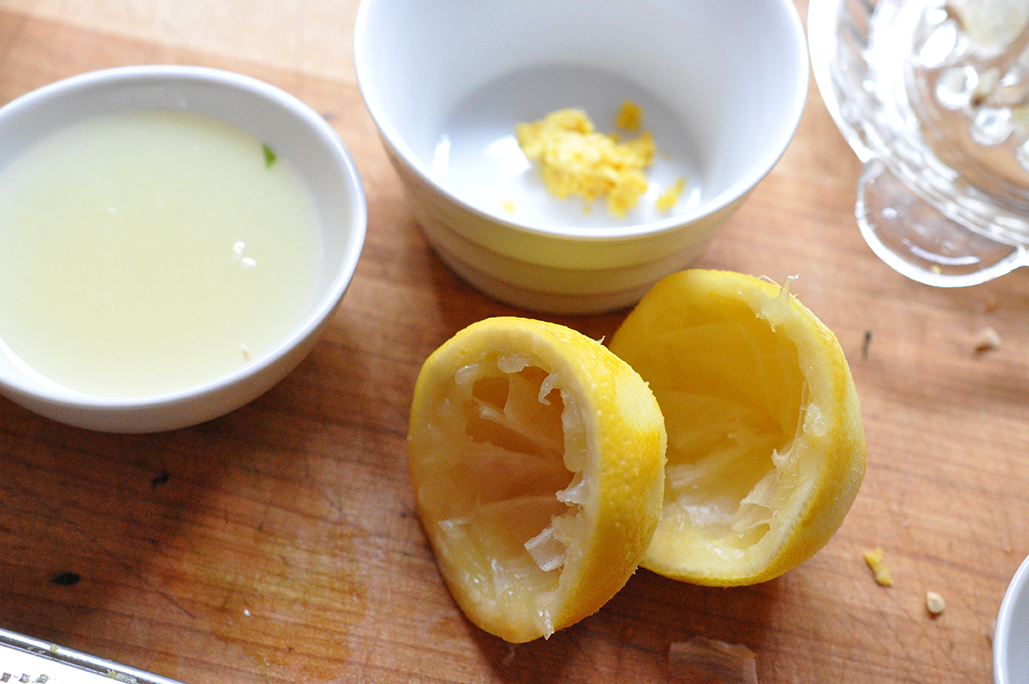
Toast the pearl couscous in a 3-quart [medium sized] pot with 1/2 tablespoon butter until slightly browned, about 3 minutes. Add1-1/4 cup water and a dash of salt. Bring to a boil over med-high heat then cover and let simmer for about 10 minutes. Wash and core red pepper. Add to blender/food processor along with sundried tomatoes, 1/4 cup olive oil, garlic, tarragon, pine nuts, a few grinds black pepper and 1/2 teaspoon salt. Blend until smooth and all ingredients are well incorporated. After washing the spinach and sorrel, cut both into thin ribbons. [Note: sorrel is more common in the spring and fall, it doesn't love the heat, so if this is hard for you to find this summer you should sub in any flavorful green you like...basil, arugula, curly endive...get creative, go crazy!] Zest and juice the lemon. Pat dry the scallops and season lightly with salt and pepper. Heat a large skillet over med-high heat and add 1/2 tablespoon butter and a 1 tablespoon olive oil. When the butter begins to foam and brown slightly add the scallops to the skillet, spacing them out generously. Let sit for 3-4 minutes until the underside is golden brown. Flip, cover and wait one minute more. Turn off the heat, remove the scallops from the skillet, add lemon juice to the skillet and step back – it will smoke a little – this will deglaze the pan and pick up all the flavor from the scallops. By now the pearl couscous should be finished cooking. Add 1 tablespoon olive oil, the drippings from the deglazed skillet and the lemon zest, a dash of salt, a few grinds black pepper and 1/2 of the greens and mix well. Plate each dish starting with the couscous, the greens, a generous layer of the red pesto and the scallops, garnish with a few leaves of tarragon and….Enjoy! 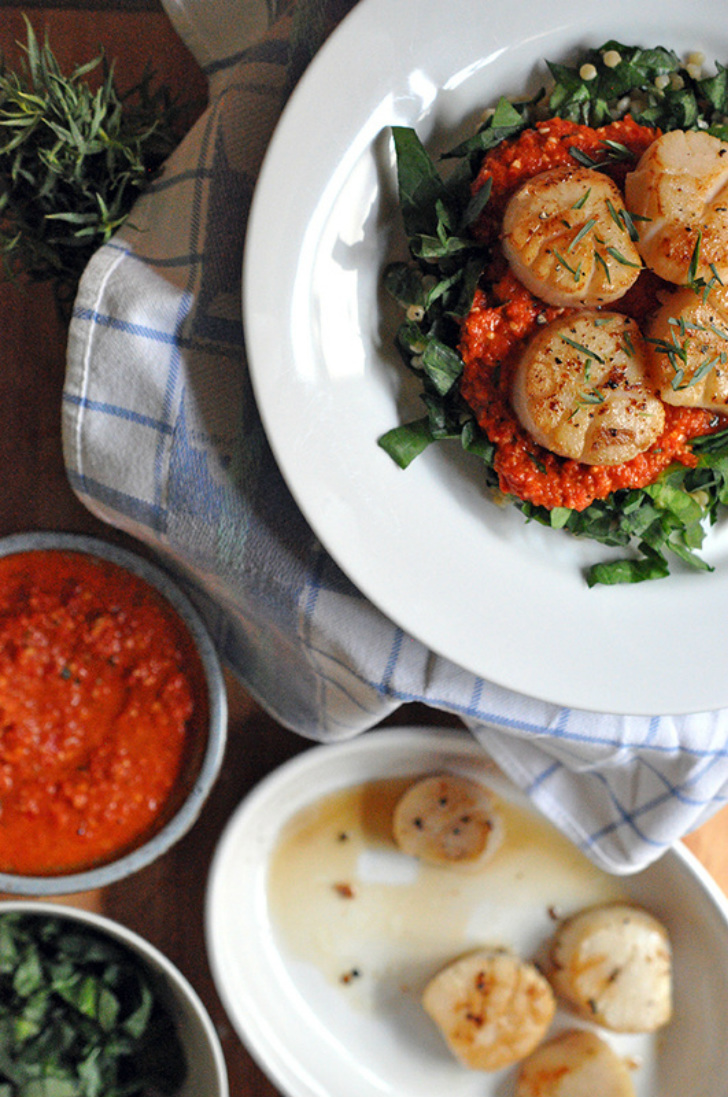
3 Comments
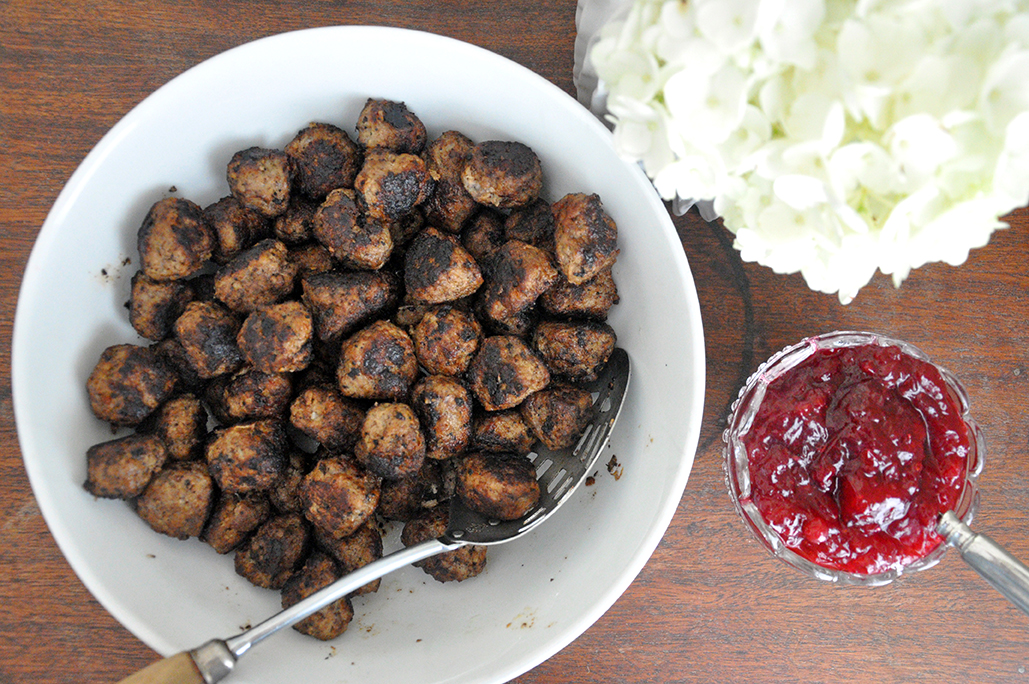
 We all have those cringe-worthy holiday family traditions - great Aunt Bethany’s jello molds at Christmas or being forced by your parents to wear lederhosen in family photos. Sometimes they are founded in fact or history, many times they remain shrouded in mystery…yet we still accept them. Why? Because it’s tradition! As children we sighed and stomped and tried to run away from them, not taking part because it was our moral obligation not to. But then we realized that we miss these silly rituals, we no longer live at home or no one makes the effort anymore because we are all adults…and soon you fear they may be forgotten. Of course some people may never even consider this, but being the nostalgic sucker that I am, I do. In fact I am the unrelenting family member encouraging a constant stream of new traditions; the few days before Christmas have become the felt decoration making time [well it happened one year]. Making cocktails with my sister and mother, any time we see each other – yes let’s turn that into tradition too! So I guess I should get to the point. When I was a little girl, my sister and I would go with my mother to Stockholm in the summer. We were visiting her sister and would get to experience the awesomeness that is Midsummer, or Midsommar as they say. It happens all over Sweden on the third Friday of June, the eve of Midsummer’s Day…whole towns of towheads in traditional Folk dress, flowers in hair, jumping dancing running around a green leafy maypole, while singing in a language I still don’t know that well – never quite understanding what was going on, but wanting to be a part of the celebration, this is Midsummer to me. It is a celebration of light, of the longest, sunniest day of the year. For Swedes it is a magical day filled with wild flowers, aquavit, herring and fresh picked strawberries – a weekend long celebration really. But no, this was not really my tradition growing up, but it was my mother’s and so by proxy over the years I have taken it on. So when my good friend and fellow foodie said she wanted to have a summer solstice party – I said, Yes! Midsommar! It happened and it was awesome. We sang Swedish drinking songs and sipped caraway flavored Aquavit, poked at Swedish meatballs with Swedish flag toothpicks. We ate pickled herring and snacked on knäckebrot with jarlsberg cheese. Why did everyone join me so wholeheartedly? Well, because it’s tradition. Just a few links in case you're curious... Swedish Midsummer Traditions A Midsummer Night's Feast at The Tasting Table Nordstjernan - Most popular Swedish Drinking Song Helan Går NYTimes 36 Hours in Stockholm 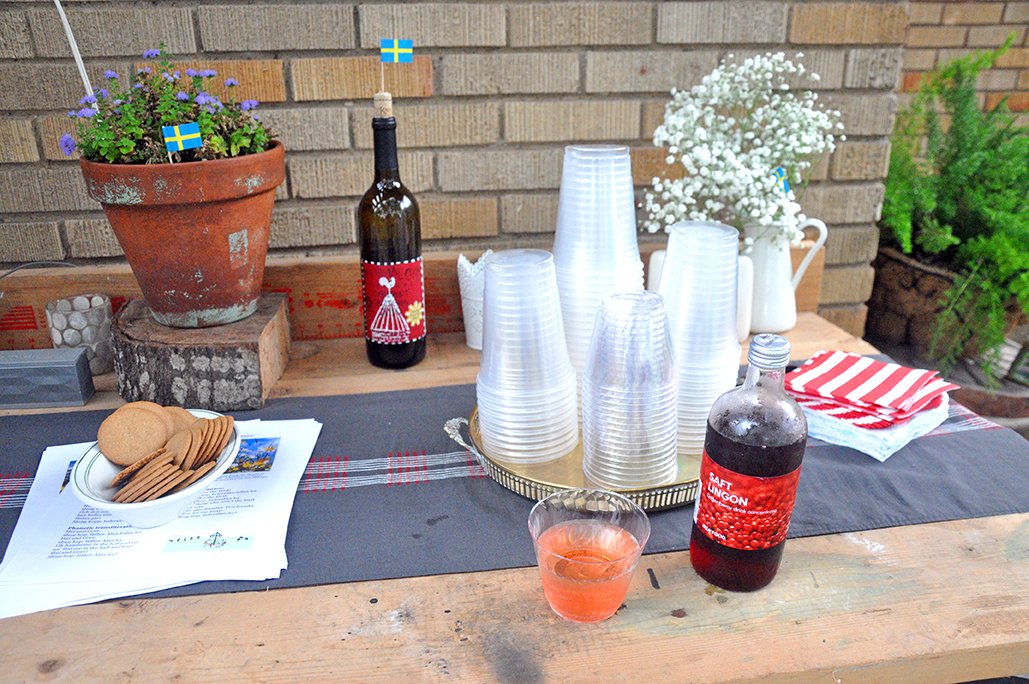 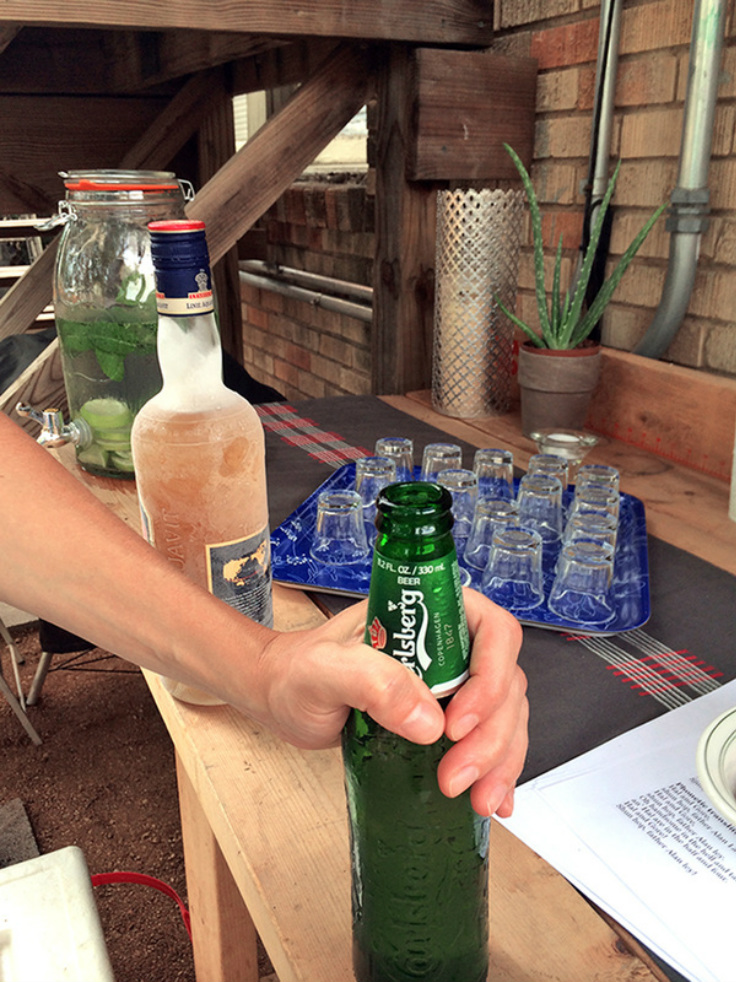 Photo by Brandon Thibodeaux  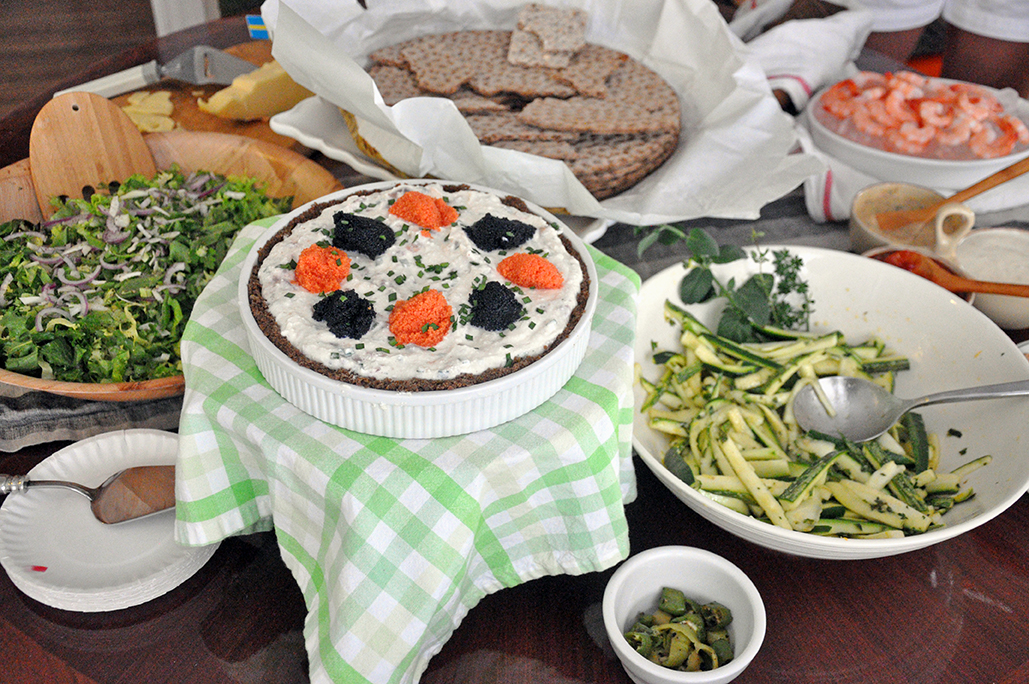 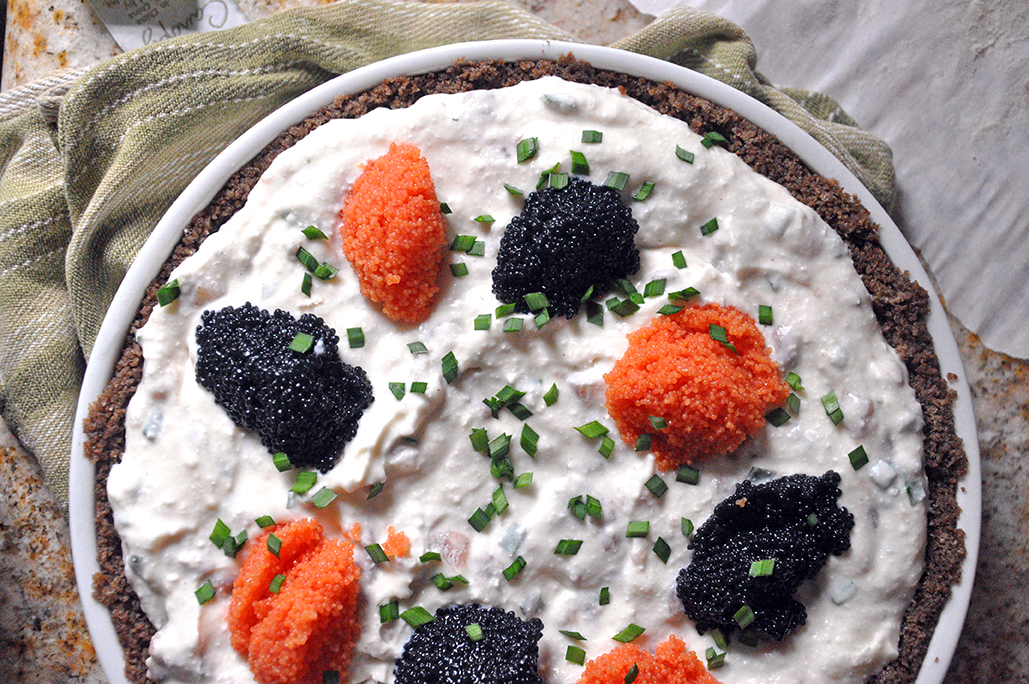
  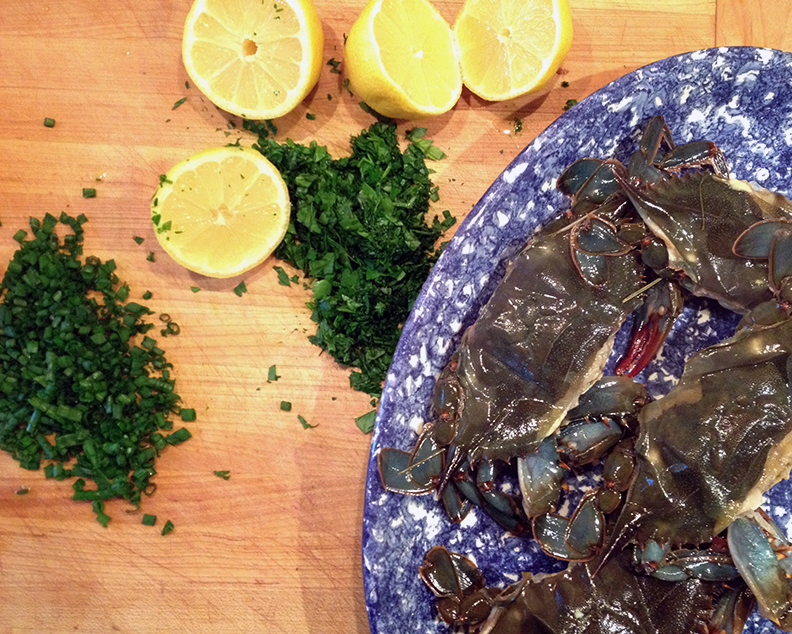 While I love to cook and play around with recipes for you all, I also love to talk to other people about food and check out what they are cooking and feeling inspired by. So I wanted to start a feature series, where every now and then I’ll head over to a friend’s kitchen, poke around and take some notes. Last time I featured Kaspar, by other, sweet-toothed, half on our camping trip, this time…my mom! Two weeks ago I was home in New York visiting my parents. I have a mom to whom I feel pretty indebted for my gastronomic passion and interest. While I may have started out as a frozen pea girl, my tasted buds have luckily developed past this naive phase. It is tradition that when I go home, my mom asks me what we should cook. This past trip I was lucky enough to be treated to some fresh soft shell crabs. These crabs have recently cast off their hard shell or “molted” it and are in season Spring through late Summer. When lightly pan-fried with the right amount of seasoning they are a little bit of heaven…crisp and salty, tangy from lemon and sprinkled with some fresh herbs. But enough, lets get my mom’s perspective... 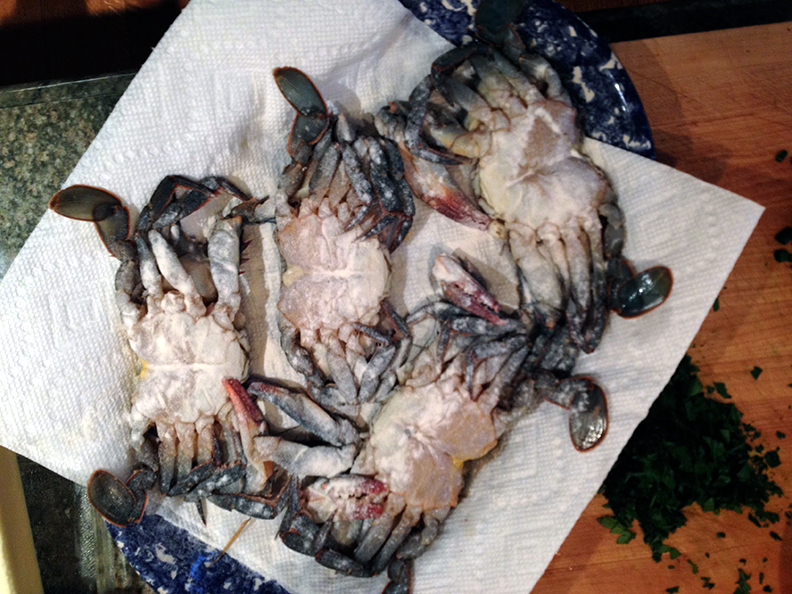 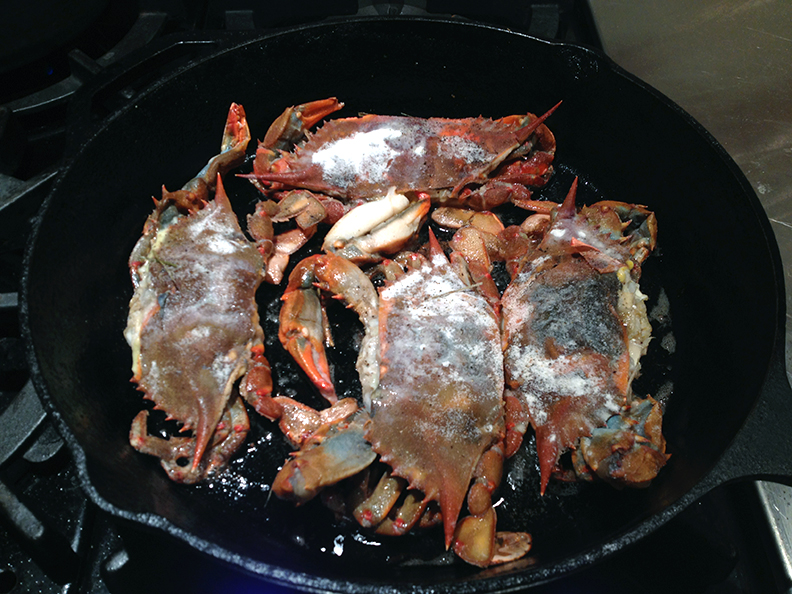 So here's how it all began... When your father asked me one spring day, a long time ago, "are the soft shell crabs in yet ?" I stared at him in confusion, not having a clue what these crabs were, nor that they were considered a seasonal delicacy. 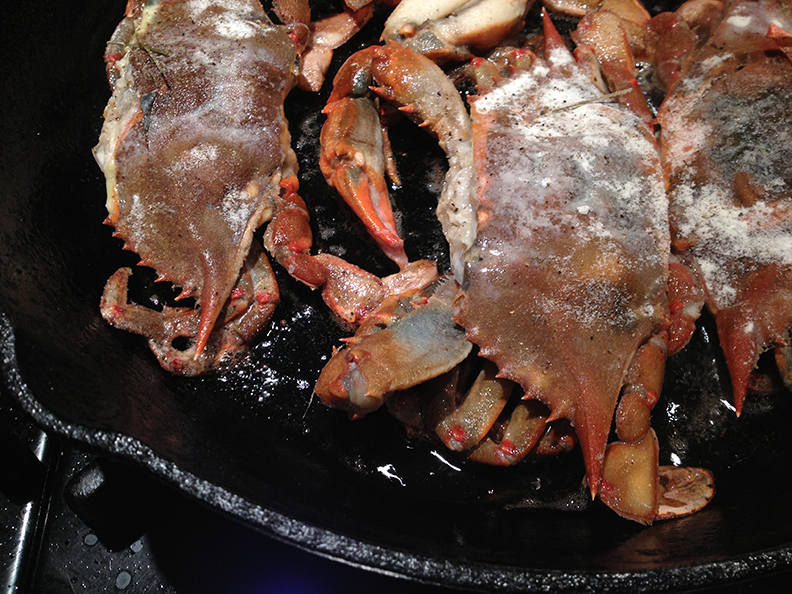 So I went down the avenue to 92 street to Holland Court Meat and Fish Market to find out. I came home with 4 small crabs, minus the heads, and didn't have any idea what to do with them. This was 1971. In those days there was no Internet, no Google , no Food TV - only cook books ! And I took down my fat as bricks 2 volume set of " The Gourmet Cookbook " , so handsome with their burgundy covers with gold scroll…sure enough - I found inspiration there. I learned how to soak them in a mixture of milk, garlic, onions and herbs, then drain them and dredge in flour and sauté them in butter [and learned fast to use a mesh screen - the crabs pop with a cheerful sound and get juices all over!]. 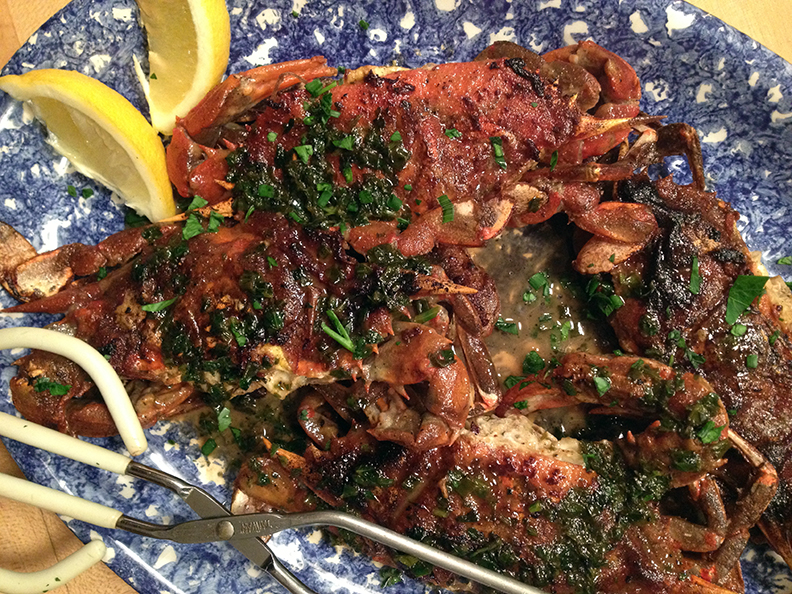 To finish them off, I would melt butter, add lemon juice and parsley [this was my father's go-to for all sautéed fish] and pour it over them - and I was sold! The legs were crunchy and delicious and the body fleshy and moist - truly a seasonal delicacy!! I taught myself how to cook in that bright simple little kitchen... and all these years later I still make the soft shell crabs this way and your father and I look forward to that first bite of the season.
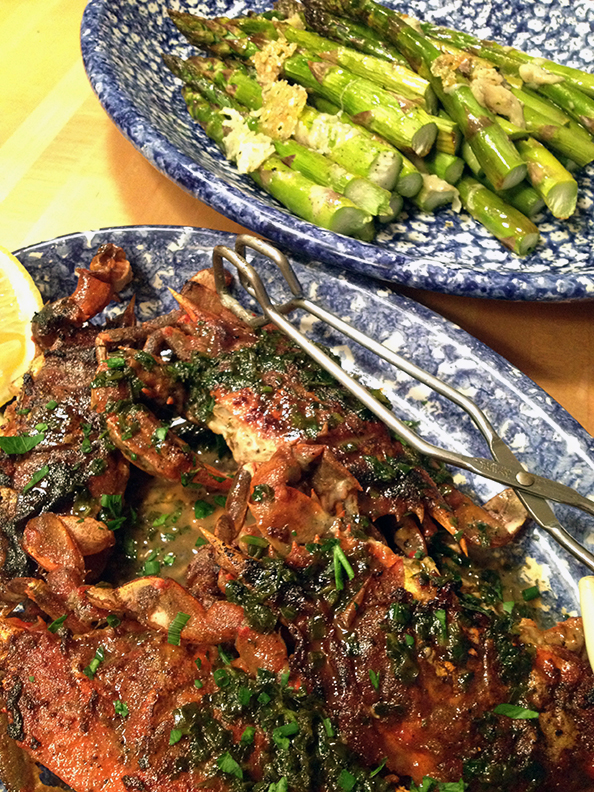
Soft Shell Crab PRINT RECIPE [Prep: 30mins / Cook: 8mins / TOTAL: 38mins] [Serving size about 1 crab per person, earlier in the season the crabs are smaller so you may want to get 2 per person]
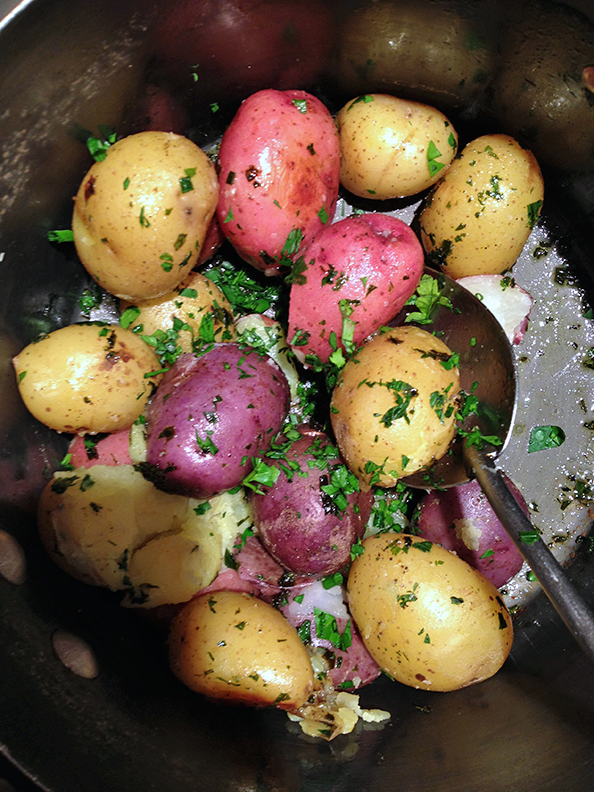
Optional sides: Green beans or haricôt vert: washed and ends trimmed, blanched ahead of time for about 2 minutes with just enough water to cover them. Tossed in ice bath and set out to dry for a few minutes. Then quickly sautéed in olive oil with slivered garlic and red pepper flakes Roasted asparagus with parmesan cheese: washed and ends snapped off, lightly tossed in olive oil and seasoned with salt and pepper, evenly spread out on baking sheet. Cooked in oven at 400° for about 10-15 minutes, depending on the thickness of the asparagus. Remove from oven, turn on broiler and grate enough parmesan to lightly cover the asparagus, return to oven for 30 seconds under the broiler. Boiled small potatoes lightly pan fried with fresh herbs and butter: bring potatoes to a boil over high heat in a deep skillet with just enough water to cover them – you’ll want most of the potatoes touching the bottom of the skillet. Let boil for about 10 minutes. Drain potatoes and turn the heat down to a simmer, add 1 tablespoon butter and toss with herbs of choice. Let them lightly pan fry while you finish cooking the soft shell crabs. Mixed green salad tossed with lemon and olive oil. You can serve the crab on a bed of this salad – makes for a pretty presentation! Most seafood stores will have already cleaned and prepped the soft shell crabs before you bring them home - keep them in the fridge until you are ready to cook them. Pour the milk into a shallow bowl and add 1/4 cup parsley, 1 tablespoon chives, onion, garlic, 1 tablespoon lemon juice, a few dashes salt and a few grinds fresh black pepper. Add the crabs and let soak for about 25 minutes. There should be enough milk to cover the crabs, if not then adjust amount. If you are making side dishes you should prep/cook them now. Remove the crabs from the milk mixture and pat dry. Dust entire crab with flour. Place large cast iron skillet over med-high heat and add 1 1/2 tablespoons butter. When butter begins to foam add the soft shell crabs bottoms down first, evenly spread out and let cook for about 3-4 minutes, or until golden brown - make sure to have a splatter screen ready, you will need it! Flip the crabs and finish cooking top side down for 3-4 more minutes, also until they are golden brown. Remove them from the skillet and add 1 tablespoon butter, scraping up all the browned bits and add a few pinches parsley and chives [leaving a little of both for garnish] the remaining lemon juice and white wine. Stir well and let cook down for 1-2 minutes. Evenly disperse the white wine sauce over the plated soft shell crabs and serve with your sides. Enjoy! 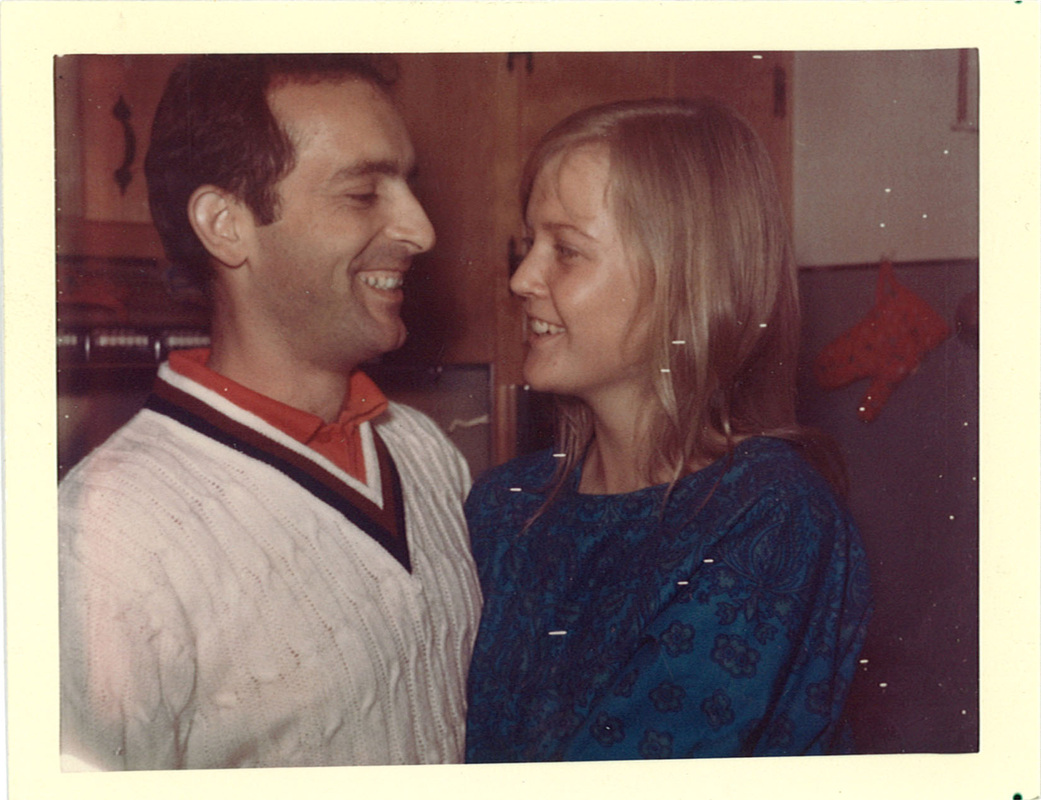 Soft shell crabs please! [early 1970's] 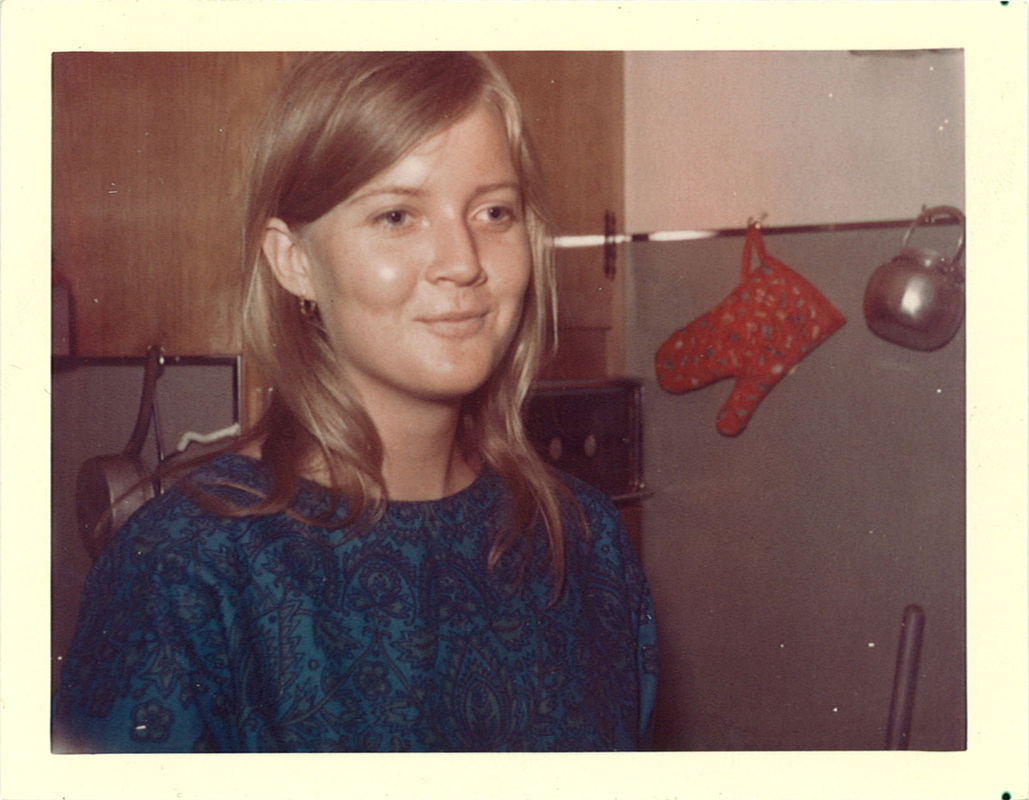 Mom [early 1970's] 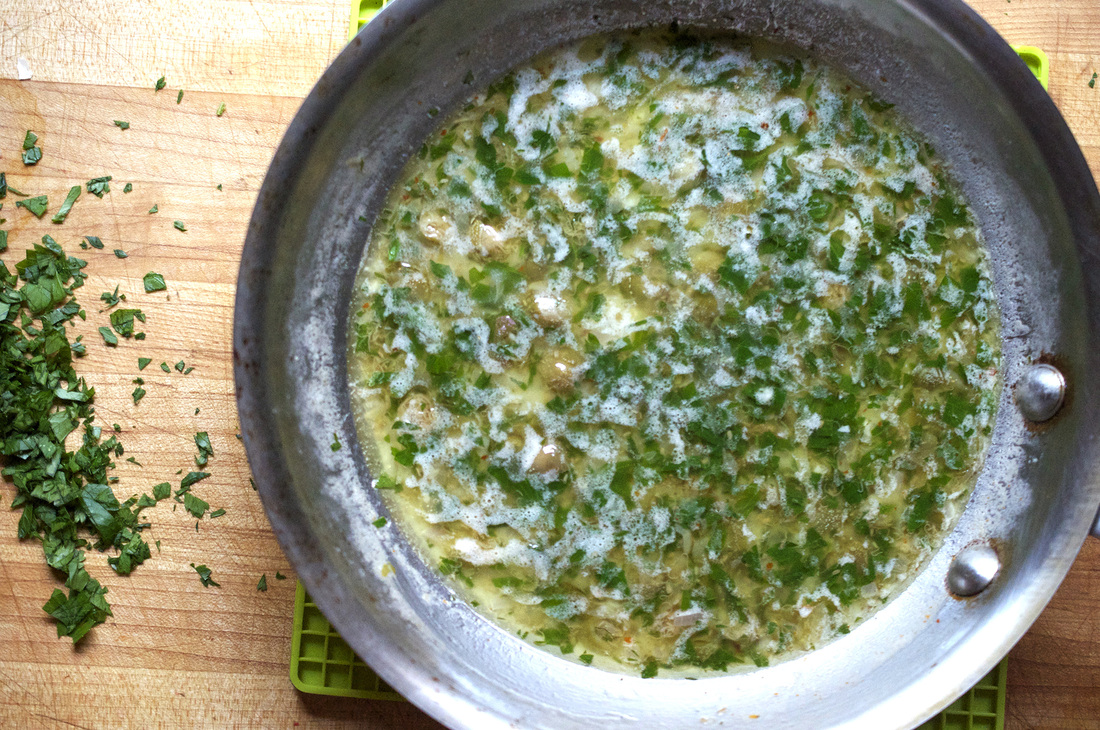
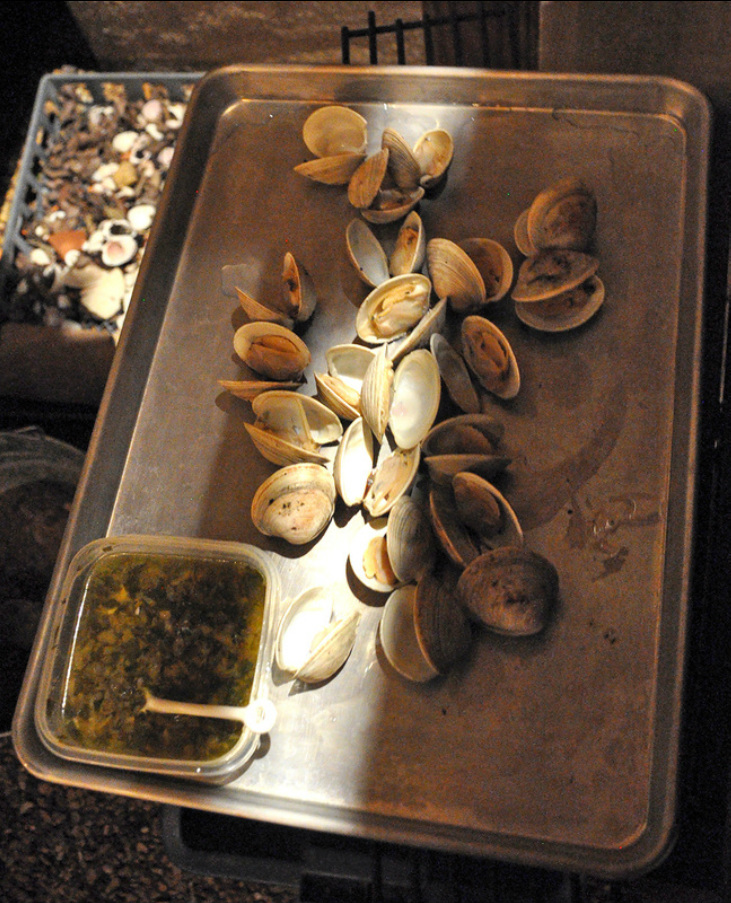
Hands down, my two favorite dishes to have when the weather starts to feel like summer are basil pesto and grilled clams. I could alternate these meals and eat them for days…I mean I would try, have tried…You could probably cook the clams in a cast iron skillet or in an oven, but there’s something about grilling, right? Nearly everyone has a fond childhood memory or two of eating corn, bbq chicken, ribs, or skewered veggies hot off the grill with friends and family nearby. Things can get messy, but the food always tastes great. So when I was recently invited over to my friend Marin’s house to grill, I piped in, “I’ll bring the clams!” My exclamation was received positively with perhaps a little bit of doubt. Down here in Texas I’ve had some dreamy grilled meats, from falling off the bone ribs to buttery brisket, to hot links and perfectly seasoned burgers – but what I'm always thinking in the back of my my mind is...where's the grilled seafood. Spending summers out on the east end of Long Island I grew accustomed to a normal (constant) intake of super fresh summer seafood. Softshell crabs fried in butter (sigh), seared sweet bay scallops, salty oysters, big plump blackened shrimp, and stuffed clams. To be honest it pains me to reminisce…but I’ve traded one tradition for another. I wish I could bring the smoky salty brisket with a perfect bark back for my parents to experience. 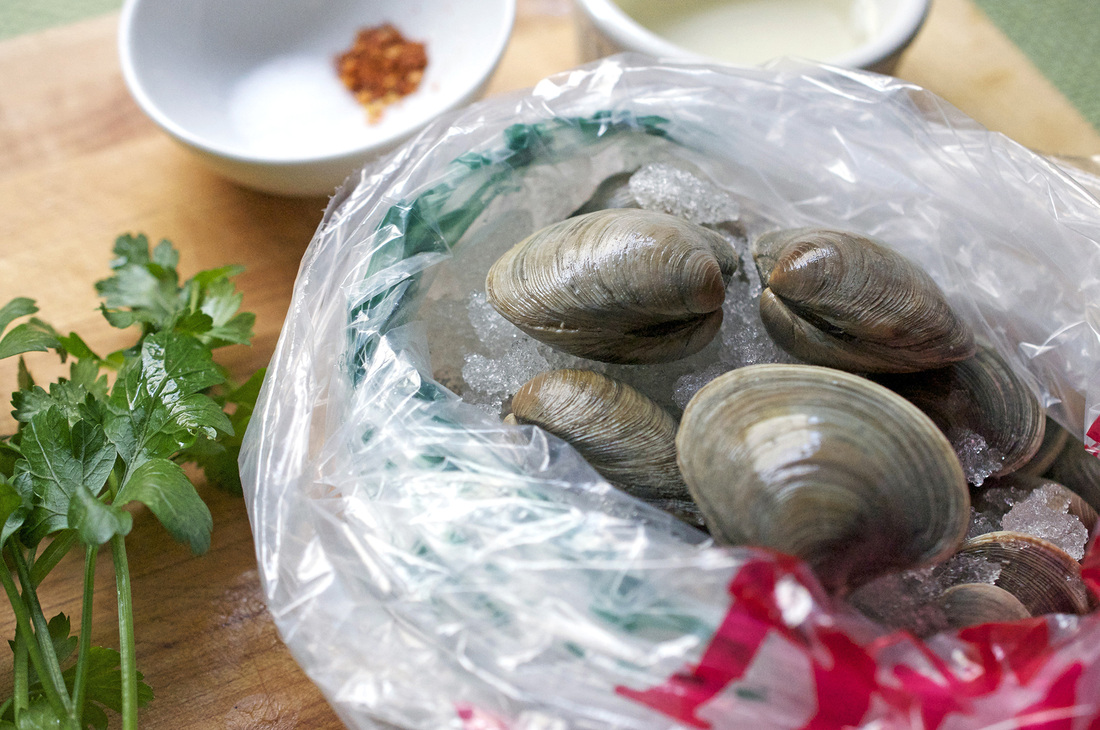
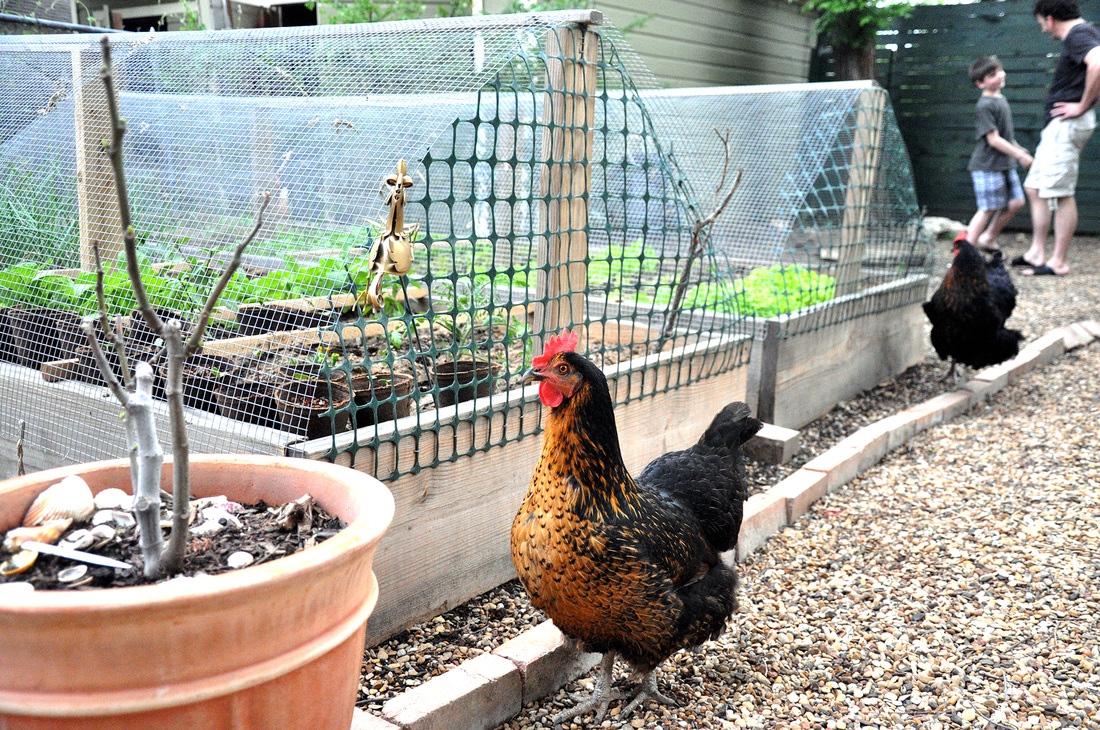
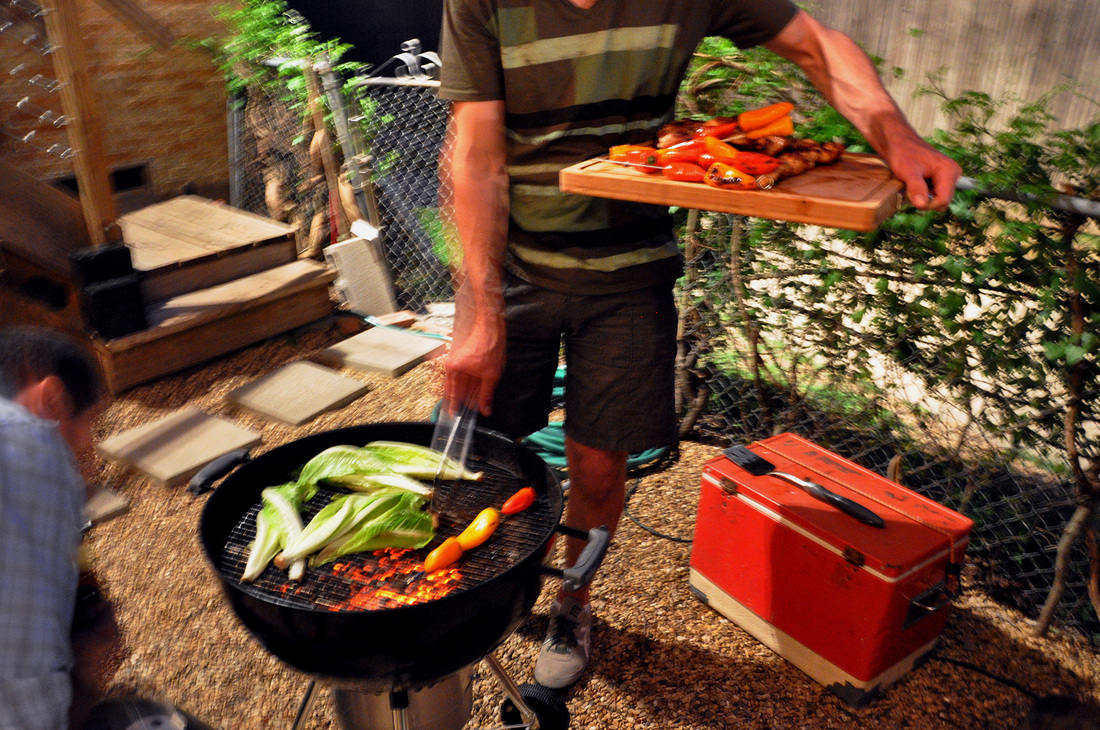
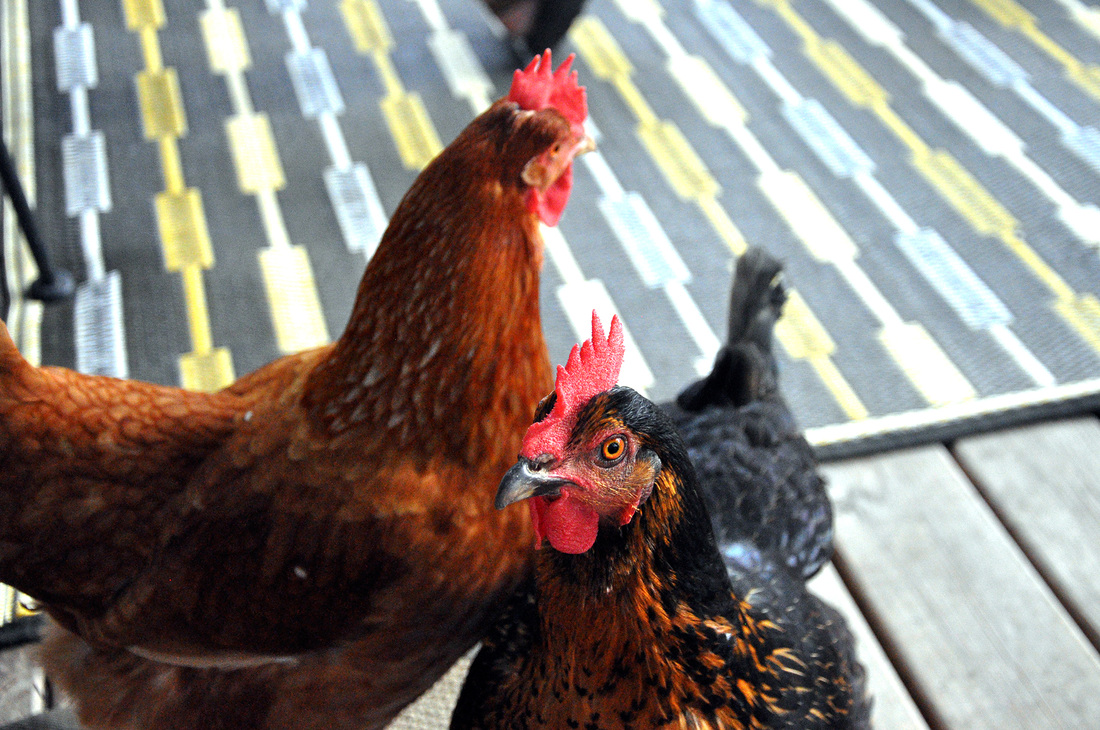
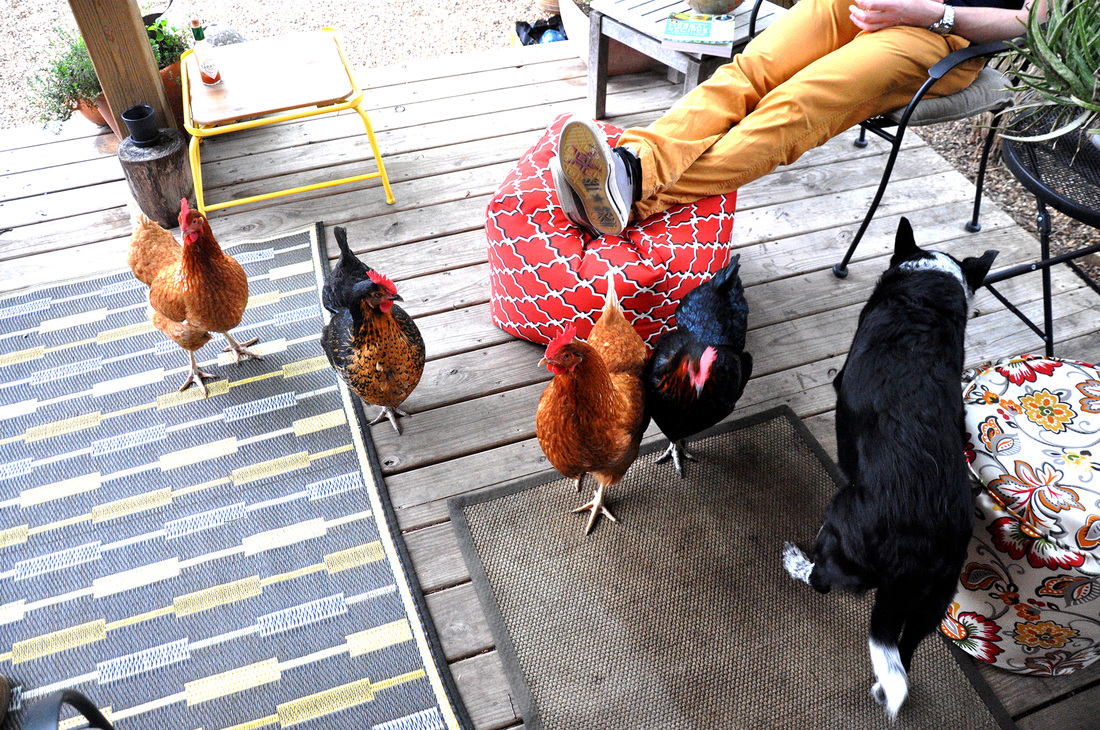
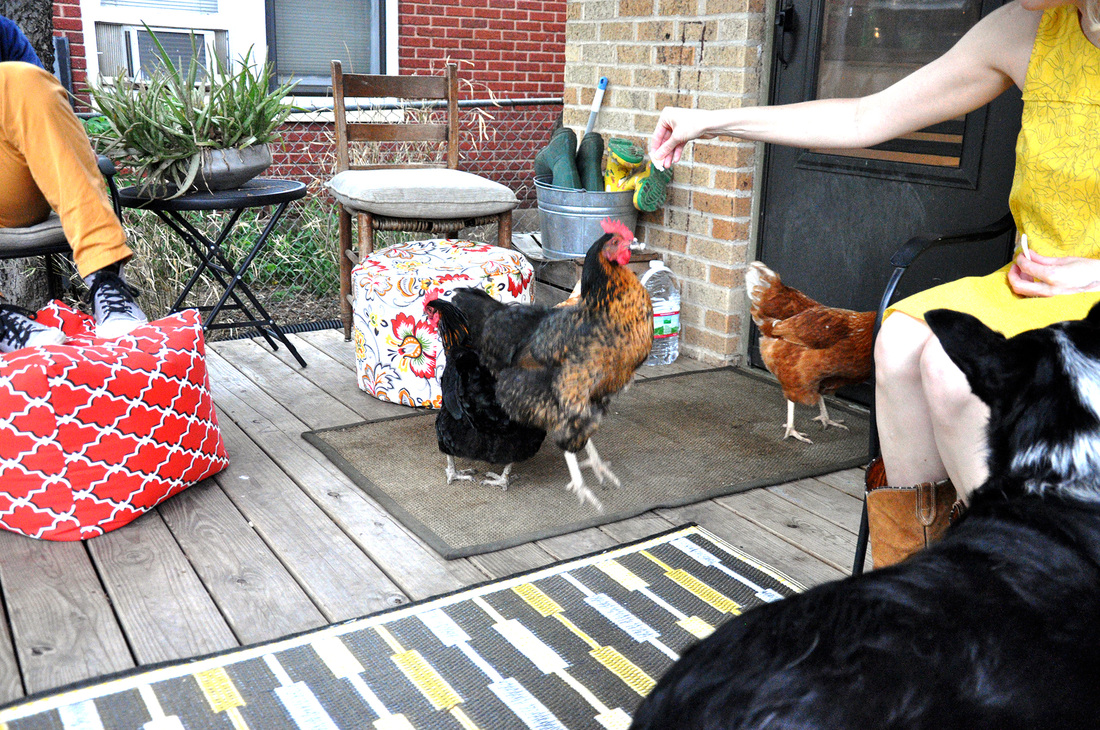
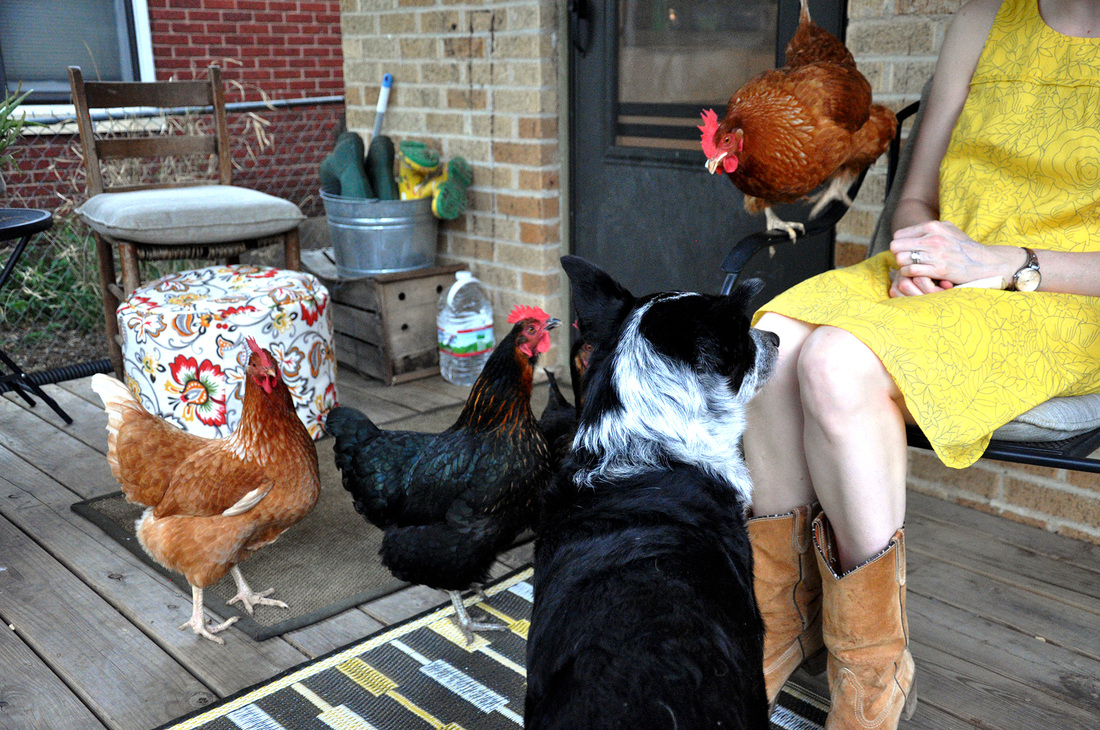
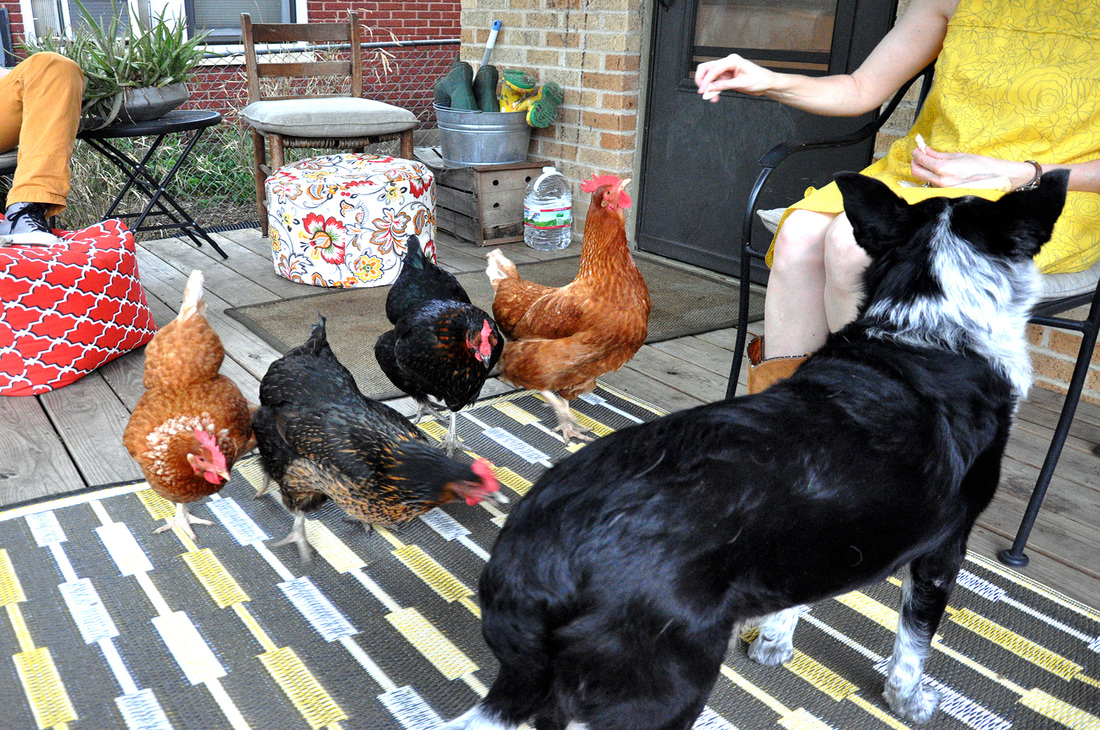
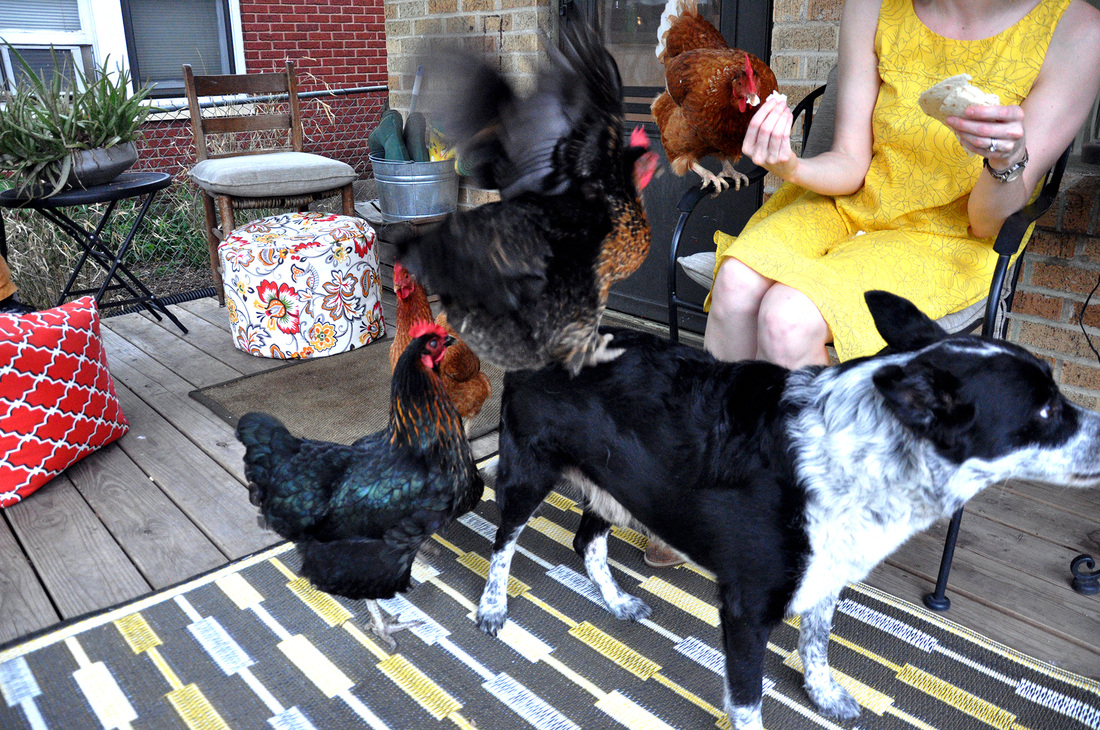
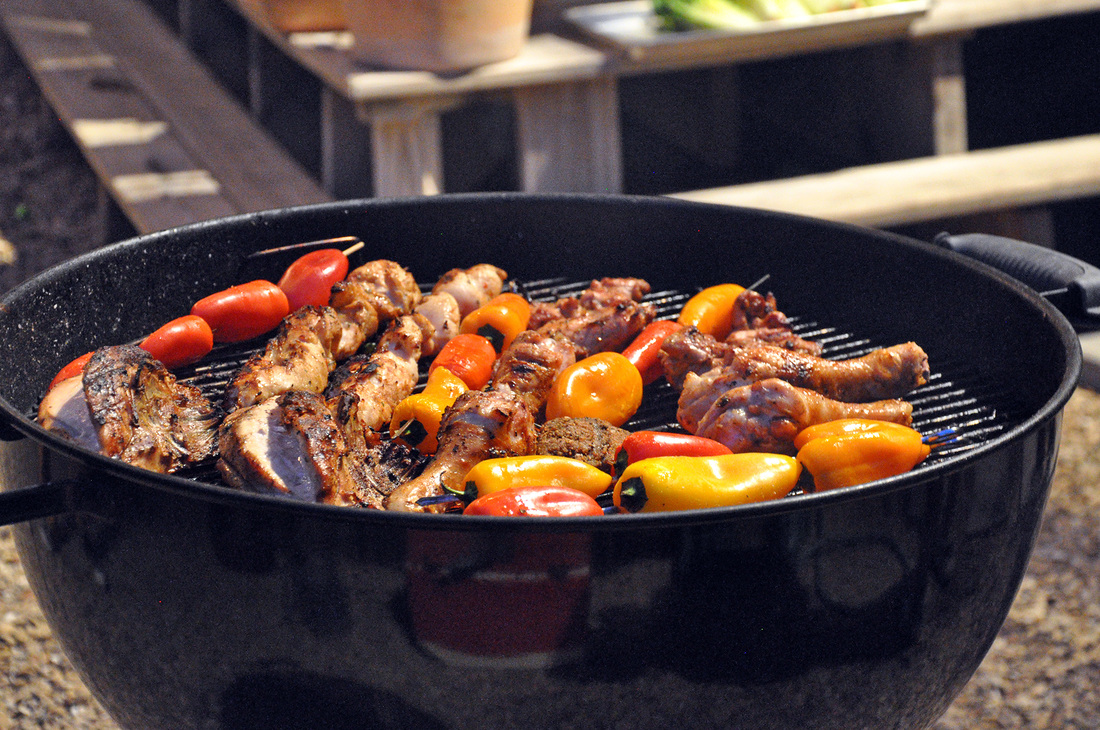
Anyways, I’m getting off track and sort of hungry…The point is that I always want to grill clams when given the chance and was excited that I was going to share my simple recipe with a group of newbies. So where was I? Oh yes, last week I found myself at Marin’s – a true Kentucky lady at heart – urban farm. She has managed to turn her back yard into a little country oasis. With chickens waddling around, a sweet sweet dog name Bear soliciting butt scratches, and a kitty named Kitty sleeping through it all. I was immediately happy and at ease. There were raised garden beds and a made from scratch chicken coop – the only thing missing was, of course, the teepee that hadn’t been waterproofed yet. Herbs sat happy, young and fresh in assorted crates and old planters, the aloe was nearly exploding out of its container. I loved it all. Food is good enough on it own, but when enjoyed in such a perfect place, well let’s just say I was a happy camper. The clams went over spectacularly, claiming their rightful place next to the ribs and sliders. [warning
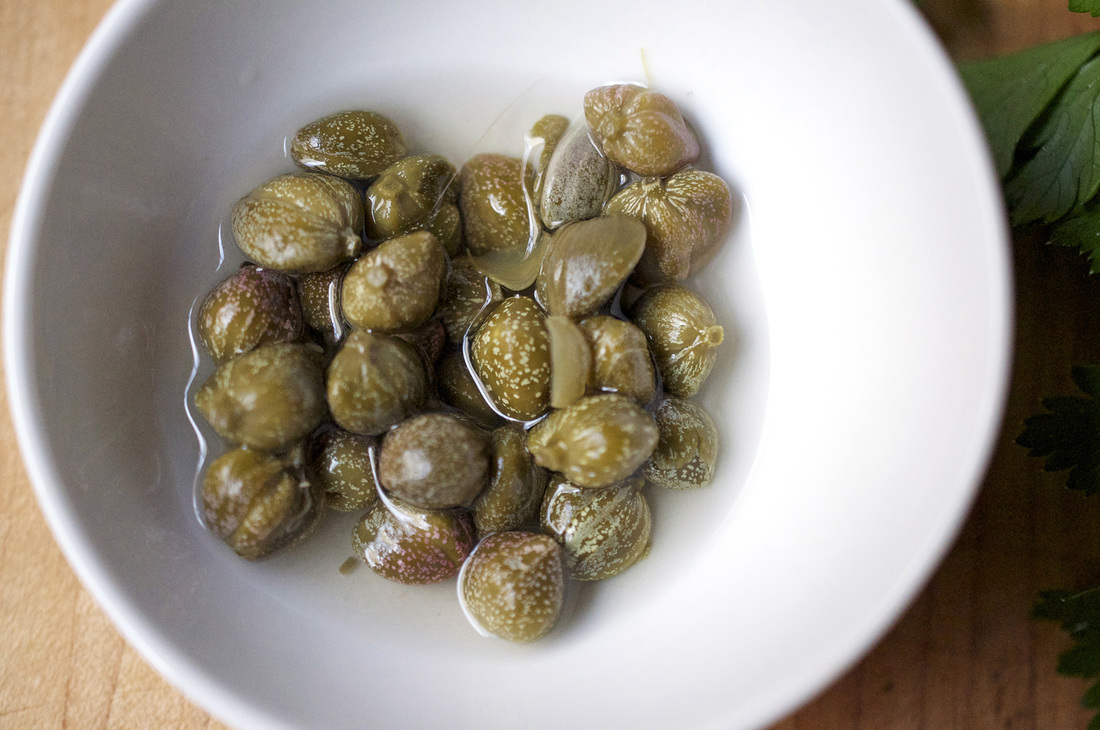
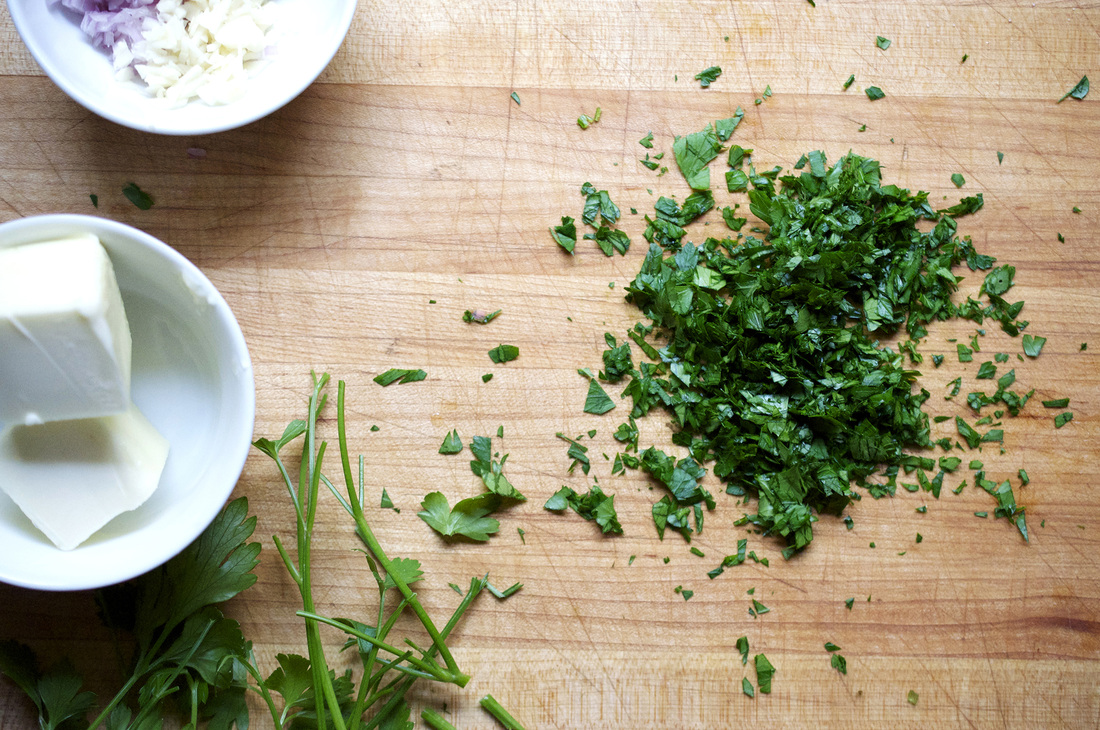
Grilled Clams with Parsley Caper Butter PRINT RECIPE [Prep: 5mins / Cook: 20 / TOTAL: 25mins [*Serving size about 5 clams per person = 5 people]
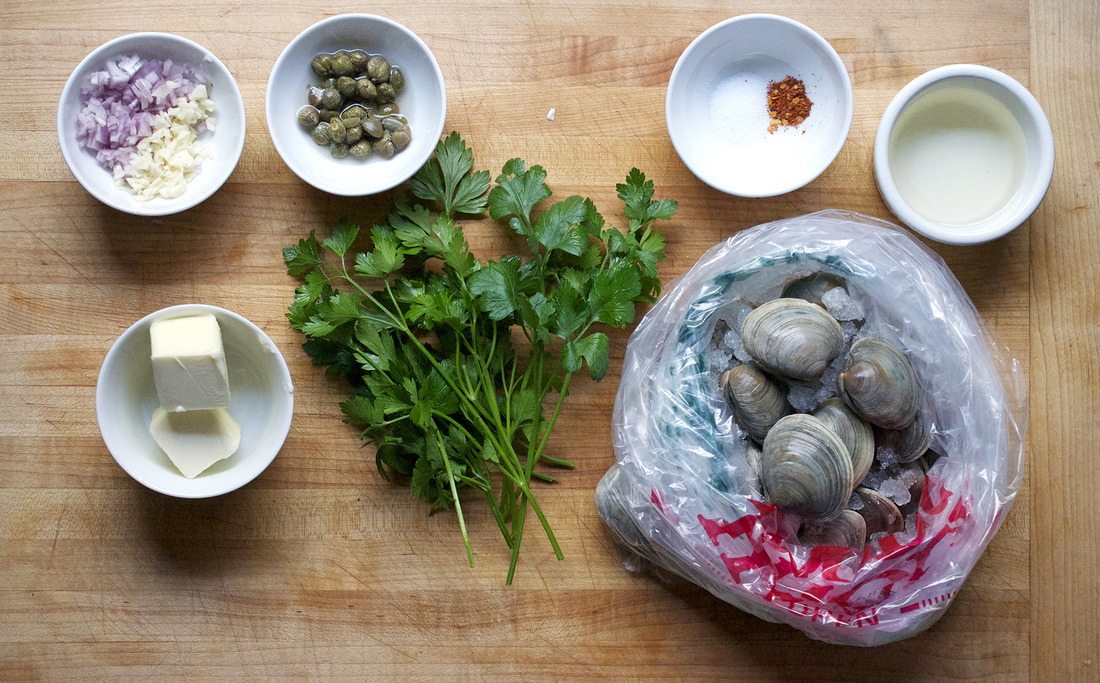
Depending on what kind of grill you have you may want to start heating up the coals/turn on the gas so you won’t have to wait around for it to get nice and hot. When you are ready to start prepping the meal take the clams out and fill a bowl with cold fresh water. Let them sit for 20 minutes. This will cause them to spit out any sand or grit that they have inside their shells. Most clams won't come covered in barnacles so they just need a good rinse with a firm brush right before they're cooked. [Does this sound familiar? Check out my Summertime Clam Pasta for more deets on cooking with clams:o)] Peel and mince both the garlic and shallot. Rinse the parsley, drain the capers and mince both. Once all the prep is finished, melt the butter in small skillet over med high heat. Once the butter is bubbling lightly add the minced shallots and minced garlic, let sauté for about 2 minutes, stirring often. Add the ¼ cup white wine and let it cook off for 1 minute. Add the capers, parsley, salt, pepper and hot pepper flakes. Lower the heat and let simmer for 2-3 minutes before removing from the heat. Transfer to a small serving bowl. If the grill is ready, then the throw the clams on. Spread them out so that they do not crowd each other and close the grill. After 5 minutes start checking for open clams. Make sure to have a serving platter ready next to the grill. As they open remove them from the heat right away. Some clams may take a little longer, just give them a tap or two and keep the grill closed as you wait. The clams can be eaten right away – but watch out, they can be hot! Make sure to give each one a good splash of the parlsey caper butter sauce! *This serving size is based on the clams being a starter or passed appetizer. They go fast so feel free to grill more, especially if they are the main course! The volume of parsley caper butter sauce will go far. I usually have a little leftover and will freeze it and use it as a starter for a seafood pasta sauce. **I used little necks, but cherrystones – a bigger meatier kind – are really good on the grill.
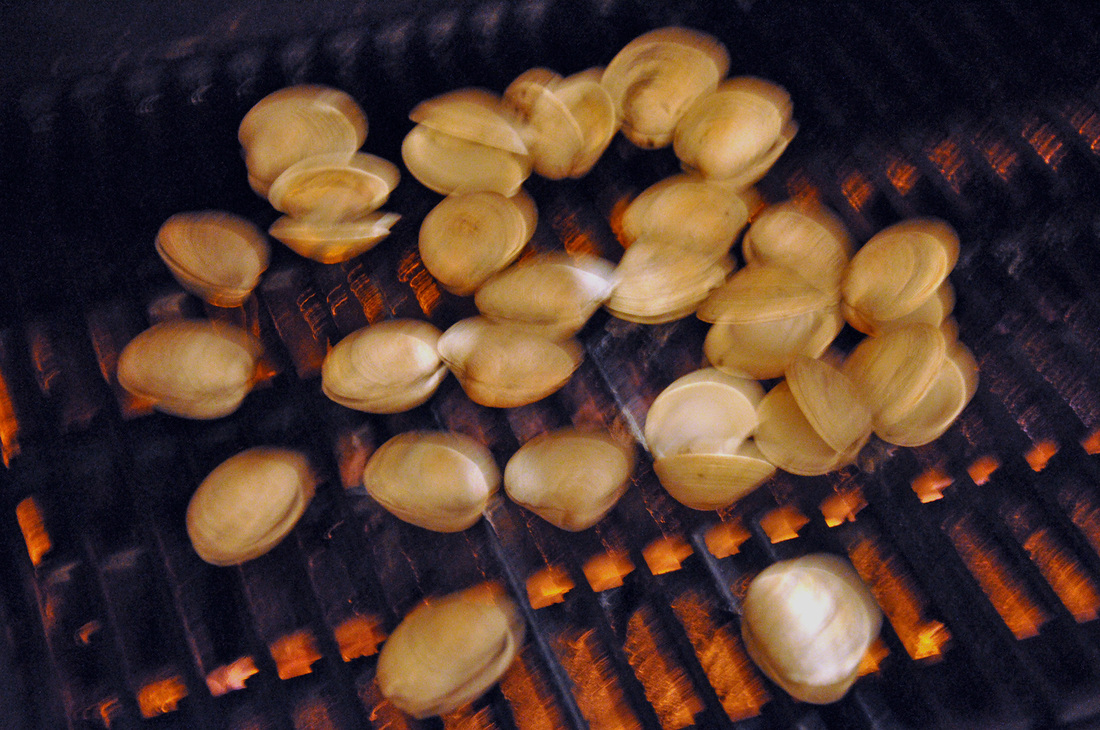
[I need a tripod...or a steadier hand.]
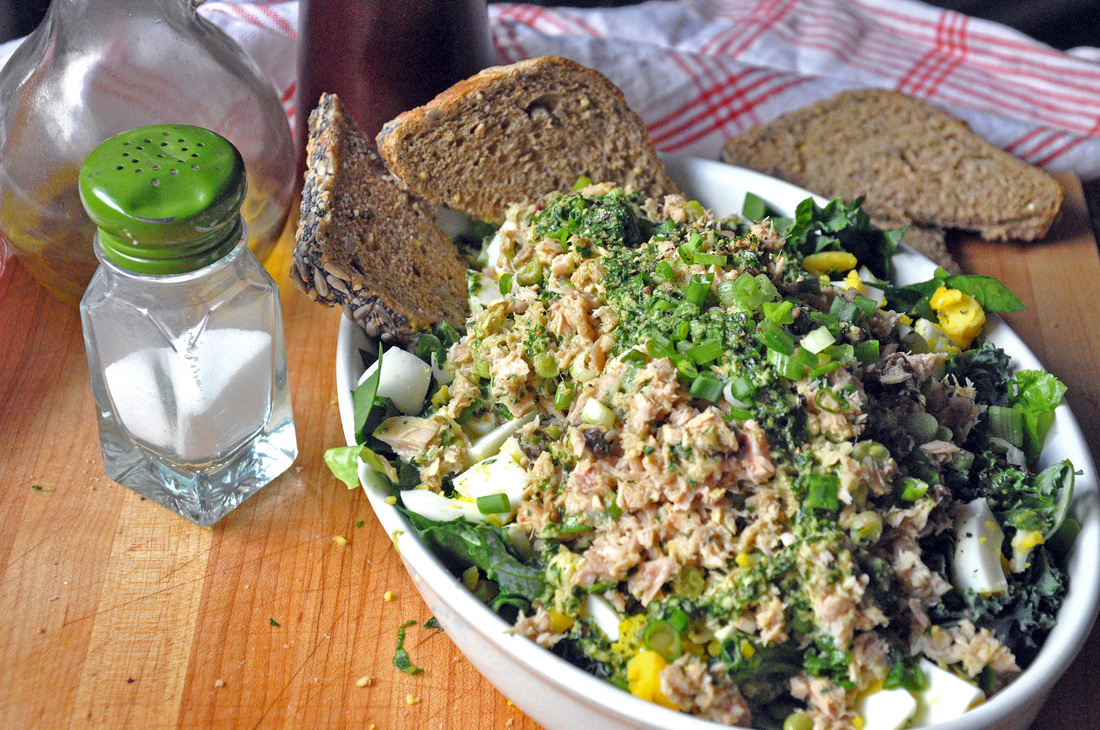 Hey so I’m back! I’m not quite sure who out there is following me yet, but to those who are, I am sorry I left you hanging…Amidst post holiday fatigue, a baby shower, cleaning out my childhood apartment (sniff) so they can be sold, travelling to see family (see two previous items mentioned), a rockin’ ladies weekend in Memphis, and a stronger desire to eat food instead of holding on a sec and documenting it…I haven’t been a good friend to you all. It’s also been super cold, no wait it was springtime last weekend…annnnnd now it’s cold again. So I haven’t been quite sure what I wanted to make for you. So finally I decided on this: tuna salad with raisins and hard-boiled eggs! I call it Eggy Tuna Salad. I have a feeling your first reaction isn’t going to be all that great, its ok I’ll wait. Sound good yet? No? Well it may never actually sound good, but it tastes good and that’s all that matters. Come to think of though, I’ve had this one in the back of my mind for a while. Ever since I first tasted this combination, tuna salad with hard-boiled egg on raisin grain bread, I’ve been a bit perplexed. It was a few years ago now and having put some space between that sandwich and my palette I can quite remember the seasoning, but I thought I’d give it a try and put my spin on it. Oh and I used to think a boiled eggs was just you know…a boiled egg. But check out this diddy from Bon Appetite if you what to know what’s what about cooking an egg. 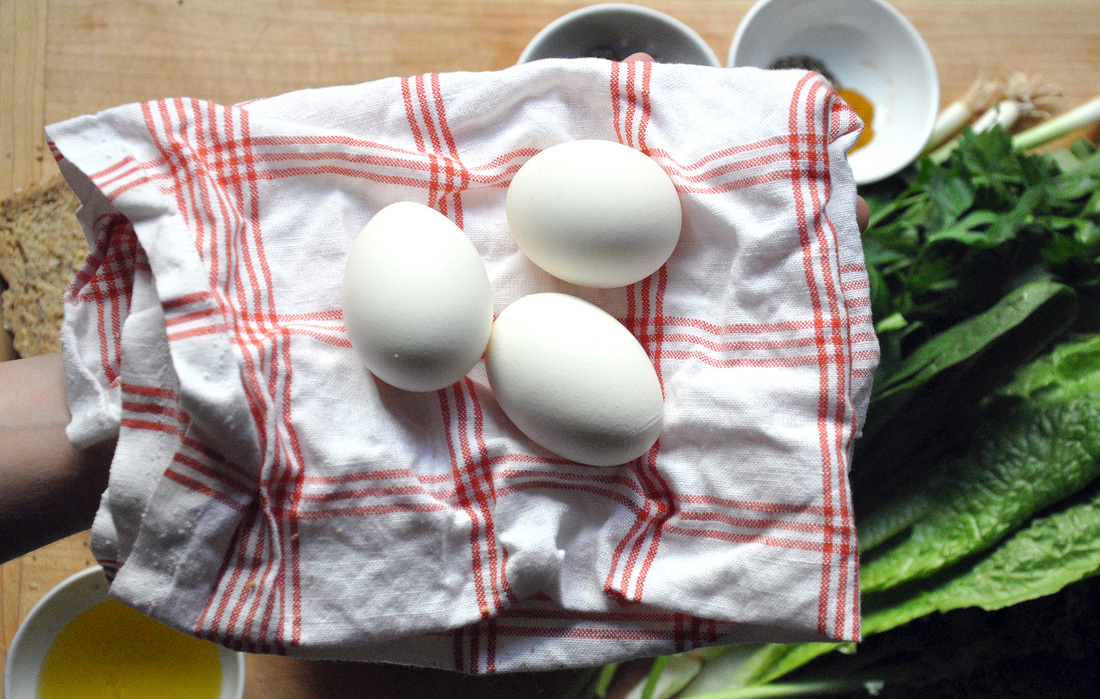 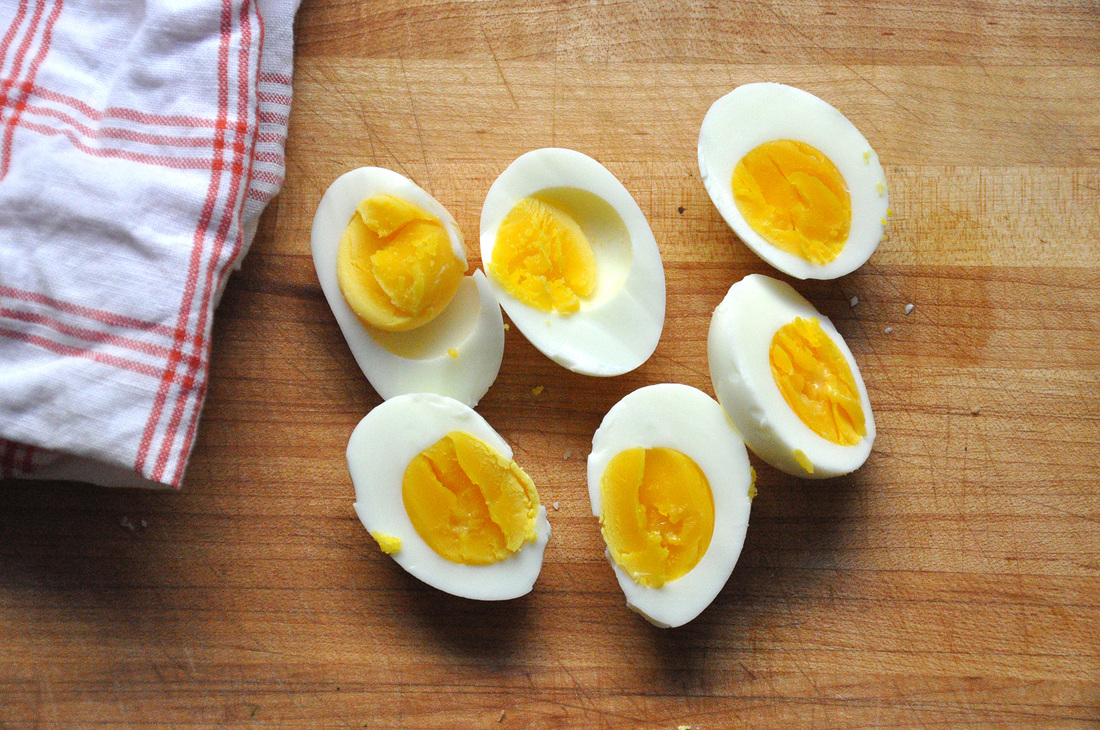 
Eggy Tuna Salad PRINT RECIPE [Prep: 20min / Cook: 5min / TOTAL: 25min [4 small servings]
Place eggs in a pot, add enough water to cover the eggs, cover and set over high heat. You want to let the water come to a boil, when this happens, wait one minute, then remove from heat and let sit covered for 10 more minutes. After this they will be hard-boiled but not overcooked or dried out. Before peeling you can put them in a cold-water bath so they will be cool enough to handle. After the eggs have been boiled and are resting you can make the salad dressing. Using a mini food processor (you can do this by hand but you’ll need to mince or press the garlic and finely chop up the parsley first) add parsley, olive oil, lemon juice, water and spices. Pulse until parsley leaves are broken down. Now onto the salad greens. After they have all been rinsed and stemmed where needed (only the stem of the kale really needs to be taken out), roughly chop up the spinach and romaine, finely chop the kale and thinly slice up the scallions. Add all, reserving about half of the sliced scallions, to a large mixing bowl and incorporate a few tablespoons of the salad dressing. Toss until well mixed. In a small mixing bowl, incorporate the tuna, raisins, remaining scallions, 2 tablespoons of the salad dressing, a dash of salt, pepper, cayenne and curry powder. Mix well. Put your toast into the oven/toaster and get started with peeling the cooled eggs. Once peeled chop them up into big chunks. To assemble the salad, place the lightly dressed greens on the bottom of your serving platter, next the hard boiled eggs, and finished it off with the tuna salad. Drizzle the remaining dressing over the Eggy Tuna Salad. Slice up your toasted bread and enjoy! 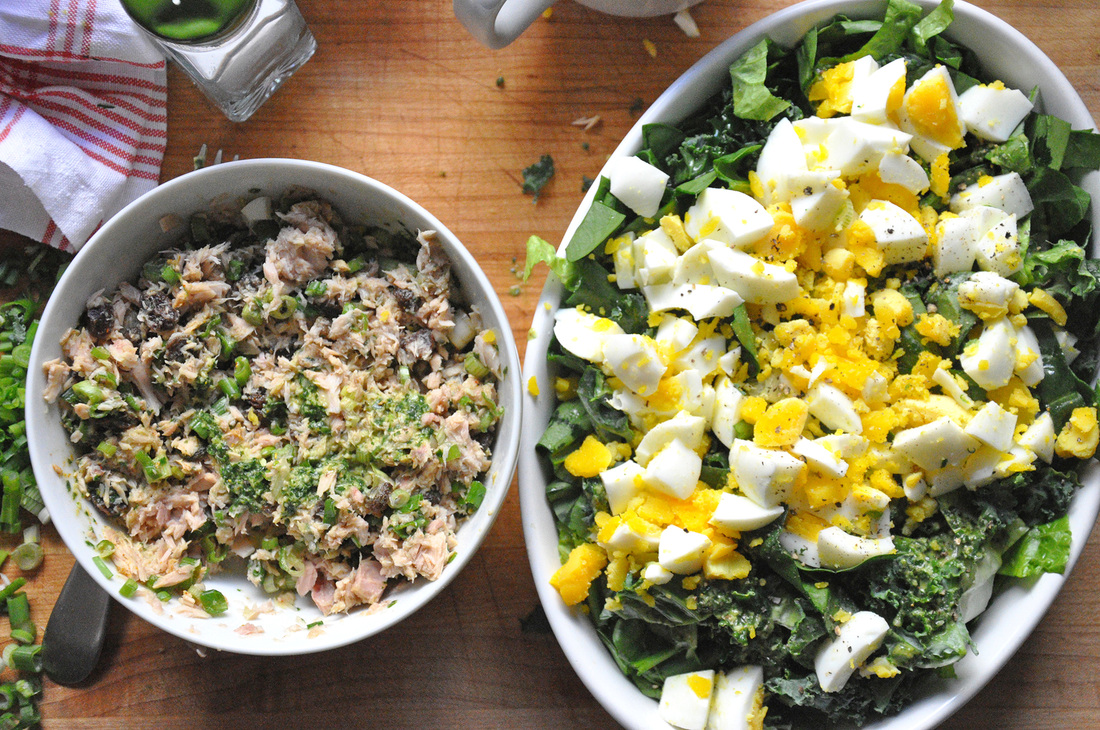 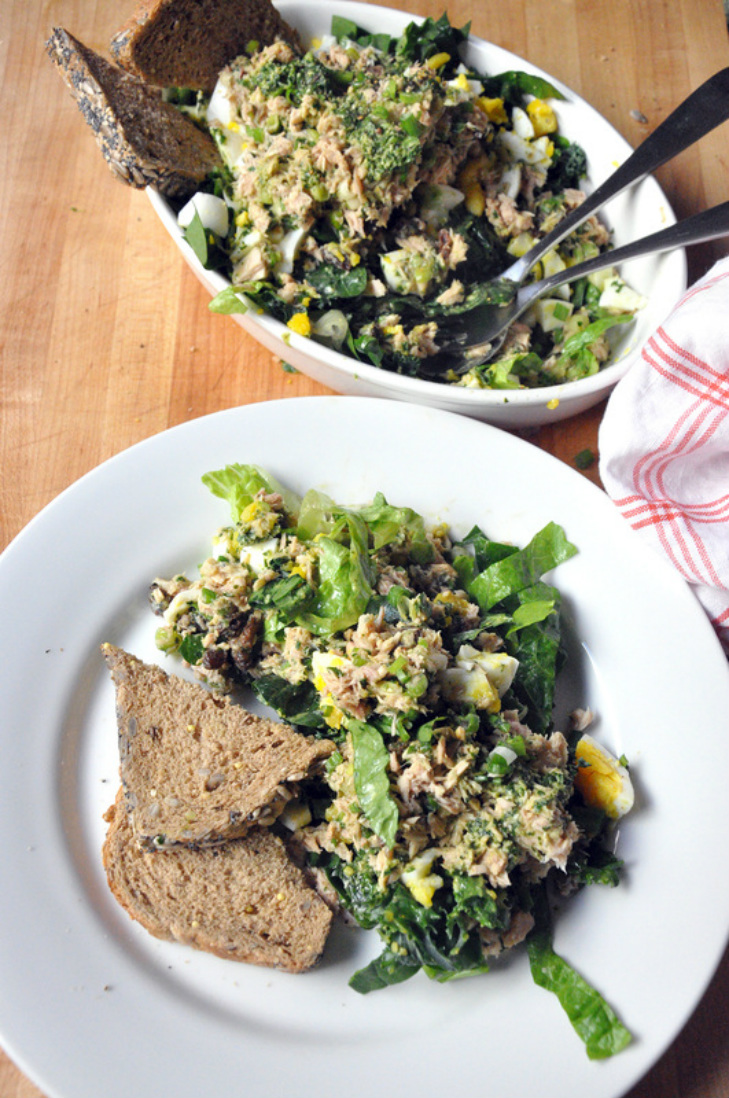 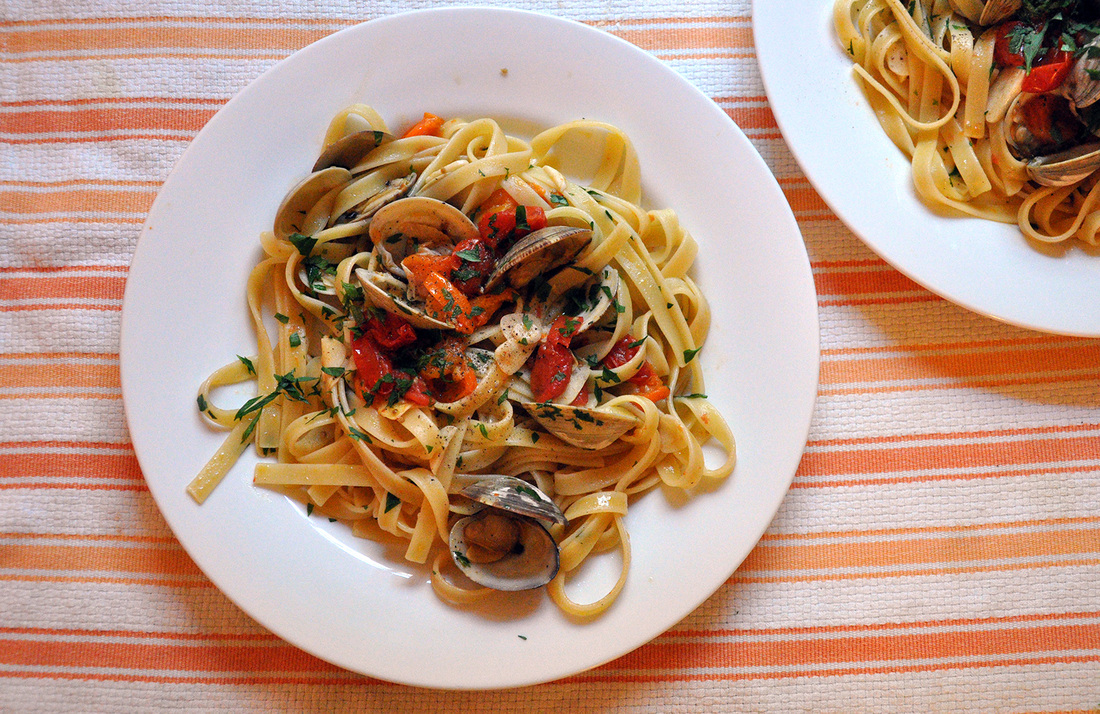 This recipe is a version of one my mother used to cook in the summertime. It’s meant to be eaten outside with family in the fading sun, back then with a glass of milk, now with friends and a glass of chilled white wine. This dish was full of summer’s bounty – freshly picked parsley, fragrant cherry tomatoes, garlic from the nearby farm and local littleneck clams. I remember the clammy briny flavor and the sweetness of the tomatoes. I loved the taste but couldn’t stand the texture of the clams – to my mother’s dismay I would eat around them. Garlic too, I adored the smell but couldn’t stand getting a chunk of it in my pasta. I wanted it smashed, mashed, pressed just not chopped or sliced. And the parsley…my mother would say “What’s wrong with Parsley?!!” I didn’t have an answer, it was just too…too…something, it was too something and could you please add it to the pasta after I’ve served myself, please? I was a silly silly child. Too picky for my own good, a trait that I’ve mostly grown out of. If I could have all those uneaten clams now I would feast on them for days, I would eat a garlic clove whole, I would use all that parsley and make some pesto… Today I live halfway across the country, but my parents still live in a coastal town in the Northeast. Nearly every time I go home I ask for clams – I am lucky enough to have a mother who takes requests. Clams grilled, clams raw in a half shell, baked clams, clams with linguine – with garlic and parsley. Every time I visit I look forward to when I can ask her “Can we go to the seafood store now?” She may tire of the menu, but thankfully she doesn’t tire of my enthusiasm. I’ve carefully watched her over the years to see how she makes her “linguine alle vongole” asking way too many questions and always standing next to her in the kitchen watching them cook, waiting to tap on them and willing them to open – because I was ready to eat! I’ve been making my own version for a few years now. I use big slices of garlic, lots of parsley and more than enough clams – I’m always worried there won’t be enough. Often as I stand in my own kitchen and prepare this dish I think it’s funny how I’ve come to adore it and wouldn’t change a thing about it. 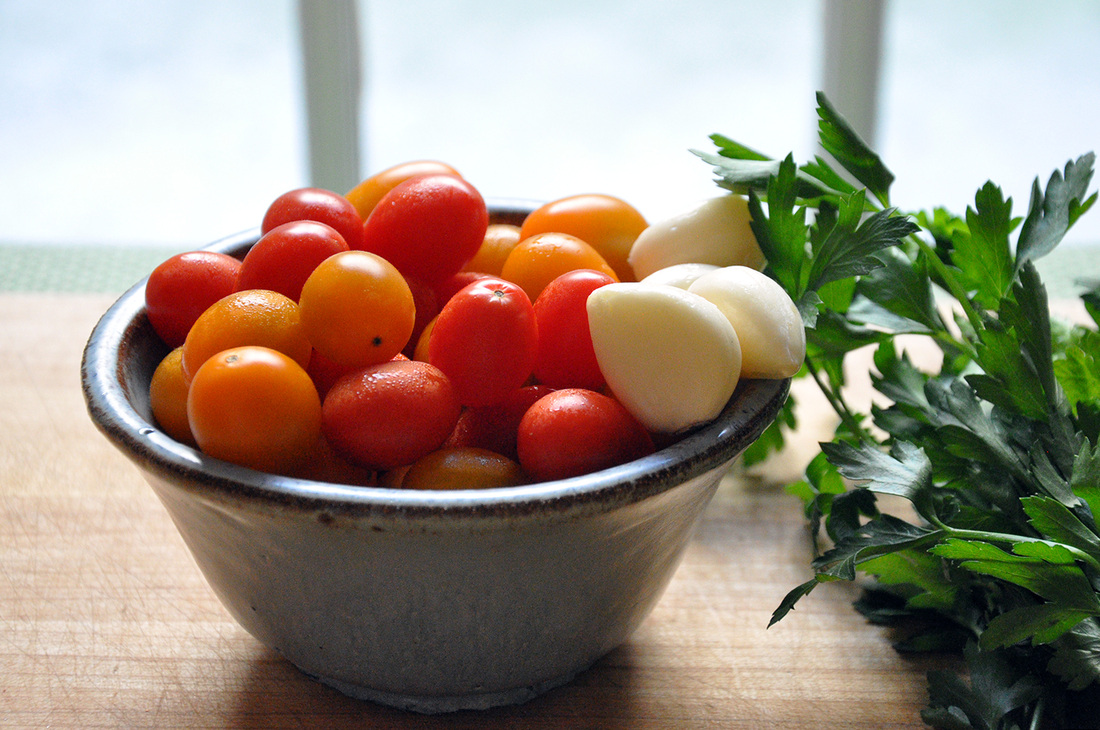 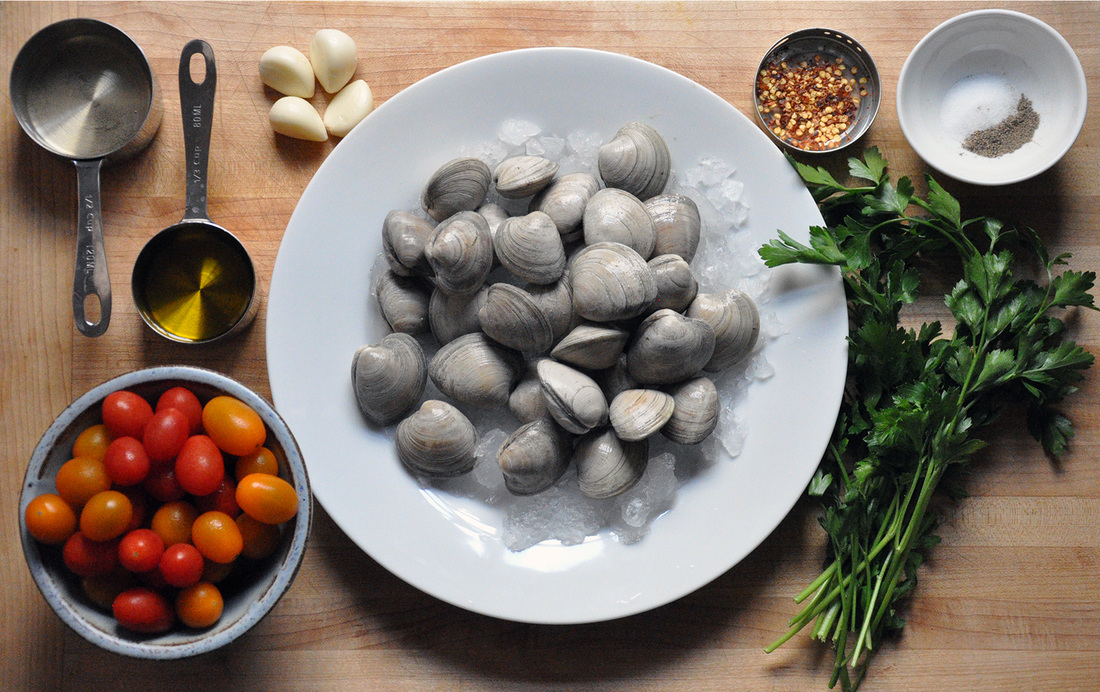 Summer Clam Pasta PRINT RECIPE [Prep: 15 minutes / Cooking: 25 / TOTAL: 40 minutes] [Serves 4 dinner sized portions]
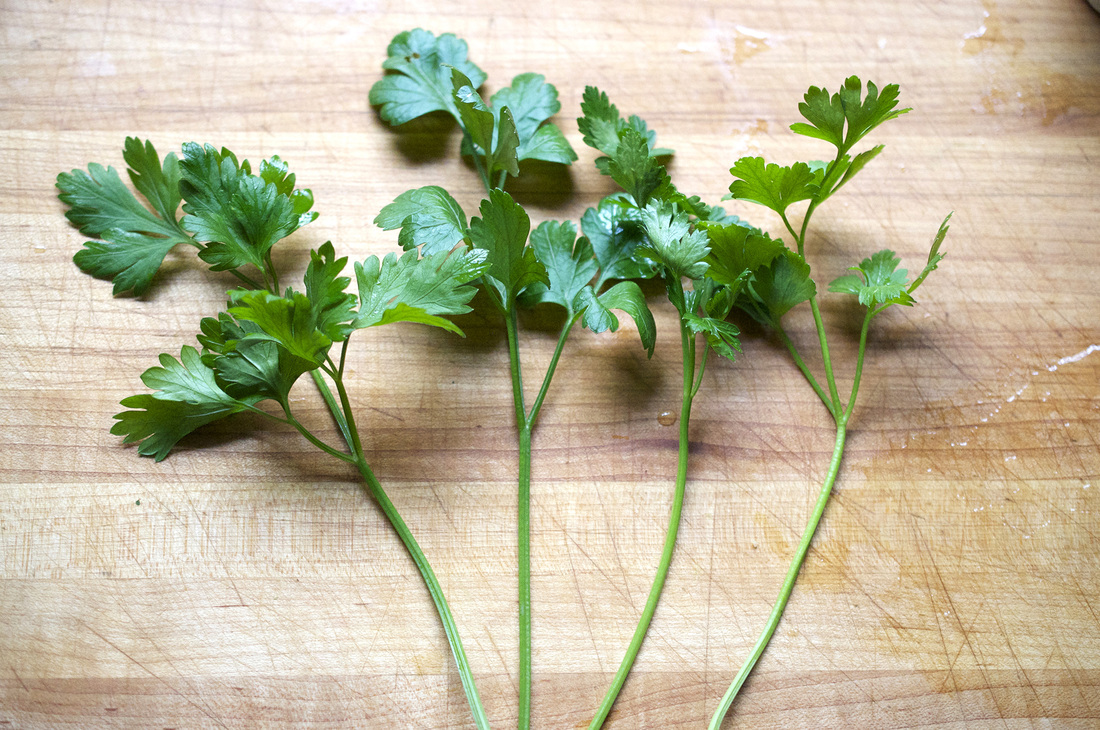
The clams should be in the fridge - preferably just brought home from the store and sitting in a bowl. A few things to know about clams, they should come chip free and tightly closed. If you see any clams that are open you should try tapping them - if they close they are still alive and safe to cook, if they stay open, even just a little, you should throw them out. When you are in the supermarket or seafood store you can always ask if there's a fresher batch in the back - the person helping you should also be looking for cracked or open clams. When you are ready to start prepping the meal take the clams out and fill the bowl with cold fresh water. Let them sit for 20 minutes. This will cause them to spit out any sand or grit that they have inside their shells. Most clams won't come covered in barnacles so they just need a good rinse with a firm brush right before they're cooked. 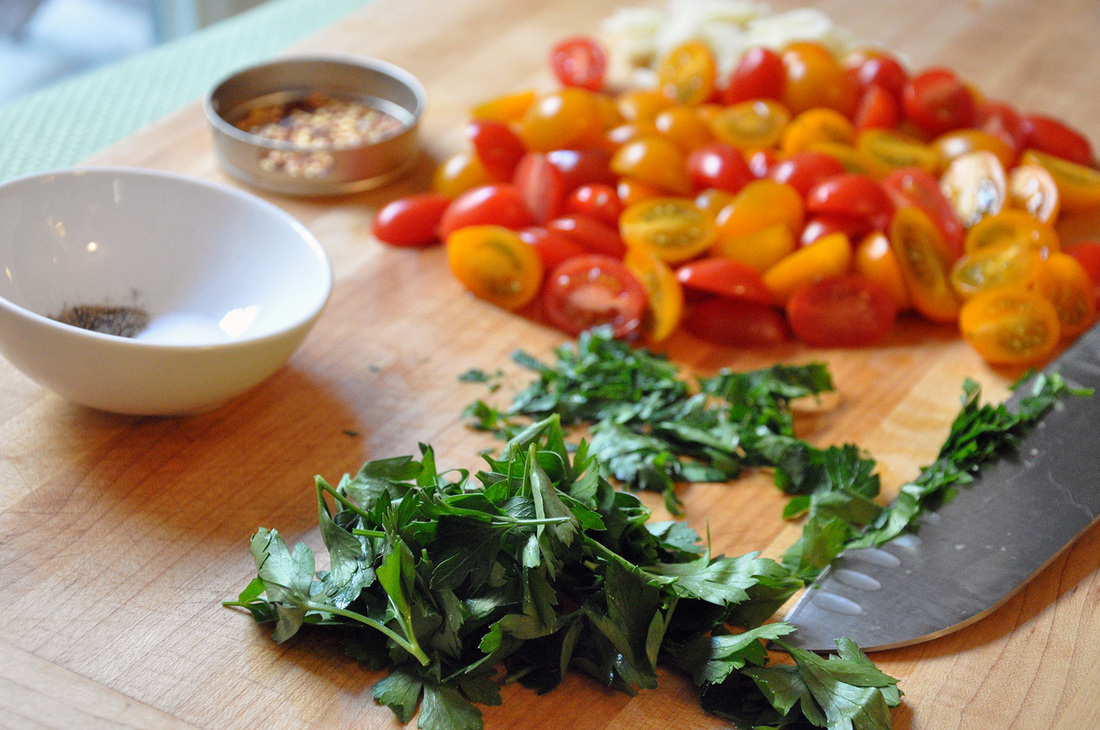 While the water is heating up you should start prepping the other ingredients. Rinse the cherry tomatoes in a strainer and slice them lengthwise. Peel and thinly slice the garlic. If peeling the garlic is a little tricky try flipping the blade of your knife so that it’s plane is parallel to that of the cutting board, lay it on top of the unpeeled garlic and push down on the blade with the heel of your hand. The garlic should split and the peel will be easy to pull off. Pull off all of the parsley leaves [it’s a personal preference, I don’t like the taste of the stems] and roughly chop them up. Your prepping is done. The water for the pasta should be boiling by this point [if not keep an eye out for it during the next steps]. Usually this recipe calls for linguine, but I had some fettuccine on hand. This type of pasta will take about 8 minutes to cook al dente. We want this pasta al dente [slightly undercooked so that it still has a bite to it] because we will be adding it to the sauce at the end where it will cook for a little while longer. Make sure to set the timer since it is easy to get distracted Put a large skillet over medium-high heat [this should be at least 2 inches deep to accommodate all of the ingredients at the end]. Let it to heat up for about 1 minute and then add the 1/3 cup olive oil. Wait another minute and then add the garlic and red pepper flakes. Cook for 1 minute or wait for the garlic to turn golden. [If you have any anchovies or clam juice on hand, this is when I would add it and cook for 1 minute.] Now add the ½ cup dry white wine and let it cook off for another minute – the sauce at this point should be at a rolling boil. Add the cherry tomatoes, the 1 teaspoon of salt and about 5 grinds of cracked black pepper [or about 1 teaspoon]. Adjust heat down to medium and let sit for about 2 minutes stirring once or twice. Then cover and let sit for 3 minutes – you don’t want too much of the tomato juice to cook off. While you are waiting for the tomatoes to cook down a little, check on the pasta [if it’s ready see directions below] and finish cleaning the clams. Take them carefully out of the water – all of the sand or grit will have settled at the bottom and you don’t want to disturb it. You can lay the clams on a dishtowel next to the sink. Run cold water over them and scrub them with a coarse brush – if you don’t have one you can use another dishtowel. As soon as the clams are all clean add them to the sauce and cover. They should take about 5-8 minutes to open – you should check on them a few times and can encourage the clams to open by tapping on them. The pasta should be done by now or nearly done. I recommend reserving a little bit of the pasta water for the sauce at the end. You can do this by taking a measuring cup – or any cup with a handle – and dipping it into the water carefully, until a about a 1/3 cup collects. You may what to use a potholder to protect your hand from the steam of the boiling water. You can test the pasta by carefully spooning out a noodle [make sure to blow on it!] and biting into it. It should have just a slight bite to it, and a small whitish dot in the center, that’s the part of the pasta that isn’t cooked yet. If it is ready, take the pot - be sure to use potholders since the water will let off a lot of hot steam - and slowly pour the contents into the colander in the sink. Drizzle about 1 tablespoon olive oil over the pasta and mix it around so it doesn’t become stuck together. The cooked pasta can sit like this for a few minutes while the sauce is finishing up. 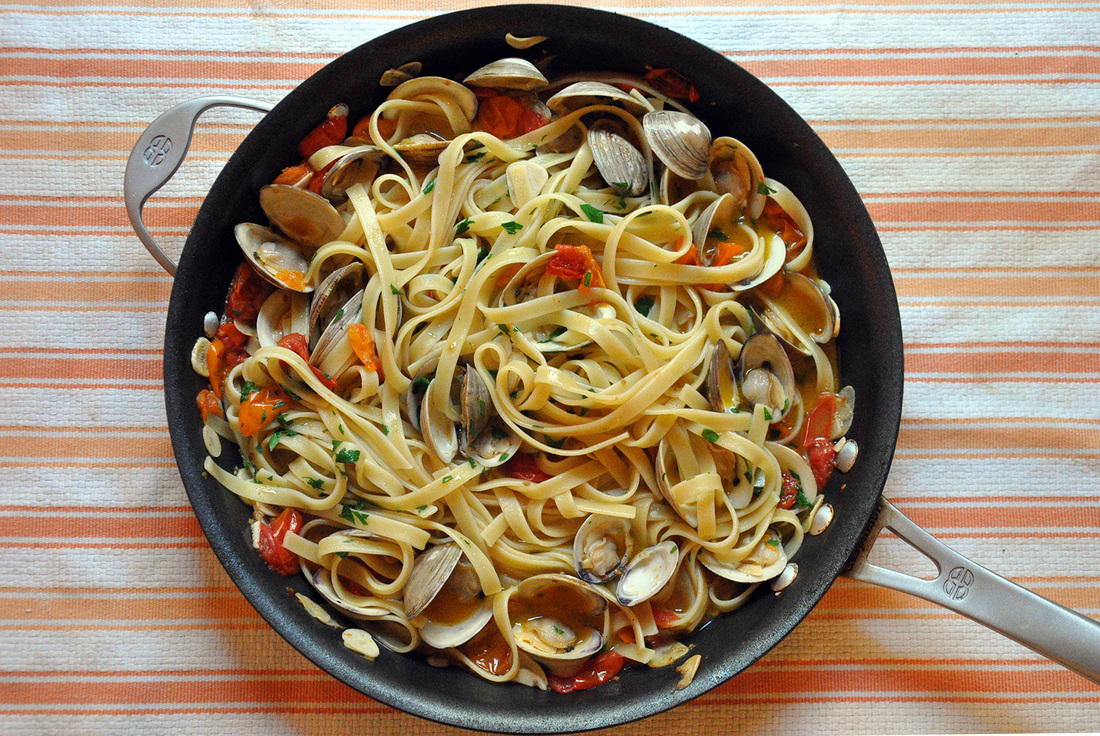 The drained pasta should be added to the skillet after most of the clams are open. [If by this point there are still some clams that are not open, they should be discarded.] Add the chopped parsley, a splash of olive oil, a little bit of the reserved pasta water and make sure to mix everything well. Turn down the heat a little and let simmer for another 2 minutes. This dish can be served right out of the skillet. I like to add fresh parsley, a few grinds of pepper and some flakes of sea salt right before eating it. Make sure to put a big bowl on the table to catch all the empty shells. Also, remember that white wine that I used early on in the recipe? - now is a good time to pour a glass and enjoy with dinner…and don’t forget to tear up some pieces of the baguette to help soak up some of the sauce. 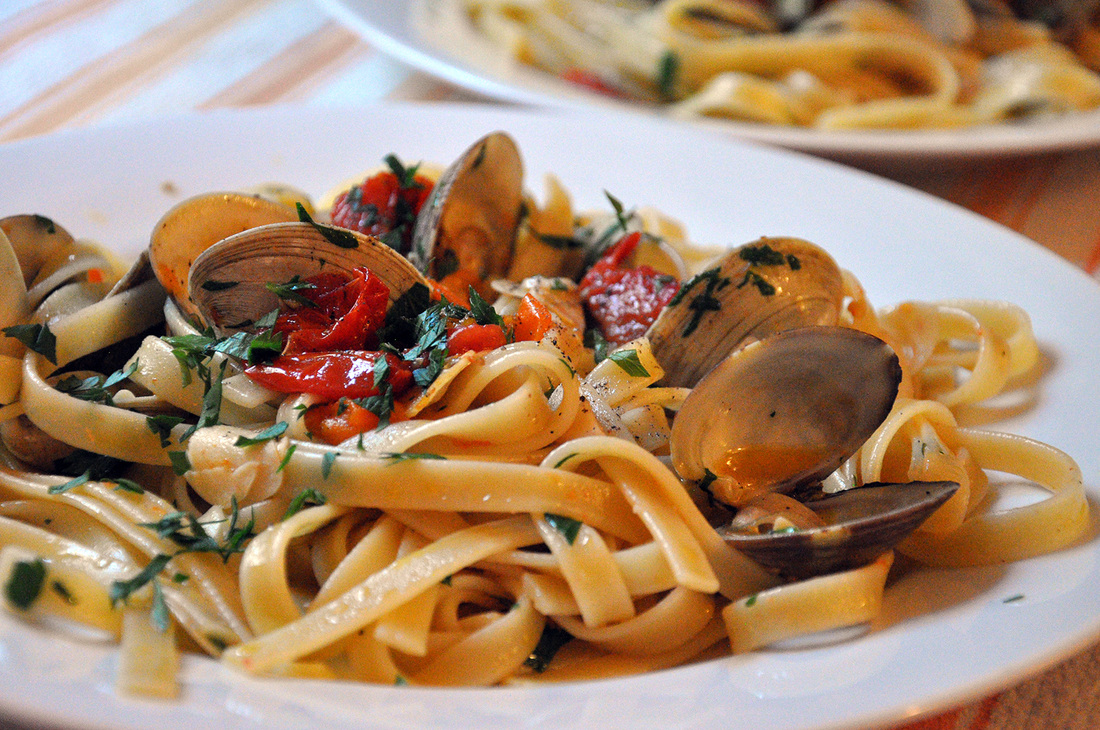 |
All
Stuff I follow...
Not Without Salt
My New Roots Sprouted Kitchen Thug Kitchen Lady and Pups A CUP OF JO The Daily Meal Melissa Clark ...always 3191 Miles Apart The Sartorialist Garance Dore The Nourished Kitchen Archives
October 2014
|


 RSS Feed