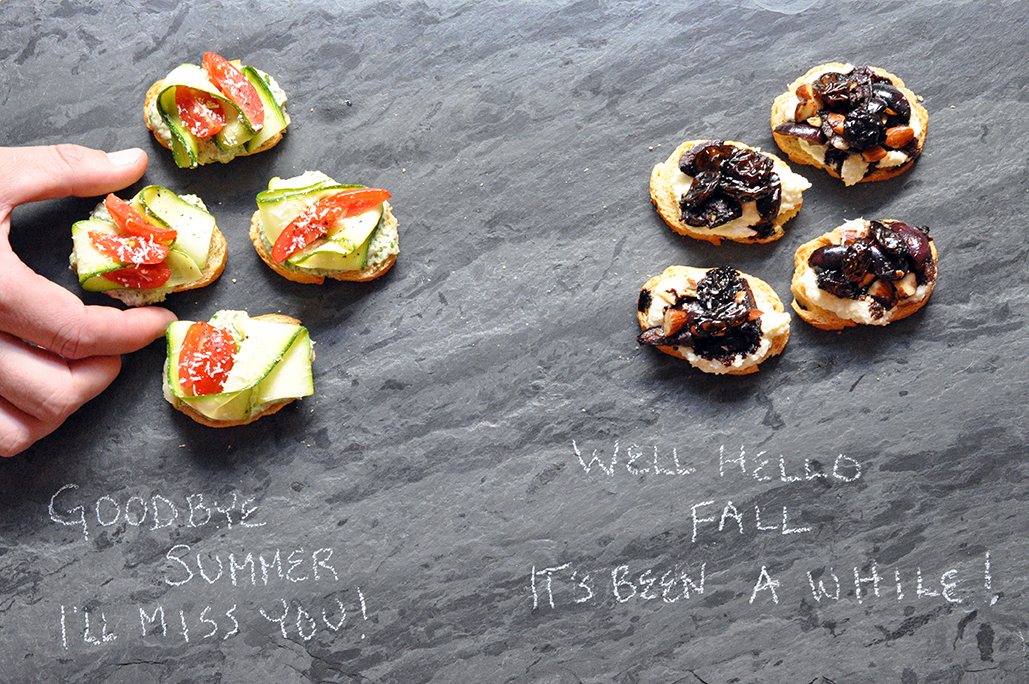
I’m sure you’ve heard it everywhere by now; Summer is over, caput, gone. See you next year, I shout as I watch it walk away, in flip flops, with a suitcase packed full of mismatched bathing suits, sunscreen, cocktail umbrellas, vacation days, grilled corn and sea shells…but wait, while dear Summer departs, your old friend Fall arrives, with a bag full of apples, boots clacking, a cool new scarf and a crisp breeze. Hey, you love time of year, remember? Though, if you’re lucky, there’s a brief period when Summer and Fall overlap a little, what could be better? Two of your favorites getting to hang out over a glass of white wine, and of course you ask them to stay for a snack so the moment will last a little longer. ..And this is what you should serve them, a little something for everyone - Ode to Summer and Welcome to Fall - Crostini. 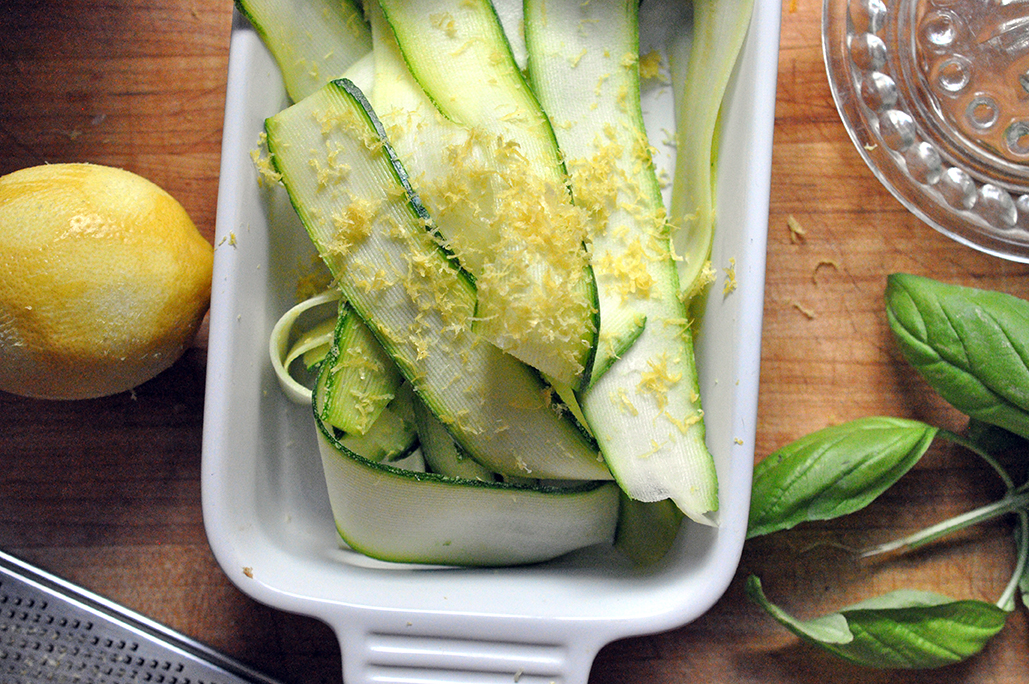
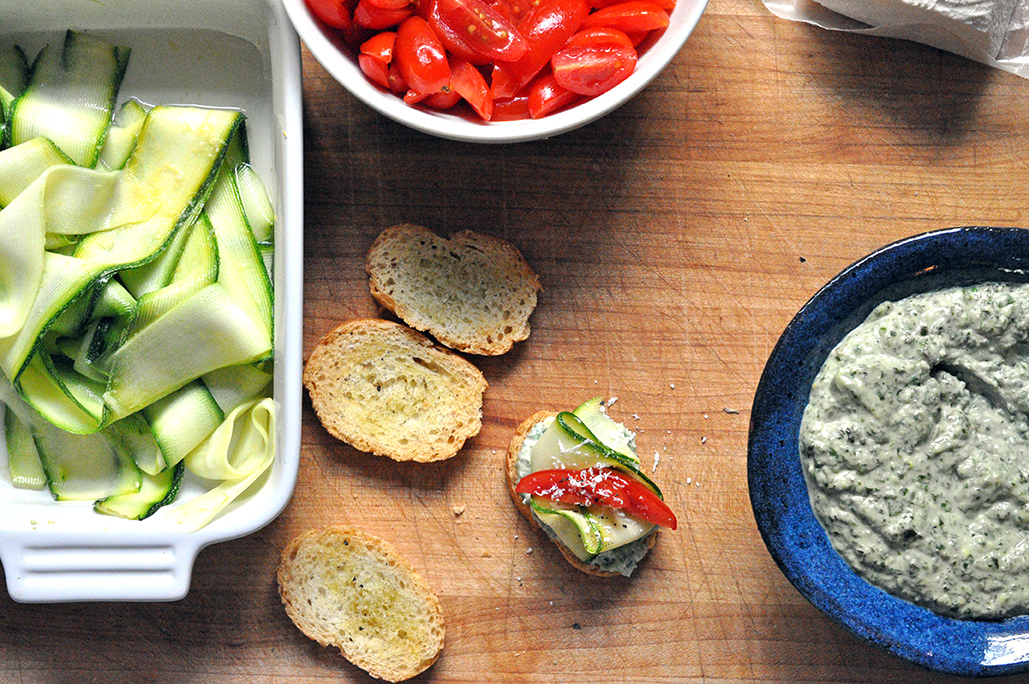
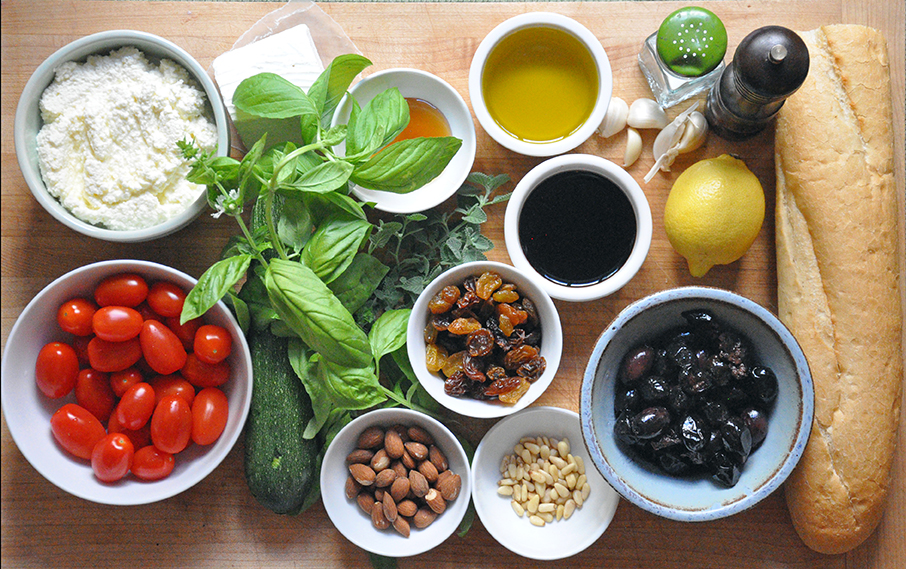
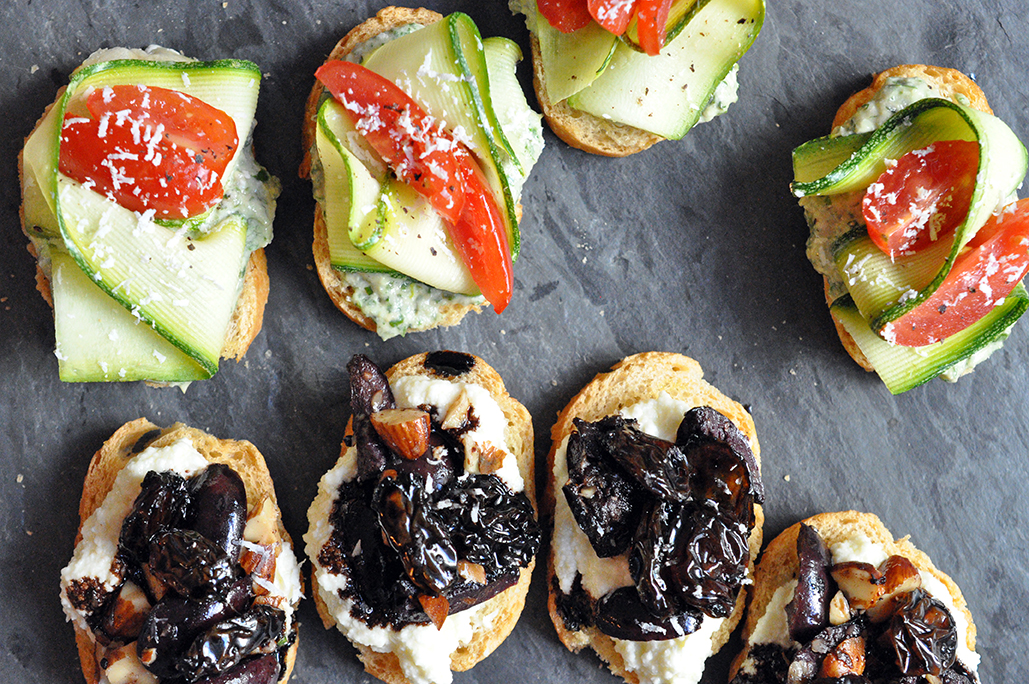
Ode to Summer Crostini (or basil-mint ricotta crostini with fresh zucchini and tomatoes) PRINT RECIPE [Prep: 20 mins / Cook: 10 mins / Total: 20mins] [Serving size: about 16 or half a baguette]
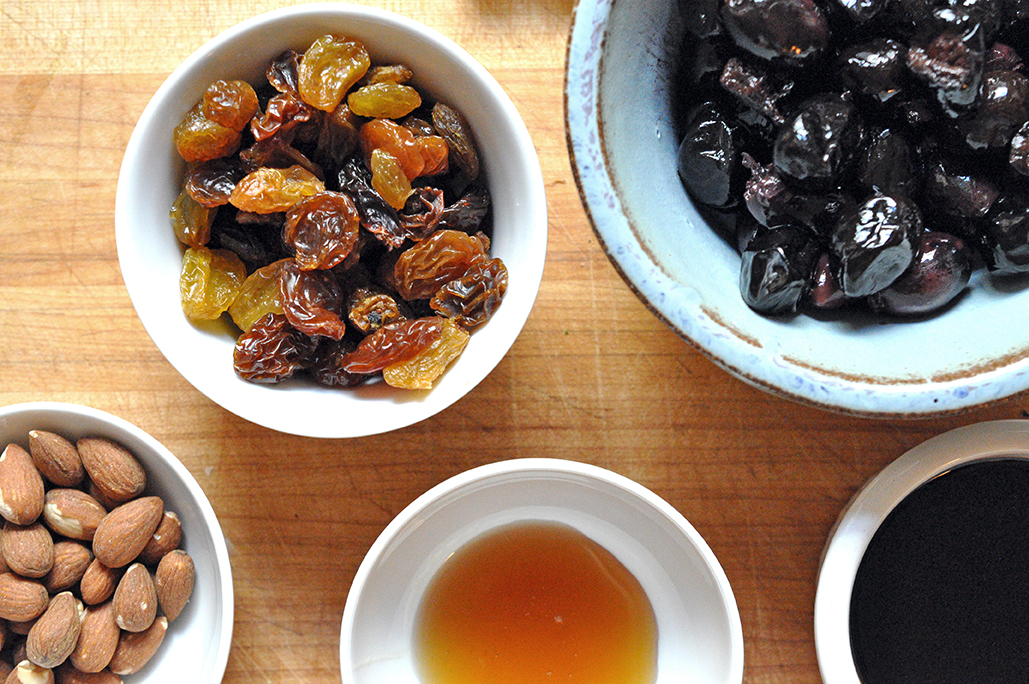
Welcome to Fall Crostini (or balsamic raisins with sauteed olives and almonds crostini) [Prep: 15 mins / Cook: 15 mins / Total: 30mins] [Serving size: about 16 or half a baguette]
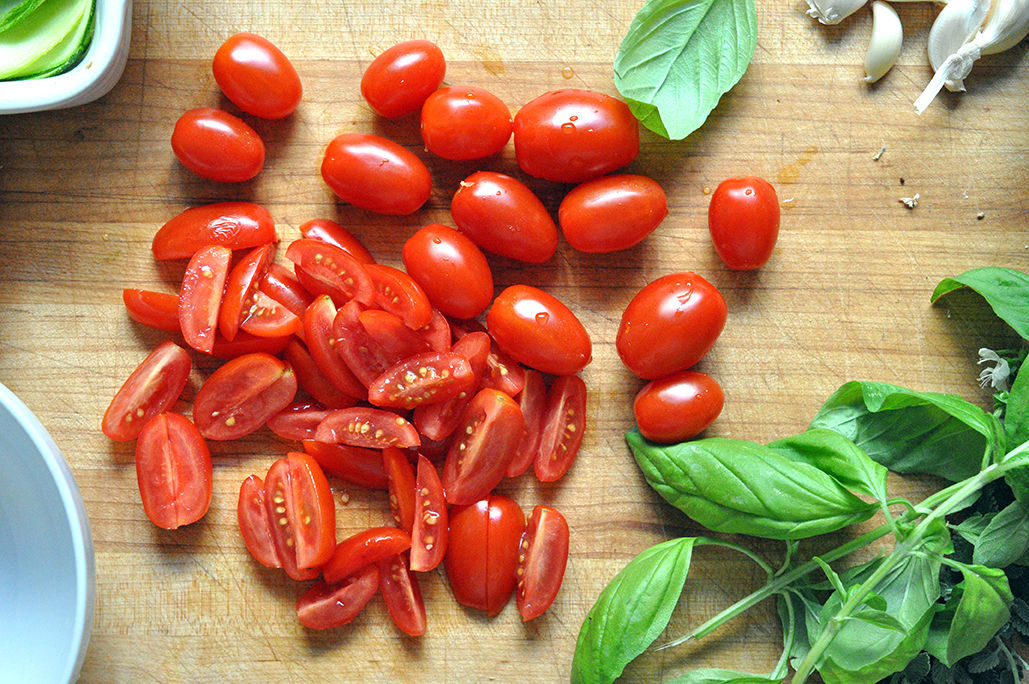
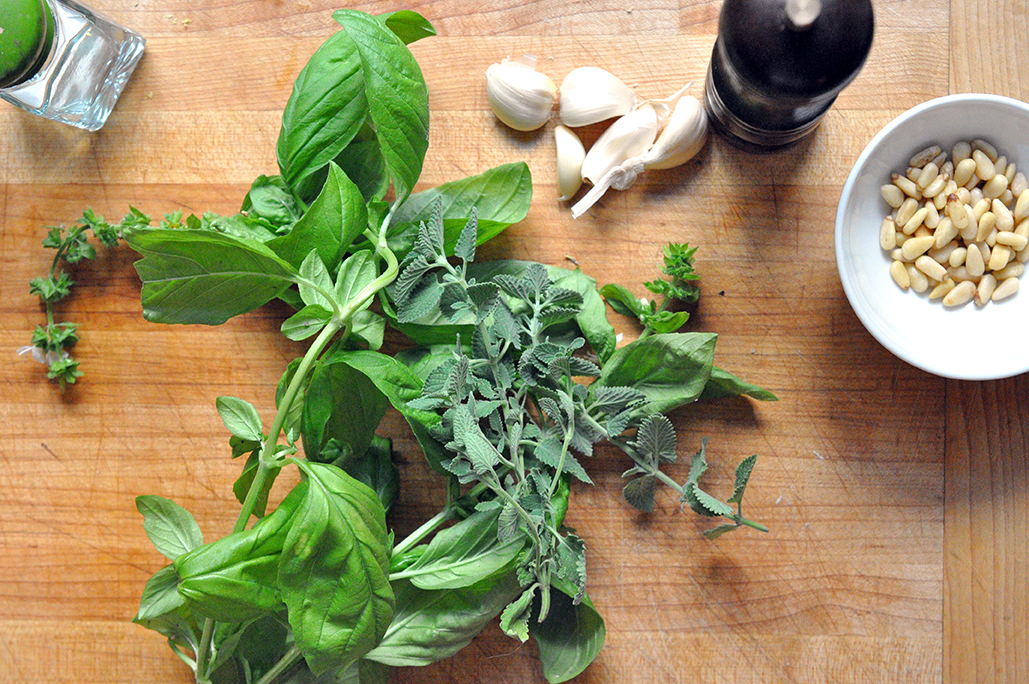
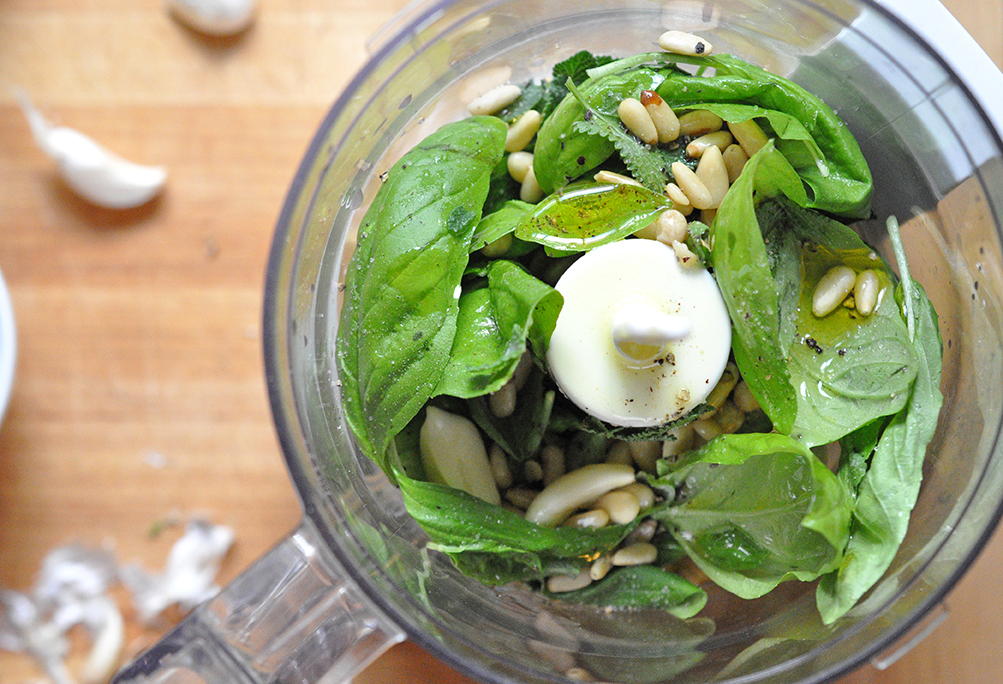
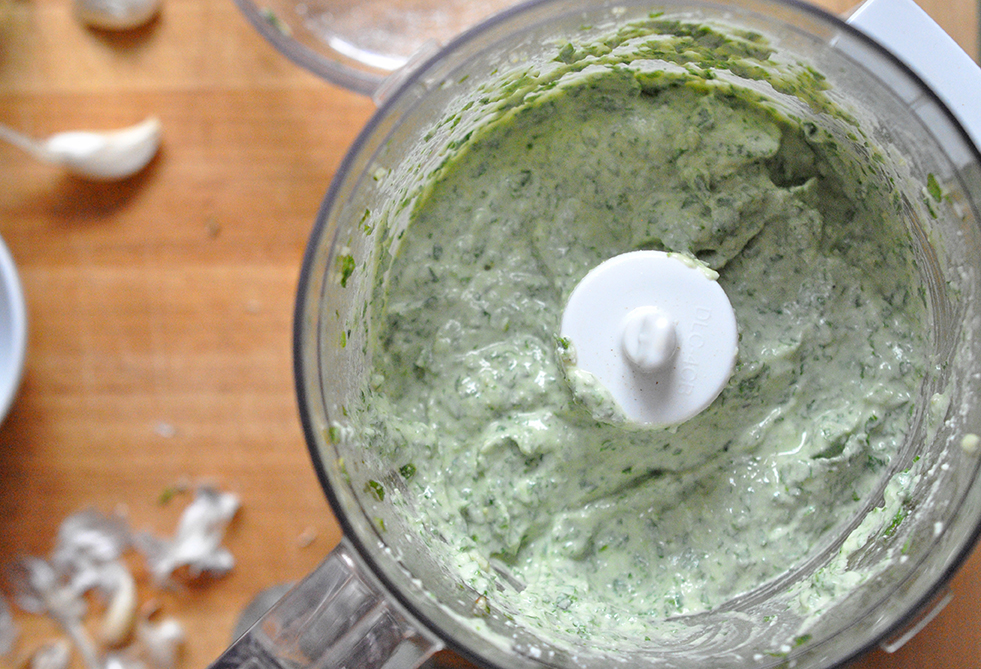
Let's start with the Ode to Summer Crostini: Preheat your oven to 350° slice baguette into 1/4” thick slices, transfer to a large cookie sheet and brush with olive oil and lightly salt. (Note: If you are only making the summer crostini you should pop the bread slices into the oven as soon as it is hot and let them bake for 10 minutes. If you are making both summer and fall crostini you should wait until you are simmering the balsamic reduction to put the bread into the oven) With a vegetable peeler take your zucchini and peel away - I rotated the zucchini 3 times, while peeling it, stopping on each side when I reached the seeds, so that I was left with a core. You can discard the core and now you have a nice fresh pile of zucchini strips. Transfer them to a small mixing bowl, lightly salt and toss with the lemon juice and zest. Quarter your cherry tomatoes and transfer to another small mixing bowl, add 1 tablespoon olive oil and a dash of salt and let sit. In a blender or small food processor add the mint, basil, pine nuts, 2 garlic cloves and salt. Blend until smooth. Add the ricotta cheese and blend again until incorporated. If you are only making the summer crostini, then remove baguette slices from the oven, let them cool for 1 minute, then rub them with the raw garlic clove. Add tablespoon of the basil-mint ricotta mixture, a strip of zucchini, some cherry tomatoes and some freshly grated ricotta salata. Enjoy! 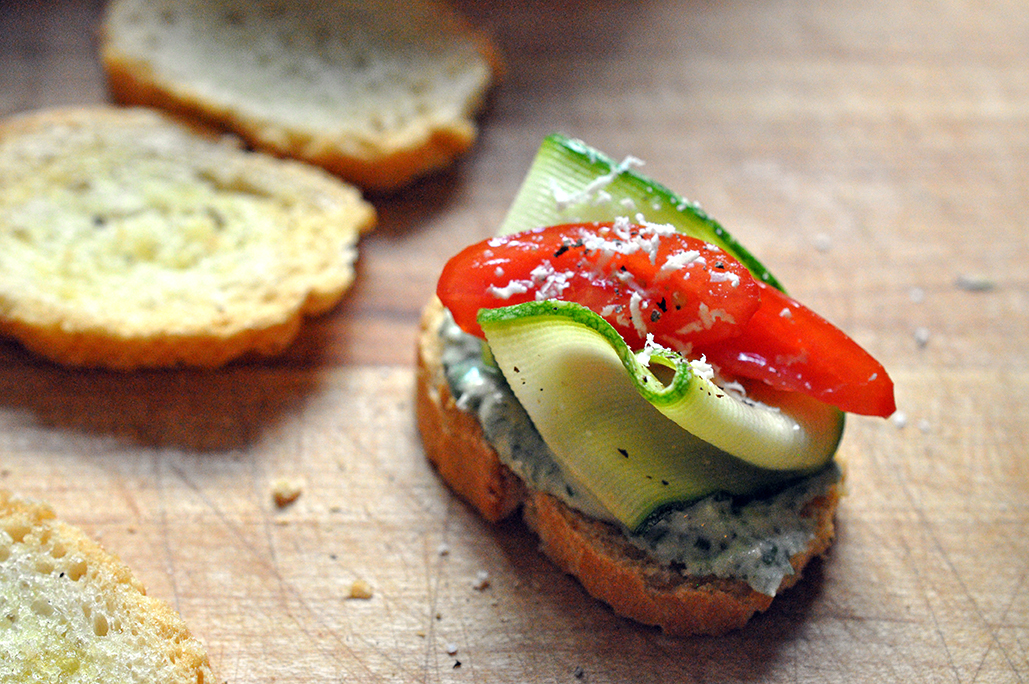
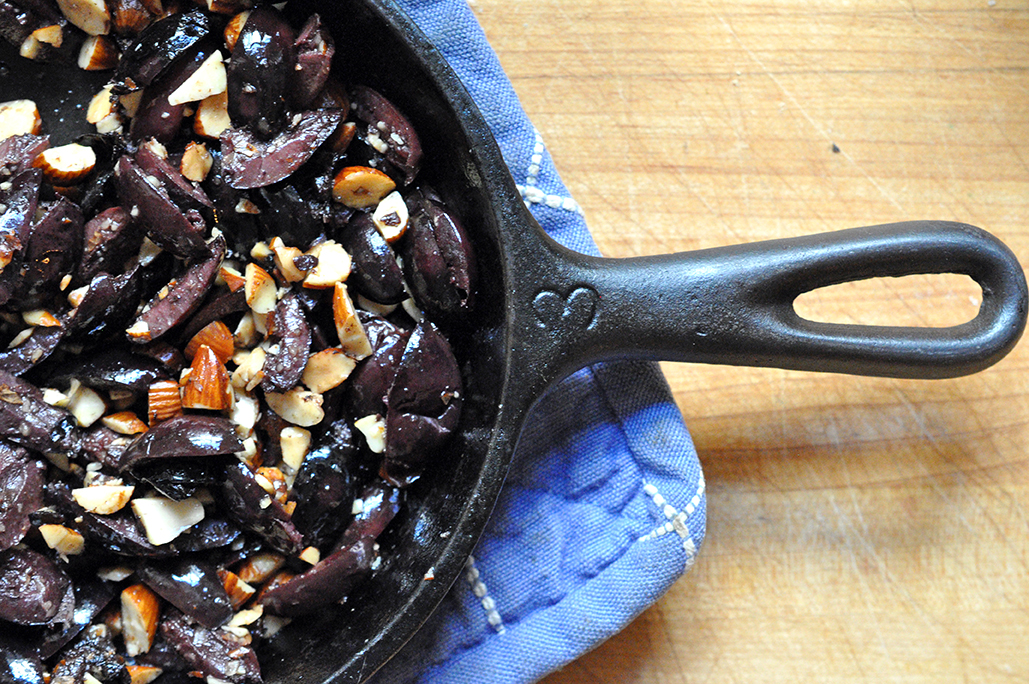
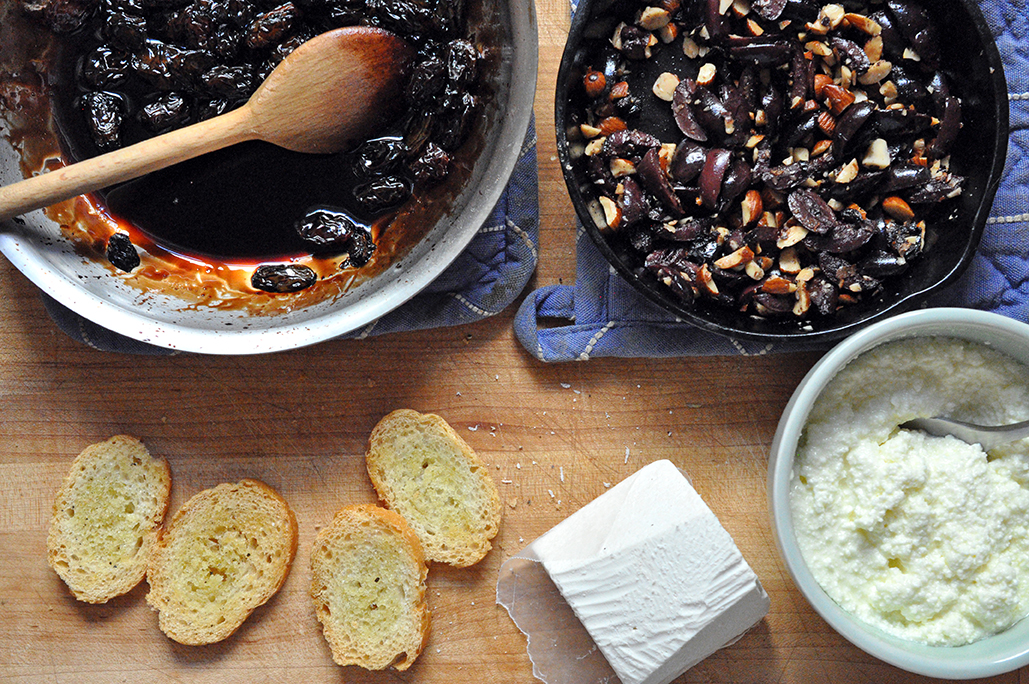
For the Welcome to Fall Crostini: Pour the balsamic vinegar and honey into a small skillet and cook over high heat until it begins to bubble/boil. Lower the heat and let the mixture simmer for 5 minutes, add the raisins and let simmer until the mixture has reduced to half of its volume and is thick enough to coat a spoon, this should take about 5 more minutes. Put baguette slices in the oven and set timer to 10 minutes (Don't forget to lightly coat them in olive oil and a little salt if you haven't already!) Heat 1 tablespoon olive oil in a small skillet over med-high heat. After 1 minute add the olive slices and almond slivers, cooking for 5 minutes stirring occasionally. Remove from heat. In a small mixing bowl whip the ricotta cheese with a little olive oil, salt and pepper. Remove baguette slices – now crostini – from the oven and rub them with the raw garlic. To create the fall crostini, add 1 tablespoon of the simple whipped ricotta, a little bit of the olive-almond mixture and top off with some freshly grated ricotta salata and finish with a drizzle of the raison balsamic reduction. This is how you enjoy two seasons at once! 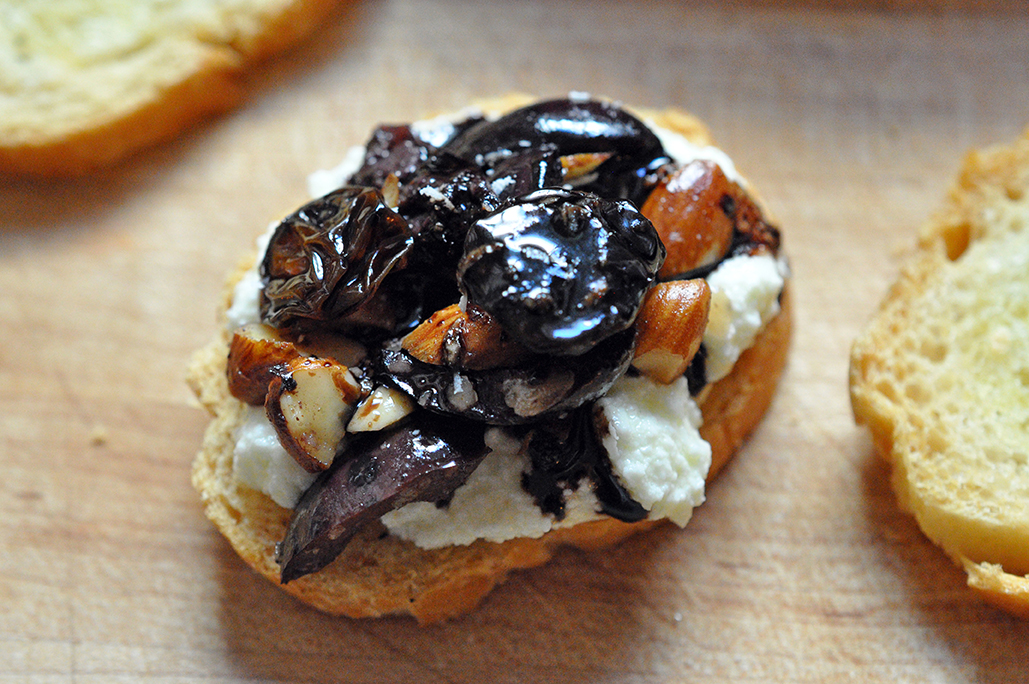
2 Comments
 I was trying to put together a menu for this weeks post when a close friend of mine called me and said, “I’ve made a huge batch of pimento cheese last night, I’ll bring you over some after work.” I politely declined and said, “I’m not a fan.” She responded with something like, “phsht, oh come on. Have you ever even tried pimento cheese?” No, I hadn’t and was ashamed to admit that I’d said no to something I’d never tasted. “You’ll like it,” she promised. So I’ll admit I had to look up pimento cheese the first time I heard about it. Growing up in the northeast it wasn’t one of the comfort foods that I had become familiar with. Actually when I finally I figured out what it was, I thought pimento cheese sounded perfectly awful. Mayo? American cheese? Jarred peppers? Why would I want to eat that? It was a southern tradition that I was fine to miss out on. Except that it kept popping up, at restaurants, in conversations and cocktail parties… I remained skeptical even when a friend ordered it at a diner in the grilled cheese fashion, and enjoyed it. It really took one of my best friends – originally from Mississippi – making a homemade batch, for me to try it. I trusted her not to steer me wrong, but I still told her no thanks the first time she offered. She persisted. I finally gave in and said, “What!? This is what I’ve been missing?” It was good. Really really good. Since then I’ve had pimento cheese with sliced apples, crackers, warmed up on toast as she suggested. I was a convert. What I learned is that like any dip, spread or sauce, there’s a supermarket processed version, and then there’s homemade. There are so many possibilities with pimento cheese, you could add pickles or garlic, mix different kinds of cheeses, or spice up your mayo.  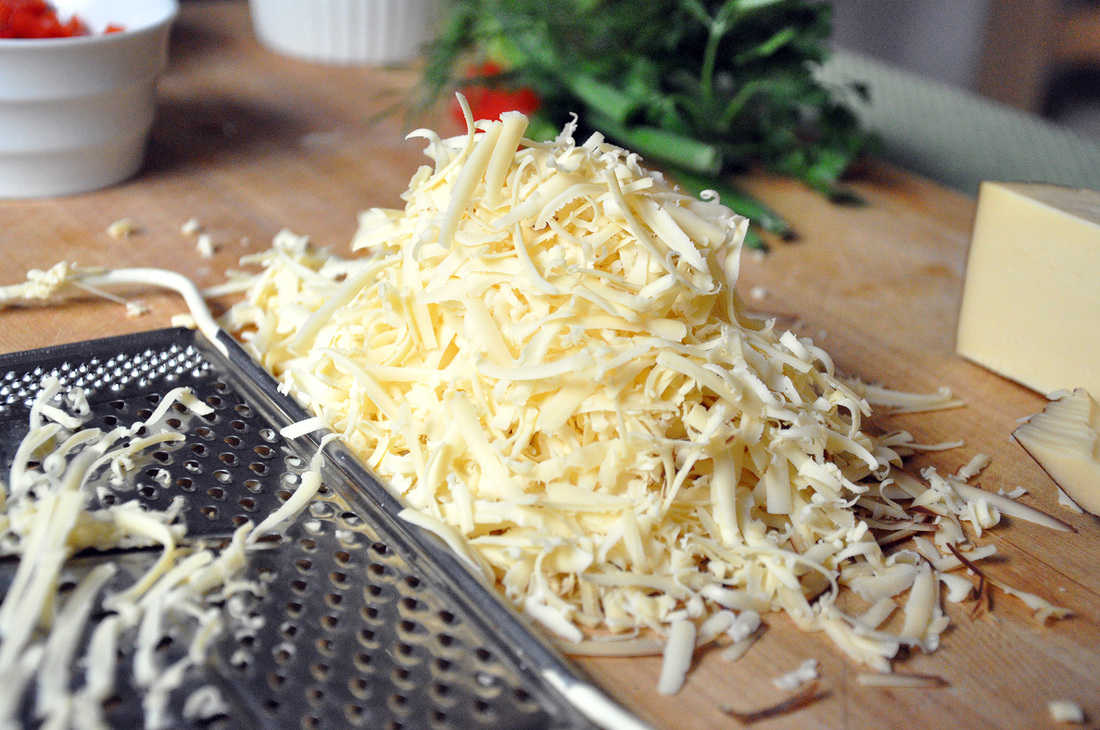  So Basically I’ve learned to shut my mouth, open my mind and try anything once. Especially when it’s homemade. I think I’ve made my southern friends very happy. 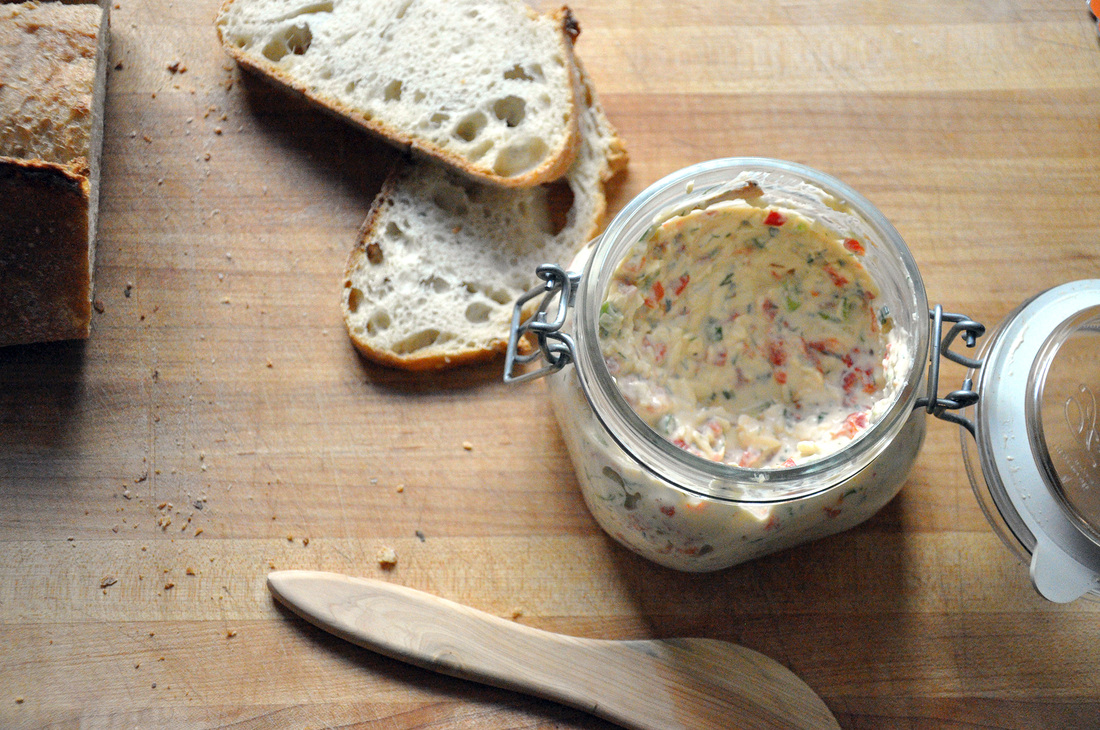 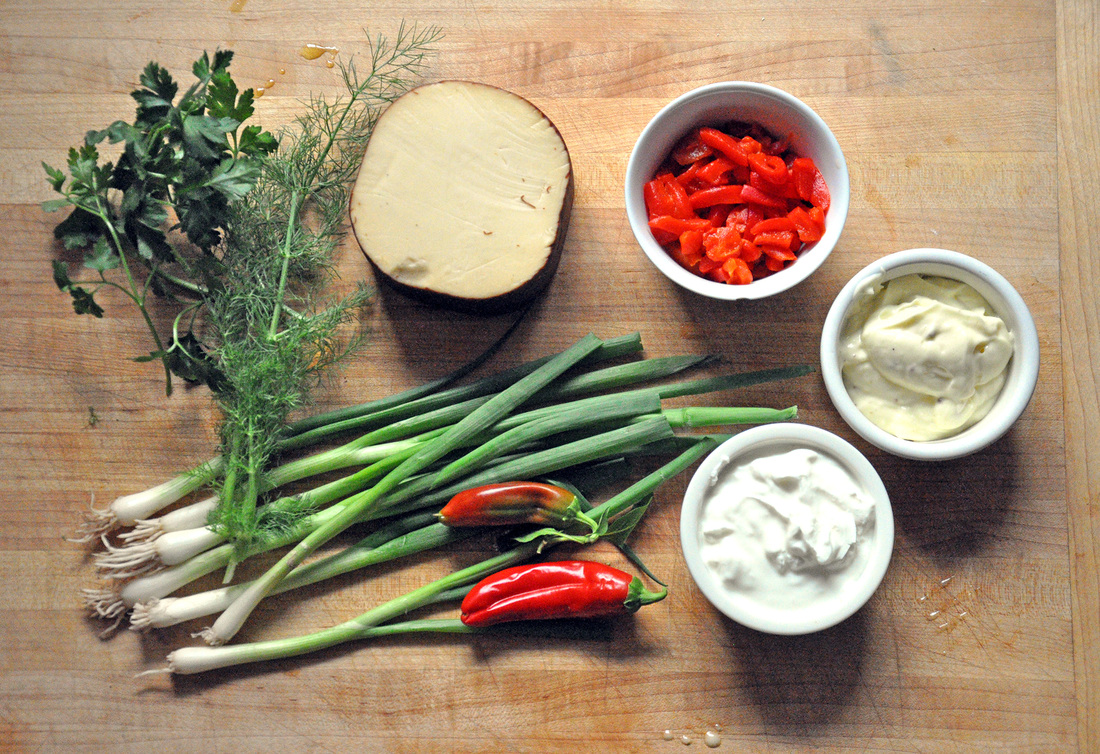 Smoked Gouda Pimento Cheese Sandwich PRINT RECIPE [Prep: 25min / Cook: 5min / TOTAL: 30min] [6 servings]
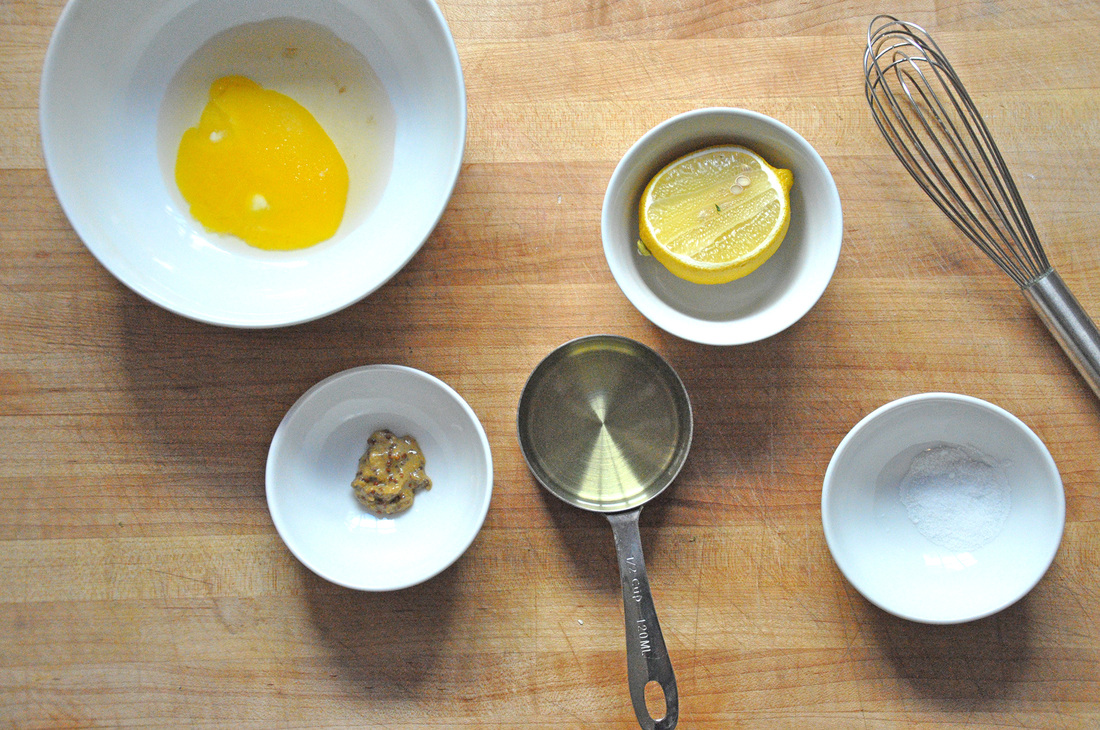
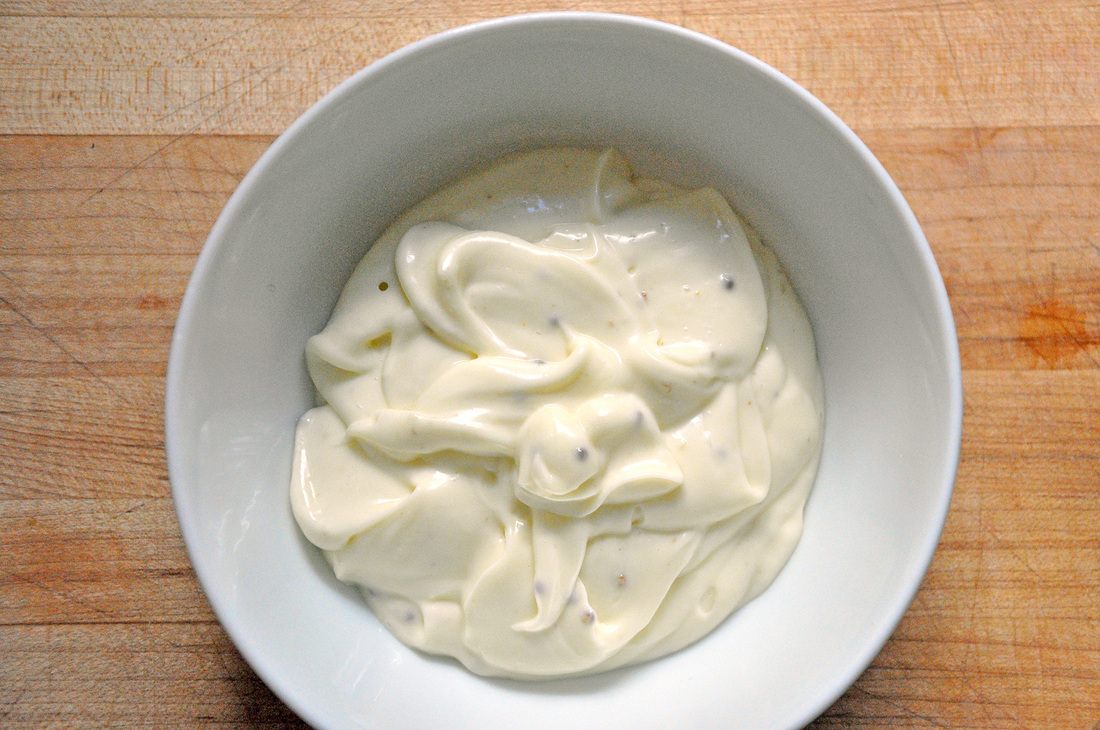
Homemade Mayo [~3/4 cup]
The hardest part of this recipe is making your homemade mayo – which of course is totally optional. While I’d like to say that I whipped it all up by hand, I recently got a mini food processor and really wanted to try it out. So first I added all of the ingredients for the mayo – except the oil – together in the mini food processor and pulsed it a few times. Then I slowly added the oil bit by bit until the ingredients started to come together, thicken, and become mayo. It really is that easy, and it tastes delicious. You should experiment with herbs and spices to make “fancy” mayo, a good way impress any dinner guest.
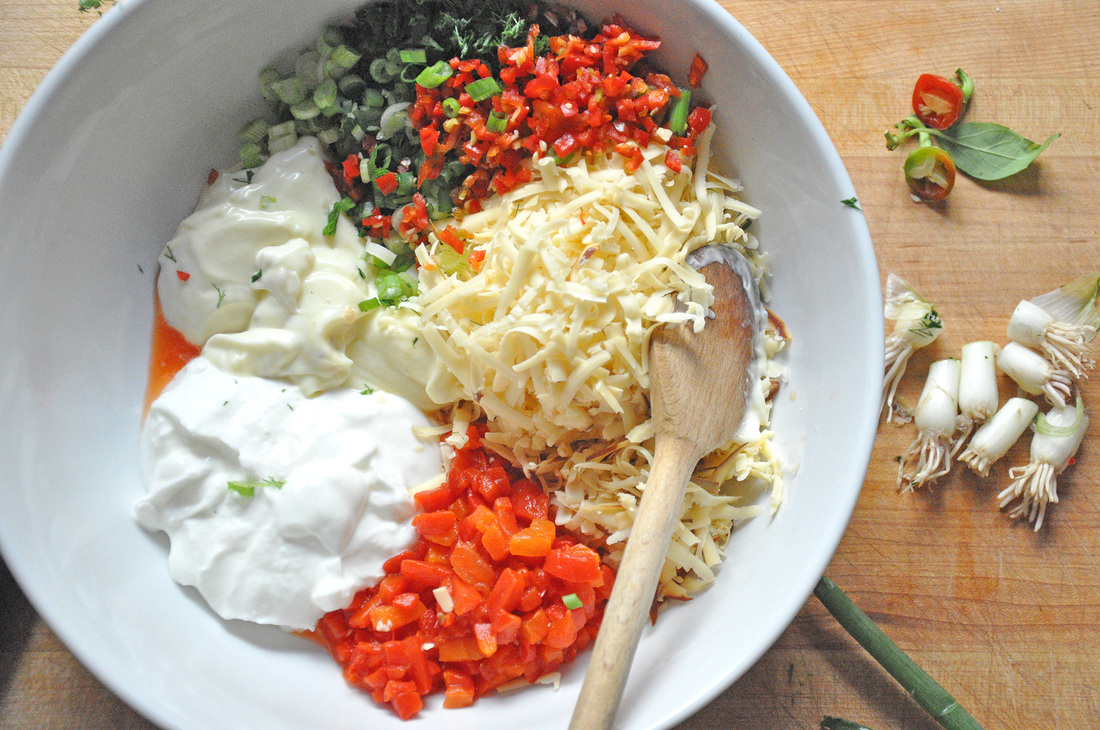
To make the pimento cheese spread start by shredding the smoked gouda, you can do this by hand or in a larger food processor that has a part for shredding cheese. In a medium sized mixing bowl, combine the cheese, yogurt, mayo, and pimento peppers. Finely chop up the rest of the herbs and veggies, incorporate and mix well. There you have it! Pimento Cheese. This type of cheese spread can be served many different ways, with crackers or veggie sticks, but I think the best way is the grilled cheese way. Basically just pile as much pimento cheese onto a slice of bread as you can handle, top it off with another slice and “grill” on a well-oiled cast iron skillet over med heat. Flip after one side is browned and toasted, about 3 minutes and cover, waiting about 1 more minute. 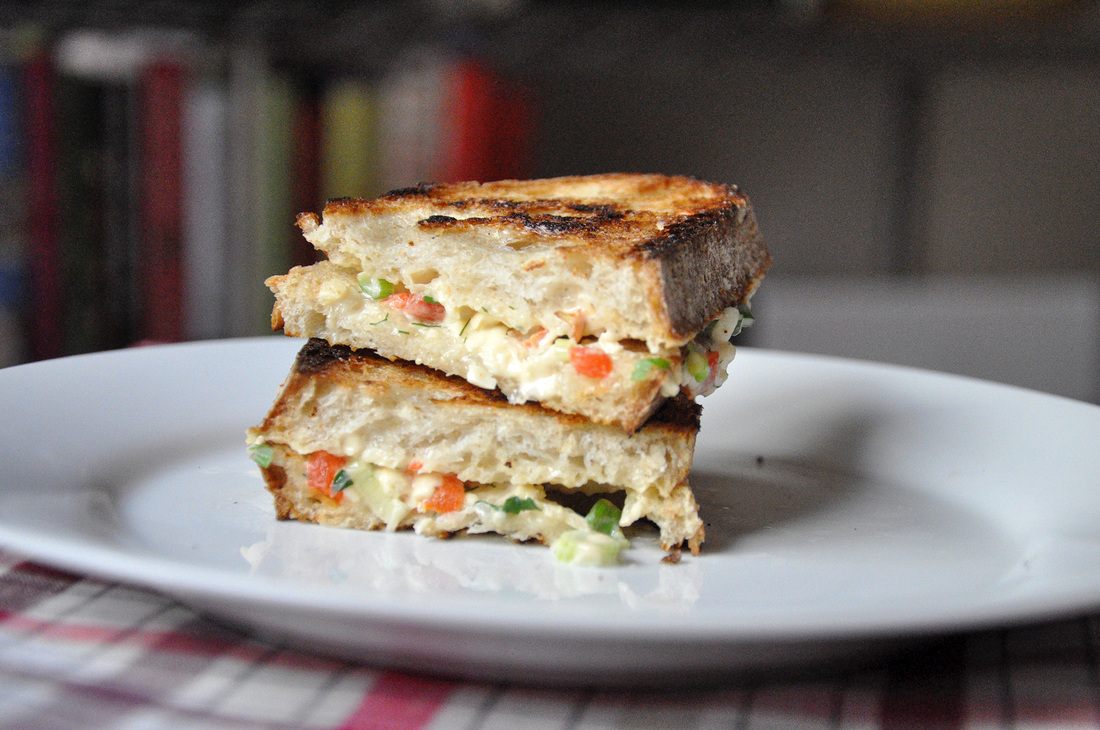 |
All
Stuff I follow...
Not Without Salt
My New Roots Sprouted Kitchen Thug Kitchen Lady and Pups A CUP OF JO The Daily Meal Melissa Clark ...always 3191 Miles Apart The Sartorialist Garance Dore The Nourished Kitchen Archives
October 2014
|
 RSS Feed